1800doorbell

Blog

  • RC3250 Wireless Chime Demo

    RC3250 Wireless Chime Demo

    RC3250 Wireless Chime Demo Video Product Video Transcript

    Carlon RC3250 Wireless Door Chime Kit Basic Set-up Video

    Hey good afternoon this is Michael with 1800doorbell a Lord Henry Enterprises company.
    Just going to shoot a quick video here to show you how simple it is to install the RC3250 which is really the main staple of the Carlon wireless door chime product line.


    Going to be sending more videos out here in the next few days covering some more detailed topics. But this is just a basic installation. You can see the product ships with two components, one is the doorbell transmitter most people refer to it as the push button and one is the receiver.


    In this case, it is a plug-in receiver that plugs into a standard wall outlet. I’m going to quickly plug this into the wall to kind of give you an idea to plug it into a standard wall outlet. Pretending this was mounted on an outside door. You’ll notice on the back the front cover pops off, you insert the screws through here then pop the cover back on. Someone pushes the button and tunes play. So that is the melody chosen by the user on this transmitter.


    You’ll notice this protruding pimple on the top. That is where you change the tune, give it a simple push, and that cycles to the next tune. Want to go to the next tune? So again that cycles through the tunes, The reason you would do that is if you want to tell what is being played at the front door versus the back door. Tomorrow we are going to go through the privacy codes and how to install batteries on this product and give you some other tips on using this product.


    So again sorry for the poor quality of this video but we just wanted to get something up on the site so that people can use it to make some good decisions.

    t
  • How to Install a Doorbell (Wireless or Wired)

    How to Install a Doorbell (Wireless or Wired)

    There are many reasons to replace a doorbell button. First, if it’s broken, replacing it is usually easier than fixing a doorbell button. Other times, though, you might just think it’s time for a more decorative doorbell button. I mean, c’mon, who doesn’t want a kitschy-cool pineapple doorbell button? – It’s all too beautiful!

    On the other hand, if you’re considering a wireless doorbell for your home or business location, you’ll be happy to know that learning how to install a doorbell is very simple…especially wireless doorbell installation. Compared to setting up a hard-wired system, installing a wireless doorbell is a breeze. With a wireless store doorbell system, you won’t need any electrical knowledge or wires (of course) nor will you need a transformer. However, there are a few tips and tricks that can help you speed through the job and make sure your wireless doorbell operates just the way you want it to.

    Wireless Doorbell Instructions for Installation

    Learning how to install a wireless door chime unit is fairly easy, but it is important to first do some planning: choose the location for the receiver. The receiver is the indoor part of the wireless system, sort of like a speaker, that will chime to alert you that someone is pressing the doorbell at your front door, back door, or any door on your property. You want to make sure of 3 things:

    1. That the receiver is within range of the transmitter(s), which is/are the doorbell button(s). You may have multiple doorbell transmitters, one at each of your home’s various entrances, and you need to make sure a receiver (wherever you’re planning to put it inside) is well within the stated range of your particular wireless doorbell model.
    2. That the receiver is within hearing distance: Make sure you can hear the doorbell from wherever you are in the home or even outside in the back yard (or in the stock room or storeroom if you’re setting up your business.) Estimate if this fits the system you’re thinking about. You may want to purchase extenders to ensure you can hear from anywhere in the house.
    3. Get extenders if necessary to increase the doorbell signal range: If you have a big home (or office or factory), you may want to get a doorbell extender: to give your wireless doorbell a longer signal range. An extra transmitter will “forward” the signal from a spot near the door to a receiver further away. This way you can cover your whole premises and/or you can even purchase a wireless doorbell with a portable receiver to take with you when you work in the backyard garden or garage.

    How to Install Wireless Doorbell Buttons

    • Insert battery: Wireless doorbell buttons from 1800Doorbell.com usually come with long-life batteries already installed. Doorbell buttons typically require small round lithium batteries.
    • Look for any location markings, in either numbers or words for the “Front” door and the “Rear” or “Back” entrance door on the buttons.
    • Choose a spot for installation where the wireless doorbell button is visible and within easy reach, typically at about 4 feet above the floor. This is the maximum practical button height for wheelchair access, so you could opt to go a bit lower.
    • Adapt to your surface: Wood, vinyl, aluminum doors, and door-sills are all acceptable surfaces to attach a doorbell button. For metal doors or doorframes, however, you may need to place a wooden shim behind the doorbell button to prevent signal interference from the metal. For masonry or brick installation, you may need a plastic shield before under the button, between it and the masonry, for a secure hold when screwing in.
    • Attach with adhesive strip or screws: Wireless doorbell buttons are often mounted using the adhesive strip on the back of the button assembly. You can usually also mount the wireless doorbell button with two screws.

    Installing Wireless Doorbell Receivers

    The receiver is the part of the wireless doorbell system that will receive the radio waves emitted by the transmitter (button) when a visitor presses it. Then it will play the appropriate doorbell chime or sound so that you’re alerted. As you read through the installation instructions for your wireless doorbell, remember to follow the manufacturer’s instructions if they differ. In general, most wireless doorbell receivers are installed in this manner:

    • First, insert any batteries required by your wireless doorbell receiver. BATTERIES: Often 3 AA batteries are needed for the doorbell receiver unit and may only need to be replaced every year or two.
    • Sync with the transmitter button. Press the chime control button and select the chime module. Go to push button/transmitter outdoors and press the button. This action synchronizes both the outdoor doorbell push button and the indoor chime unit. You can pair multiple push buttons to the same door chime receiver unit.
    • Select your sound choice for the front door and one for the back door, if applicable. This lets you know which door to answer. The receiver inside the home often also has a small visual icon that lights up to tell you which door is being activated.  This varies by product and manufacturer.  We have an entire article about this topic you can see here: “Changing to Tune on Your Wireless Door Chime”
    • Set volume.
    • Plug the receiver into an electrical wall outlet, if necessary, although some run on battery power. Plug-in doorbell receivers are extremely convenient to install.
      OR
      Insert batteries:
      Battery-powered units have more options for installation placement and can be placed higher on the wall than your typical plug-in model, for example. Some come with a mounting bracket or holder that you screw into the wall. Then you can take your receiver unit out when you want to change the chime sounds/volume or to replace batteries (which should only be needed every year or two).
    • Test to be sure the signal reaches from the front (and back) doorbell buttons to the receiver. Take the receiver to the spot where you plan to plug it in or mount it to the wall inside your house for an accurate test. If the sound does not come through when the button is pressed, you need to move the receiver to an outlet closer to the door. Or you might instead try removing any large furniture or another item that may be interfering with the signal. You may want to use a second receiver to extend the doorbell sound and signal further into the home.
    • If the doorbell is mistakenly activated by a nearby remote control, change the doorbell to another channel or frequency. Most doorbells offer several channels for this purpose.

    Wireless Doorbell Advanced Features

    Now that you have an idea of how to install a wireless doorbell, you can browse the different types available and make a selection. To choose the best wireless doorbell for your home or business, think about what advanced features you might want, including:

    • Multiple tunes or melodies so you can change at will.
    • Decorative wireless doorbell receivers and stylish doorbell buttons so that your doorbell can complement your decor.
    • Long-range transmission of up to 1000 feet.
    • The visual alarm can alert you to the doorbell in a loud environment or provide a visual doorbell alert for hearing impaired persons.
    • Additional security and convenience features like:
      • Extra push buttons (also called switches or transmitters) – one for each entrance.
      • Extenders, and extra doorbell receivers to forward the signal further into and throughout the home.
      • Portable receiver: that you take with you when you’re going to the backyard or elsewhere.
      • Event log that tells you when the doorbell rang, and where, if you missed anything. It would also record the time and location if a motion detector went off if your system is so equipped.
      • Cameras
      • Intercom(s) for voice communication, such as a wireless portable intercom with video
      • Motion sensor to sense someone before they push (or so that they have no need to push) the doorbell button. BATTERIES: Motion sensors often use a rectangular 9-volt battery.
      • Window sensors notify you of a window break-in.
    • And more options.

    Ways to Use Versatile Wireless Doorbells

    Wireless systems are flexible and portable, meaning you could use your wireless doorbell system in other places and for other purposes, including:

    • Portable system: Take the button, motion sensors, and receivers out of your home and use them in your business or even take them with you to a vacation rental.
    • Call system: You could even use your “doorbell” as a call system, giving the button unit to, for instance, a sick child or elderly relative to use when they need to call for assistance when you’re in another part of the house.
    • Pets or Kids: Use a motion detector to sense when someone enters or leaves a room.
    • Garage: You could also use the motion detector to alert you if someone enters your garage, for instance, if you leave the door open after driving your car into the garage.
    • Driveway: You might also place a motion detector at the end of a long driveway, to let you know that someone is driving up to the house. There are also purpose-built driveway alarms that use a hose or a ground probe to trigger the alarm/chime when cars drive over it or pass by it.

    The good news is that most of the time replacing a button is an easy thing to do.

    How to Install a Doorbell Button: Wired Doorbells

    First, choose a replacement wired doorbell button. If you want a different style of doorbell button, make sure the replacement is going to fit.

    Be prepared, for example, to at least add a little paint around a new rectangular doorbell button if you’re replacing a round doorbell button. Other times, the space might have been specifically designed for the doorbell and it might require more of an intervention than you want to make a replacement.

    Note: If you have an older unit, test the voltage across the button before selecting a replacement. All doorbells have a transformer that reduces the voltage from the house line voltage (120 volts (V) and normally 15 amps) to something much less, which makes it safe to touch the wires that lead to the doorbell button, but not other wires in the house or the doorbell. However, current doorbells use a smaller voltage (16 V or 12 V) than earlier doorbells, which use a higher voltage (36 V or 24 V). When a doorbell button rated for a lower voltage is installed in a doorbell that uses a higher voltage, the doorbell can get hot, especially if the doorbell button has a light in it.

    Next, remove the old doorbell from the wall by unscrewing it. If you haven’t previously removed it for testing, you might have to cut away caulk or paint. Now, unscrew the wires. As we mentioned above, you don’t have to turn the power off for this because the voltage is very low, but if it makes you feel safer, there’s no harm in turning the power off. If the wires feel like they want to slip back into the house, a clothespin or other large clip can be used to hold them outside the wall so they don’t go in – fishing them back out can be nearly impossible.

    Now screw the wires onto the new doorbell. It doesn’t matter which wire goes where. So long as both have good connections the bell should work fine. Twist the wire around the screw in a clockwise arc so that the wire has more connection and the action of the screw pulls the wire in, rather than pushes it out.

    If the doorbell has a light on it, this should be lit up when you connect the wires. Test the button before you put it back on the wall. If it doesn’t work, check the connections on the wires. If these seem fine, disconnect one and touch it to the other to make sure you get a tone. If you don’t, you likely forgot to turn the power back on before trying your test.

    If the doorbell is working, put a caulk around the back of the doorbell before securing it in place. This will keep air and bugs from using your doorbell as an entry and exit. Once the caulk is dried, you can touch up the paint around the doorbell as necessary.

    How to Install a Doorbell Button: Wireless Doorbell

    Once you have selected your new wireless doorbell button, you must make sure it is coded properly before it will work for your receiver.

    Open up the button and look for a series of metal pins in two rows. Normally, they will have some black plastic blocks on them, but sometimes these aren’t in place on a new wireless doorbell button.

    Now open up the compartment on your receiver. You should see a similar arrangement of pins with black plastic blocks on them. Place the blocks on your new doorbell button so they match the blocks on your receiver. Then replace the receiver in the socket (if necessary) and push the button. If the button doesn’t work, it’s possible you had the two units misaligned when trying to match them up – it can be hard to tell which way to hold them – so try a mirror image on the new button. If it still doesn’t work, maybe the factory-installed battery isn’t working. Try a new battery. If it still isn’t working, the wireless doorbell button may be defective.

    For Carlon door chimes, we have a complete article devoted to “changing the door chime privacy codes.”

    Attaching a Wireless Doorbell Button

    If you are setting up a new wireless doorbell, attaching the wireless doorbell button to the wall can be a bit of a challenge. For many surfaces, such as wood, you can just put screws through the holes provided in the backing of the doorbell button.

    If you’re lucky, the screw holes on the back of the wireless doorbell button might even match those from an old wired doorbell button. Other times, you may have to put a block of wood in to allow you to screw the new doorbell where the old one was.

    For many smooth surfaces, such as wood, aluminum, or vinyl siding, two-sided tape works well. Often this comes with the wireless doorbell button, but other times you may have to buy it separately.

    Other surfaces can be a bit more challenging to attach the button to, such as stucco or brick. If the brick is relatively smooth (especially if it’s painted) you should try two-sided tape, but if it’s rough or has grooves in it, it’s probably not worth the effort.

    One good solution, in this case, is poster putty, such as you might have used in your college dorm room or rental property where you weren’t allowed to put holes in the wall. Some brands are better than others, but if you try a few, you’ll find one that really grips the rough surface and can hold your wireless doorbell button-up quite well.

    If you want a secure hold for your wireless doorbell on these surfaces or if you don’t want to bother with the trial-and-error of poster putty, you can secure the doorbell with screws. Masonry screws are normally too large for the holes on the back of a wireless doorbell button, so you have to drill holes and place anchors. This is a bit more work, but on the plus side, you won’t have to worry about your doorbell falling every once in a while as tends to happen with double-sided tape or poster putty.

    A Doorbell for All Seasons

    Once you figure out how easy it can be to replace your doorbell button, you might decide that just one doorbell button is not enough. You could have different doorbells for different seasons, or maybe just one that you pull out for that special holiday party.

    Okay, so most people aren’t that obsessed with their doorbells, but we’re just saying – if you are, it’s not that hard of a thing to do. Certainly easier than a new haircut – and if you decide you don’t like it, you don’t have to wait for it to grow back!

    If you’d like assistance in choosing the best doorbell for your needs, call 1800Doorbell. If you need wireless doorbell installation support, contact us at 1800Doorbell.com. The doorbell experts on our customer service line are happy to help.
  • Get Creative! The Most Interesting Doorbell Ideas…Ever

    Get Creative! The Most Interesting Doorbell Ideas…Ever

    Creative Uses for Versatile Doorbell Components

    If any of the following problems sound familiar, let us help you plan a doorbell setup to fit your unique needs!

    Doorbell Buzzers: To Call Out the Bears

    WDK-ERA-SS Doorbell Kit for Warehouse With Very Loud Siren at 115 dBA
    WDK-ERA-SIREN Commercial Doorbell Kit with Loud Siren

    PROBLEM: Zoo doorbell needed for bear training! A customer from a zoo wanted to train the polar bears to come out into public view in their exhibit area at the sound of a buzzer.

    This customer used the ERA-UTDCR long-range wireless doorbell kit, with the DH920 buzzer wired into the ‘C’ relays on the back of the receiver. The push-button was mounted outside the cage. The buzzer receiver was placed inside the cage. When pushed, the push button triggered a wireless signal sent to the receiver, activating the buzzer sound.

    Driveway Alarms: Help to Protect Your Property Fence Line – and Your Cattle

    Driveway Informer Di2000s

    PROBLEM: Darned cows breaking through the fence line and wandering off!

    • 1800DOORBELL SOLUTION: The rancher used the Di2000S-A Driveway Informer at each corner of the fence line where his cows were kept. When wandering cows passed the fence line, the driveway alarm receiver was triggered to warn the ranch hands. No more lost cows!

    Entrance Alerts: Help Protect a Family Member with Dementia

    • PROBLEM: Dad keeps wandering off in the night. A woman had an elderly parent (father) with dementia living with her family. Believe it or not, her dad opened his window one night and crawled out in his pajamas. The next morning the police called from a nearby city. Dad had walked miles to a train station and was trying to go somewhere.
    • 1800DOORBELL SOLUTION: The LRA-C1000 Long Range Entry Alert w/ Strobe – in this case, used as an EXIT alert. The alert device was installed over the door of the elderly dad’s bedroom and exterior windows. If the windows were opened, a chime sound would generate from the receiver, alerting the family that Dad is taking a midnight stroll – giving the family time to head him off and keep him safe.

    Special Doorbells for Special Needs

    Helpful resources for your unique needs:

    When you need a creative and interesting doorbell for a unique purpose, contact us at 1800Doorbell.com. Browse our site for ideas or give us a call for some creative brainstorming! We will help you find the doorbell or driveway alarm you need. Call us today!

  • How to Fix and Replace a Doorbell Button

    How to Fix and Replace a Doorbell Button

    A doorbell button. We’ll start by going through the diagnostic procedure for figuring out if your doorbell button is the problem, but if you’ve already isolated the doorbell button, skip down to How to Fix a Doorbell Button.

    Is It the Doorbell Button?

     Most doorbell systems are very reliable. Wired doorbell systems can last for decades without any problems. (Old crank doorbells were pretty reliable, too, but they’re so old now that most have quit working by now.) When the bell stops working, it’s usually the doorbell itself, which can become worn by constant use. For a wired doorbell system, unscrew the doorbell from the wall.

    Typically, this just involves two screws. You might also have to cut away caulk or excess paint from around the doorbell. If you have multiple doorbells detach them all. When you pull the doorbell away from the wall, you’ll see two wires connected to the back.

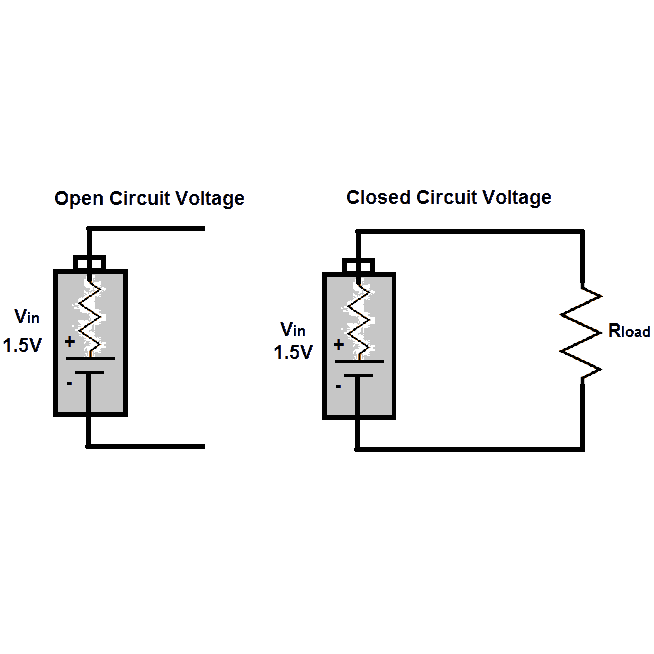
    First, check to see that these wires are secure. If the doorbell is securely fastened to the wall, it’s unlikely one has come loose, but stranger things have happened. If you have more than one button wired to your doorbell, a loose wire at one of the buttons can stop both from functioning. Often, these are wired with a common ground, and neither doorbell will work if the common ground is disconnected at one of the buttons. Closed-circuit-diagramIn a doorbell system, the button closes the circuit between these two wires, allowing electricity to travel through them and trigger the door chime. To test whether the button is the problem, disconnect one of the wires.
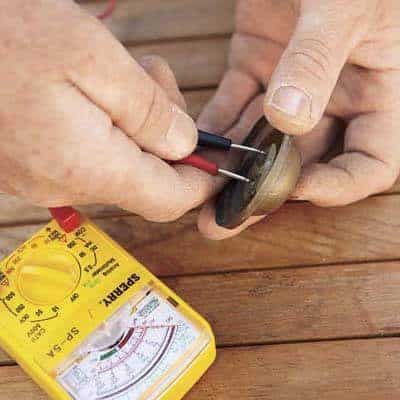
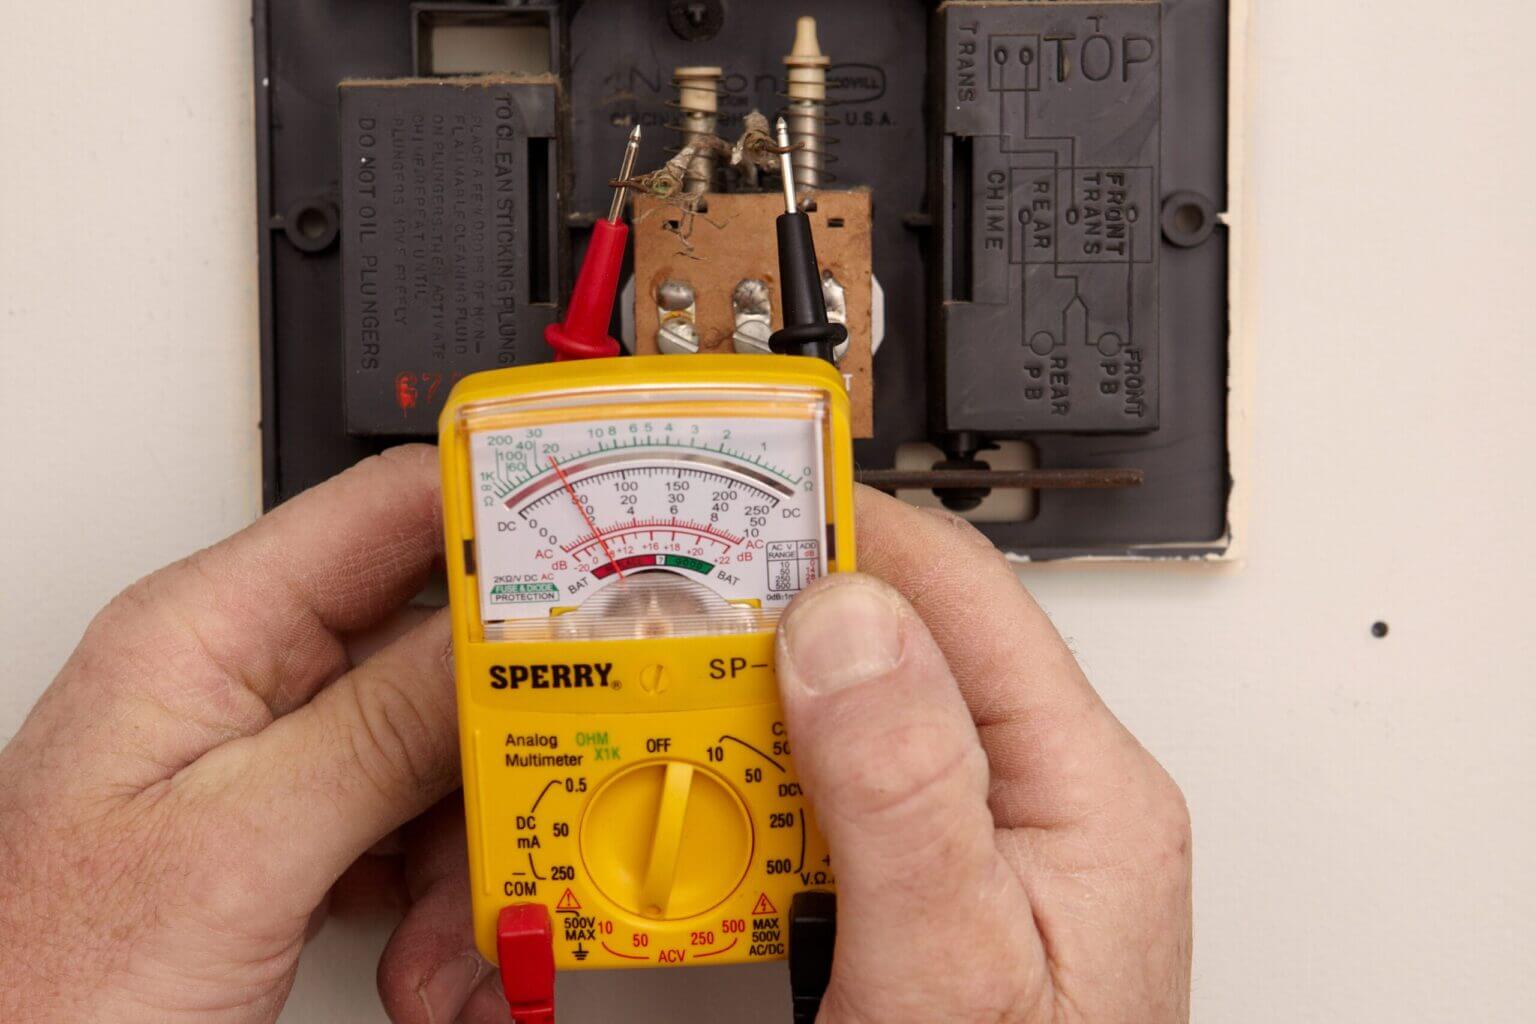
    You don’t have to turn the power off for this because, unlike most systems in your home, the power is stepped down by the doorbell to a safe 16 or even 12 volts (V) with very few amps. Even if you turn the power off, you also have to turn it back on for the next part: touch the bare end of one wire to the bare end of the other. If the chime sounds, it’s the doorbell button that’s the problem.

    If the chime doesn’t sound, it’s not the doorbell that’s the problem.

    If you have multiple doorbell buttons wired to the same chime, make sure you disconnect only one wire at a time to avoid accidentally disconnecting the common ground. You can also test the doorbell with a multimeter or ohmmeter. Your doorbell is an open circuit that closes when you push the button.

    With your doorbell disconnected, touch your ohmmeter leads (or the leads of a multi-tester set to resistance, marked “Ohm” or Ohm) to both the wire connections on the doorbell. Then push the button. Resistance should jump from infinity (no connection) to some small level of resistance. If it doesn’t the doorbell isn’t closing the circuit properly.

    How to Fix and Replace a Doorbell Button

    For a wireless doorbell button, there are two potential problems other than a broken doorbell button that might be causing the problem.

    If the button has never worked, it might not be coded properly. Look in the compartment on the back of the receiver and inside the button itself. You should see a series of metal pins, some of which have small black blocks on them.

    Make sure the configuration of these blocks matches in both places. If you think they’re right but it’s still not working, try turning one the other way and matching them up again–often the proper orientation for the code blocks isn’t clear.

    If a wireless button used to work, but isn’t now, the problem is most likely the battery. If replacing the battery doesn’t make the button work, then you have a broken doorbell button.

    What about a Hot Button?

    Your doorbell button shouldn’t feel hot. If it does, chances are you have an incorrect doorbell button for your doorbell transformer.

    All doorbells have a transformer that steps down the voltage before it goes to the doorbell, but older doorbells only stepped down the voltage from the 120 V line voltage to 24 V or 36 V. When a doorbell is designed for the modern 16 V or 12 V is put on this old line, it can get hot.

    Typically, you only feel the heat if the doorbell button has a light on it, but any time the voltage is mismatched between the doorbell button and the doorbell itself, it can damage the doorbell button, causing early failure. To figure out the proper voltage for your doorbell button, take a multitester and touch it to both wires. Read the voltage and get a doorbell that’s appropriate for the voltage of your system. Or, if you want to keep your current doorbell button (it is the most visible component of the whole system), you can just replace the entire doorbell with one that matches the button.

    How to Fix a Doorbell Button

    Most of the time, a doorbell is not going to be something you can fix. It’s usually best to just replace the doorbell. (See How to Fix a Broken Doorbell). In some cases, though, you can fix a doorbell that you can’t replace.

    Maybe it’s an old doorbell or a unique one that has a style you love, there are a few ways to fix a broken doorbell button. If the part you depress is broken (the button proper in your doorbell button unit), you can often find an inexpensive replacement button that has a depressor the same size and shape. If you do, just replace the broken one with the whole one — make sure it’s the same on the back, too. Most old doorbell buttons just have a simple mechanism inside. When the button is down, it pushes a circuit closed.

    This mechanical system is simple and resilient, but when it breaks, it can be hard to fix. You have to find something that will allow the contact to close the circuit when the button is depressed, and most of these components aren’t commonly sold, so you might have to make a piece for it. Modern doorbells have a diode in the button.

    This allows voltage to continue traveling through the doorbell after the button is released, which allows the doorbell chime to continue until the tone is finished. You can replace the diode by unscrewing the screws holding the current one in place, putting a new one in, and replacing the screws.

    It’s typically not possible to repair a wireless doorbell button, since they are often just a single printed circuit board. Once you’ve gotten your doorbell button fixed, it will likely stay functional for a long time. And, if not, each time you fix it you will get a lot faster.

    We hope this article provided you with some helpful information.  If you have more questions or need help installing your doorbell button, or any of our products, please feel free to call or email us directly!

  • Troubleshooting Tips for Your Doorbell

    Troubleshooting Tips for Your Doorbell

    Tips for Troubleshooting Your Wired Doorbell or Door Chime Problems: Doorbell Won’t Stop Ringing

    Wired doorbells as such are extremely durable and sturdy devices. They rarely develop glitches or go kaput. A good quality doorbell can very well last for 10 to 15 years without developing even a minute fault. However, even the best electrical devices can fail at times and the doorbell is no exception.

    A doorbell that doesn’t ring? Spare a thought for the embarrassment. A visitor walks up to your door and rings the doorbell only to realize that it doesn’t ring. Not to mention the fact that you will no longer know when a new visitor turns up at your door unless you have one of those large door knockers. A doorbell that keeps ringing continually? Now that’s a real bummer.

    There is no reason that you have to settle in such a situation when you can easily troubleshoot and repair your doorbell. Wait, Einstein, before you grab those screwdrivers and set out to repair them, there are a few things that you would like to know.

    Point to Remember When Troubleshooting Your Door Bell

    • The doorbell is one of the simplest electronic devices that have ever been created. The circuitry is extremely simple but four different components make it function. You need to identify the source of the glitch and then proceed accordingly.
    • Troubleshooting is eliminating one step at a time in a precise and organized manner. The steps can vary from very easy to advanced. It all depends on your expertise with electrical devices and the kind of tools that you have with you. Do not attempt anything that you are uncomfortable with.
    • You will need basic tools like screwdrivers, clamps, and needle-nose pliers. There are some other optional tools as well like a voltmeter and a continuity tester.
    • Doorbells are low-voltage electrical devices and you can troubleshoot them without shutting off the main electric supply or circuit breaker. However, if you are going to test the doorbell transformer (a component of the doorbell circuit that converts 110V electricity to 10 or 12 Volts), then it is recommended that you switch off the power before you begin.  The irony of the situation though is that you need to have the power switched on to test most components. So you will have to keep switching it off and on after each step. Always respect electricity and you will avoid any unpleasant incidents.

    Troubleshooting Wired Doorbells

    Wired doorbells typically contain four components which include the push button which we press to ring the bell, the main doorbell or chime unit, the transformer, and the wires that connect them all. Now let’s locate the source of all the trouble.

    Symptom 1: A doorbell that doesn’t ring

    What does this mean? Is there no sound at all when you push the button? It’s not playing your favorite doorbell sound?  Ask one of your family members or friends to stand near the unit and listen to it carefully when you push the button. If they hear a buzzing sound then it means that the unit is trying to make the sound but is unable to do it either due to lack of voltage or due to some other mechanical problem within it. On the other hand, if there is no sound whatsoever, then it means that the unit has failed.

    Step 1: Let’s begin with the push button. The first step is to remove it. Doorbells are usually connected with more than one button in large homes. If you have more than one button, then remove them all. Most buttons are mounted on the door frame with two screws and removing these screws should allow you to push them away from the door frame. Now, you will see two wires that are connected at the back of the push button. Are the connections secure? If either one of the two is loosely connected or disconnected, then this might be the source of the trouble. Reconnect them and test the doorbell again. Does it work? Yes? Pat yourself on the back and go and treat yourself to a cold beer. No? No sweat. Time to go to step 2.

    Step 2: Turn off the power if you still haven’t done it and disconnect one of the two wires. (In case of multiple doorbell buttons, disconnect one wire from all of them) Now touch the bare end of the wire to the bare end of the other wire. This process is called shorting the wire. If the bell rings, then the problem lies with the button. It needs to be replaced. In the case of multiple buttons, replacing all of them is recommended but if you are smart and on a budget, then you would replace one of them and retest the system to see if it works. Replacing push buttons is extremely easy. You can buy one at any hardware store, attach the wires, and mount them on the door frame. But, what If the bell doesn’t ring when you touch the bare ends of the wires? Then it is time to move ahead. Reinstall the push buttons and move on to the chime unit.

    Step 3: Now we head to more complicated territory and let me advise you that if you are uncomfortable handling wires and circuitry but have managed to pull on so far, then this is probably the right time to call the electrician for the steps ahead to require a detailed understanding of the circuitry and the ability to connect, disconnect, test and probably even replace wires. So are you all set? The first step is to remove the cover. Most people might think that this is extremely simple but it isn’t.

    There are several different types of doorbell models and many covers. Some require you to lift it before pulling the cover out there are others that can be pulled straight out. Some are held to the unit with prongs and you will have to depress them before removing the cover. Go gentle with decorative covers as you have the risk of damaging them forever. Once you remove the cover, conduct a visual inspection for any signs of a loose connection or a disconnected wire. If you spot any, then tighten it or reconnect it.

    Now, there might be two, three, or more wires and terminal units within the doorbell depending on the model or type of the chime unit. The wires are typically marked ‘F’ for the front and ‘R’ for the rear. Some are even marked with a ‘T’ for trans. Remove the wires for the front and rear push buttons. Now, touch the F wire to terminal F with the power on. If the bell rings, then you have a faulty wire.

    You can repeat this test with the Rear wire as well. If both tests fail, then you need to locate a set of twisted wires within the unit. There will be one wire that is connected to the transformer. Disconnect these wires and touch the wire that goes from the transformer to terminal F. If the bell rings now, then either one of the push wires here is defective and needs replacement. You can always install a wireless doorbell in place. It is easy, fast, and hassle-free. If it still doesn’t ring, then it is time to check the transformer.

    Step 4: The Transformer
    There are several ways to test the doorbell transformer. But the most common method used is testing it using the Voltmeter. Set the Voltage range on the Voltmeter to 120 Volts AC. Now measure the voltage between the two terminals on the transformer. A properly functioning transformer will show a meter reading that matches the secondary voltage as marked on it. If the meter reading is higher, then it indicates that the transformer is faulty and needs replacement. On the other hand, if the reading is lower but close, then test again with a lower voltage range on the voltmeter. If it still doesn’t match, then it is time to replace the transformer completely.

    You can buy a transformer at most electrical and hardware stores. However, ensure that you buy one of the same voltage and wattage. The electrical information is stamped on it and so are the instructions for installation. Ensure that you follow the instructions carefully to install your new transformer.

    Final assessment

    • Always conduct a visual inspection of the circuit first. On more occasions than not, a loosely connected wire is the culprit and the problem can be solved easily.
    • Exposed wires (frayed insulation) are another important part of most faulty doorbell circuits. They need to be covered with electricians’ tape. At times, there might be corrosive build-up on the wires. Clean them before reconnecting the wires.
    • Always clamp the wires together to prevent them from slipping into the siding or trim of a building.
    • If you are unable to conduct any of the above-mentioned tests or find them too tedious, then you can always replace the chime unit and buy a new one. There are hundreds of new updated models that offer better sound quality, resonance, and a whole new range of chimes.

    Symptom 2: A constantly ringing doorbell


    Now this one can be a real pain. A constantly ringing doorbell (not a wireless one) indicates a stuck button or wires to the button shorted together. Troubleshooting is easier than you think.


    Step 1: The first step is to test the push button. As I mentioned earlier, the button is often the root of most doorbell problems. Disconnect the power to the transformer and remove the button from the doorframe. Now disconnect one of the two wires connected to it. Now turn the power back on. Does the bell still ring continually? If not, then the button is faulty and needs to be replaced. If yes, then the problem lies in the two wires that are connected here. Turn off the power again and inspect the wires for any signs of a short (frayed insulation). Bare wires rubbing together can often trigger this sort of unruly behavior from doorbells. If you can find the short, then cover it with electricians’ tape. If you can’t, then replace the wires completely.

    Troubleshooting wireless doorbells

    Wireless doorbells are extremely popular because of their flexibility and ease of use. They are extremely easy to install and use. However, at times, they can exhibit strange behavior, especially the low-priced ones that have flooded the market now. No reason for you to break a sweat yet. You can troubleshoot the wireless doorbell easily and restore it to its previous working condition. However, in some extreme cases, the entire unit might need replacement.

    Symptom 1: The chime doesn’t sound


    Step 1: When the chime doesn’t sound, the first and most obvious thing to check in a wireless doorbell unit will be the batteries. Check the batteries in both the push button and the chime unit. Push buttons that have to add on features like a flashlight or a warm glow light can run out of juice very fast. Replace the batteries and check the unit again. If it works, then you can keep replacement batteries with you. You can also opt for a plug-in unit as it saves you from the hassle of frequent battery replacements. If it still doesn’t ring, then it is time to move on to step 2.

    Step 2: Most regular wireless doorbell models have a frequency limit of 75 to 150 feet. This range is ideal for small homes. However, if you live in a large home, then there are chances that you might have accidentally installed the receiver beyond the maximum allowed frequency range. The best way to find this is to shift the receiver to a place that is closer to the doorbell button. Does the chime unit sound now? If yes, then you can permanently mount the receiver at the new location.

    At times, you need to try different locations for your receiver to find the spot that gives you maximum signal strength and clarity. The angle at which the receiver is installed can also affect the signal quality.

    Have you heard about long-range wireless doorbell systems for your home? These systems have a range of up to 300 feet or more. You can also buy an ‘add-on’ amplifier or extender for your doorbell system. If the doorbell doesn’t ring despite moving the receiver around, then let’s move to step 3.

    Step 3: If you have installed the receiver within the frequency limits specified by the manufacturer and the chime unit still doesn’t sound, then the button might be experiencing interference from metal surfaces. Yes, the presence of metal frames or grills often reduces the transmission range in doorbell buttons. If you have mounted the doorbell button on a metal surface or close to it, then you can use wooden shims to separate it from the surface.

    Step 4: If you have sweated it out this far but have been unable to locate the problem, then you might need to replace the doorbell unit. At times, people install the doorbell unit outside the home in extreme weather conditions that can disrupt its working or damage it completely. Ensure that you buy only the best quality wireless doorbells that last long and offer quality performance.

    Symptom 2: A doorbell that rings randomly


    This is an extremely common symptom in wireless doorbells. It occurs because of interference from other frequencies. Garage door alarms, car clickers, other wireless doorbells, or similar devices can trigger wireless doorbells. Imagine running down from your study, only to find that the doorbell was triggered by the vacuum cleaner. Isn’t that frustrating? However, the best way to address this problem is to buy a higher-end model that supports multiple wireless frequencies. Some popular wireless doorbell models have up to 32 different built-in frequencies that block most external frequencies and save you a lot of unwanted trouble.

    Troubleshooting a Video Doorbell

    It is outside the scope of this article to provide troubleshooting tips on ring.com, chime, or other popular video doorbells. However, we can say that in most cases when your wired doorbell stops working after installing a ring.com or chime video camera doorbell, more than likely this issue caused by the wired doorbell transformer not having enough amperage for both a doorbell video camera and a traditional wired doorbell.

    • The doorbell stopped working with my ring.com video doorbell.
    • The ring doorbell battery keeps dying
    • Why is my ring chime not working
    • Does the ring doorbell light stay on
    • Ring doorbell hardwired losing power


    When dealing with any electrical devices, even low-voltage ones like doorbells, please make sure you take basic precautions such as disconnecting all power to the device.  If you do not have experience dealing with things like this, please call an electrician.

    Visit our product catalog at secure.1800doorbell.com for all your doorbell and door chime needs.  Call us at 800-366-7235 for any assistance you may need.

  • How Much Are Home Security Systems & How to Choose

    How Much Are Home Security Systems & How to Choose

    Here’s a little good news (and bad news) about home alarm systems: You can spend as little (or as much) money as you’ve got on them. What can be difficult is choosing the home security system you need and spending just the right amount. Overall in the US, violent crime and property crime are down, but the numbers are still huge! The FBI’s most recent property crime stats for 2013 show nearly 9 million property crimes in the US.

    Professional Home Security or DIY: Which is Best for My Home?

    At 1800Doorbell.com we firmly believe that homeowners deserve to feel and be safe at home. To make sure everyone, including you and your family, enjoys home safety and security, today we’ll discuss options for home security, from basic home security systems to sophisticated, high-tech home alarm systems. We’ll talk about professional security monitoring systems and DIY home security deterrents.
    Is it difficult to install security cameras? Do they have to be pricey to be effective? The answer is: no. You may be able to cover your home security needs completely with $50 or less–or you could spend thousands if you want.


    Today we’ll share crucial home security information to help you stay safe without busting your budget. No matter what, we suggest that you at least go the simple and effective route for home security by choosing deterrents like signs and dummy cameras. We have found and other security experts agree–if you’re unsure, start with something simple. Go DIY for home security. You can always add more security devices later. Start your home alarm decision process here:

    Consider What You Might Need: Home Security Options

    Security technology is very sophisticated and there are many home security factors you can monitor:

    • Video
    • Sound
    • Motion
    • Environmental danger (smoke alarms, radon detectors, etc.)
    • And more

    You can also choose how you want to be alerted to a home break-in or danger:

    • Loud audio intruder alert on the property (wired or wireless security system speakers, smoke alarms, etc.)
    • Silent home alarm warning on the property, alerting you only
    • Visual warnings like a flashing light for the hearing impaired or in loud environments
    • Professional security monitoring is where a security company contacts authorities and you
    • And more

    With a modular home security system, you can add on features as needed. With practical easy-to-install additional options, your home security system can:

    • Protect yourself, your family, child, or senior home alone (personal portable security monitor and wall-mounted panic buttons)
    • Protect doors and home entrances with video
    • Monitor the front porch and back door with the home security intercom
    • Alert you of window breaches, or a window is opened (using window sensors)
    • Window breaks with glass breakage sensors
    • Motion in individual rooms or outdoors (motion sensors and vibration sensors for security)
    • Perimeter and outside property monitoring (longer distance and warning alarms, infrared, video, security lighting, and driveway alarms and monitors)
    • Help protect occupants from fire, and poison gas or even warn of flood damage or dangers, environmental dangers (carbon monoxide detectors, smoke alarms, radon detectors, and basement flood detectors, for example)

    You can choose a high-tech security system that covers all those methods of home monitoring listed above. Or you can choose to go low-tech, with only warning signs and dummy cameras. (These inexpensive and clever options actually do wonders, depending upon your individual wants and needs.) Above all, you need to feel safe in your own home!

    Deterrence is Crucial for Home Security: Keeping Crooks Away from Your House

    When you think about how to buy a home security system, deterrence is an important element to consider After all, it’s better if a thief never even tries to break into your home. Keeping criminals off your property with home security systems is ideal to prevent damage to your property and danger to your family. You can begin providing a basic sense of security to your family with deterrents like:

    • Place simple alarm signage around the home and property.
    • Mount dummy security cameras yourself in a few minutes at a very low cost.
    • Consider entrance alerts if you just want to be advised of someone coming in, so you can glance up and see who it is.
    • Add outdoor lighting to deter home break-ins and crime.
    • Add timers to home and outdoor security lighting so that it looks like someone is always home.

    With just those simple home theft deterrent steps you may have all the security you need–depending upon where you live and your personal feelings about home safety. If you’d like a warning of a car approaching, for example, there are some great solutions. Early warning security devices can alert when someone enters the driveway. From basic crime deterrence around your home, you can go further, step by step, and build a more thorough security perimeter around your house to deter trespassing, keep away intruders, and warn you of a perimeter breach.

    Professionally Monitored Home Security Systems: Are They Worth the Money?

    How to decide if you need a service like ADT for professional home security monitoring–ask yourself:

    • Do you want an outside company to be on guard or would you rather have direct control? (For instance, if there is a false alarm, do you want to deactivate the loud alarm–or do you want the security company to send the police?)
    • Do you want to be locked into a year-long to three-year contract?
    • How affordable is the monthly fee?
    • Do you have a landline? You need a landline for most professionally monitored systems, otherwise, you will need to purchase additional expensive equipment.
    • Does the service provide more than you can get from a full-featured stand-alone home security system from SkyLink at 1800Doorbell?
    • Will you save a significant amount on your homeowner’s insurance if you get professional monitoring? Or will less expensive options save you much more over time?
    • Before purchasing a system with professional monitoring (like ADT, for example), add up all the costs including installation, monthly monitoring rates over a lifetime, additional fees, etc. Now compare the monitoring company’s deal with an expandable in-home security system where you can add more convenience and safety features as you need them.
    • How much are home security systems? A survey on ApartmentTherapy.com showed people paying large upfront fees for security monitoring companies ($600 for example) and monthly fees in the small sample were about $40 over a 3-year contract. All of that adds up! (It comes to a little over $2000 for 3 years.) Compare that to your self-installed Skylink system from 1800Doorbell.

    The answers to the above questions should help you weigh the cost of a monitored security system against your needs.

    Full-Featured High-Tech Security Systems can be Simple to Install

    Even advanced, cost-effective home security is made simple with some of the best and latest high-tech security alarm systems to help you monitor your property and improve your safety. You don’t have to contact an electrician to install most systems and equipment from 1800Doorbell. Our security systems and components are typically a DIY installation project. When considering how much you’ll spend for a home security system, you won’t have to worry about installation costs with an 1800Doorbell system.

    Deciding on Your Home Security System: How to Assess Your Home Security Needs

    Wondering how to choose home security systems? Factors to consider when choosing the right security system for you and your home.

    • Do you live in a high-crime area?
    • Do you live in an apartment or a house? You can get affordable security for each type of residence here at 1800Doorbell.com. Apartments should have window sensors and door security at least.
    • Do you have a property that is especially attractive to thieves? Do your home or possessions stand out in your neighborhood?
    • Do you have a landline phone and a cell phone? Or do you rely on only one type of phone? A security system can help you stay safe and help alert neighbors or authorities using a two-way radio.
    • Do you live in a rural area where law enforcement may take a while to arrive? Would you like a warning of any visitors?
    • Do you live on a large property and want perimeter protection from intruders and trespassers?

    The Bottom Line on Simple, Effective Home Security from the Experts

    As US News and World Report pointed out, property crime reached 9 million by 2011. The US News experts advise that even spending just a little can save your home from crime, recommending “outdoor fake security cameras that look like real ones.” You can get those for about $5 or $10 each, right here at 1800Doorbell!


    Start your home safety improvement today! Don’t let all the options for home security deter you, just browse the home security section at 1800Doorbell for helpful information about the most cost-effective home security products on the market. We’ve narrowed things down because we only carry the best, most reliable, and easiest-to-use products on our site. Whether you want high-tech or low-tech or need professional advice call 1800Doorbell. We can help you find the best product for your specific needs.


    Remember, effective, high-tech security doesn’t have to cost a lot. Contact 1800Doorbell.com online or call 1-800-Doorbell (1-800-366-7235) toll-free today!

  • How Home Security Systems Work

    How Home Security Systems Work

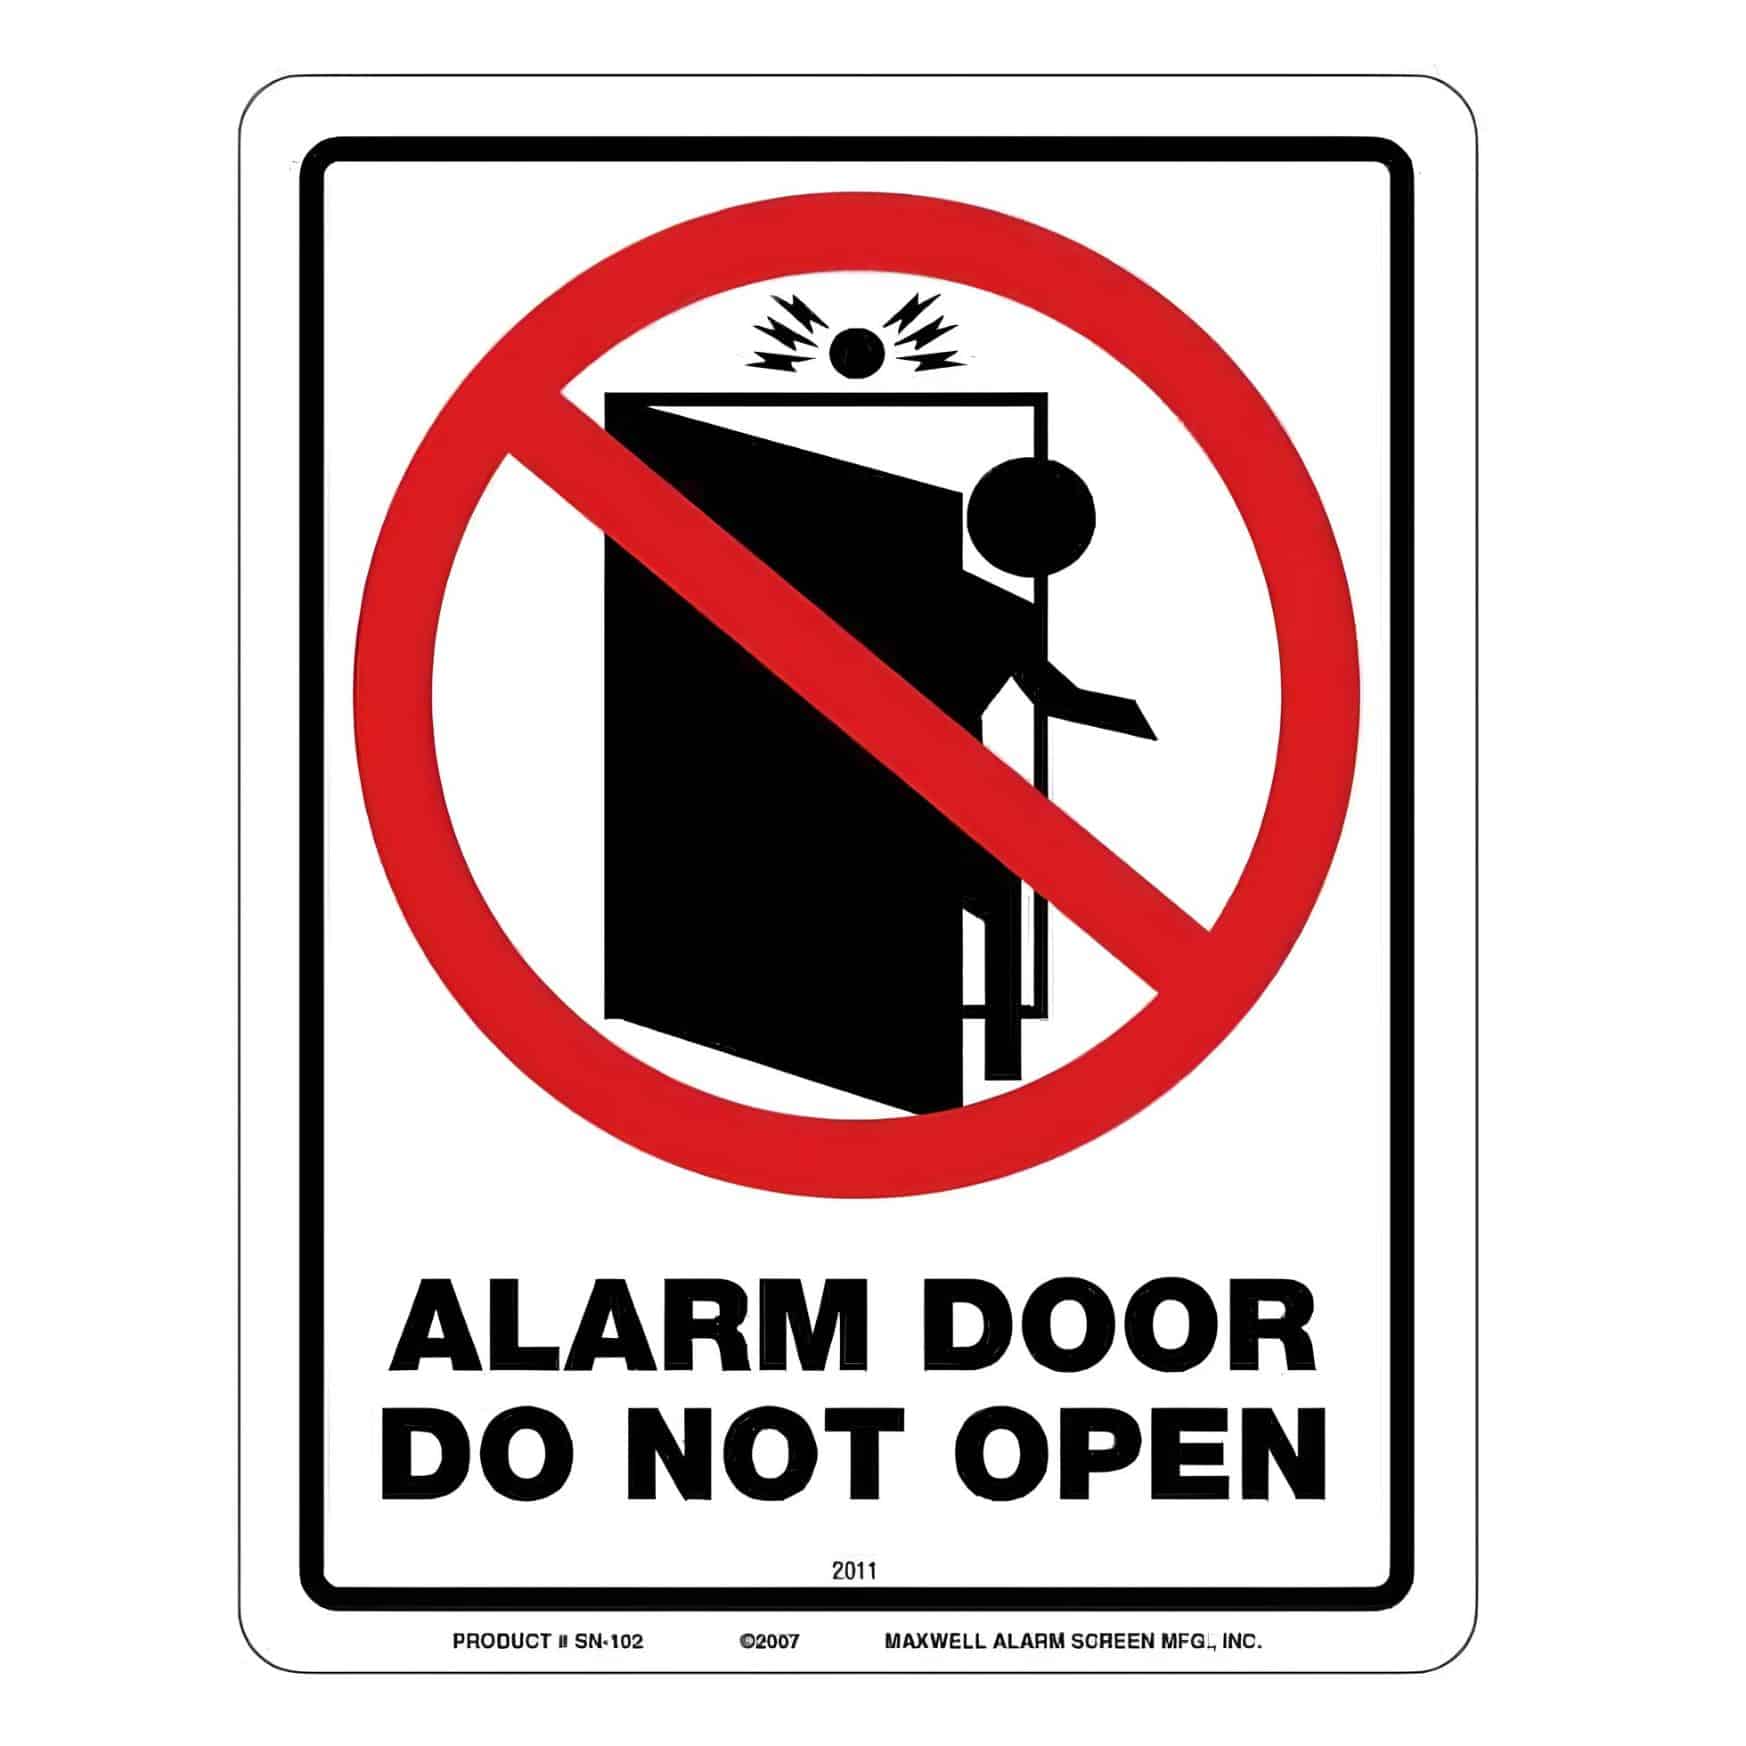
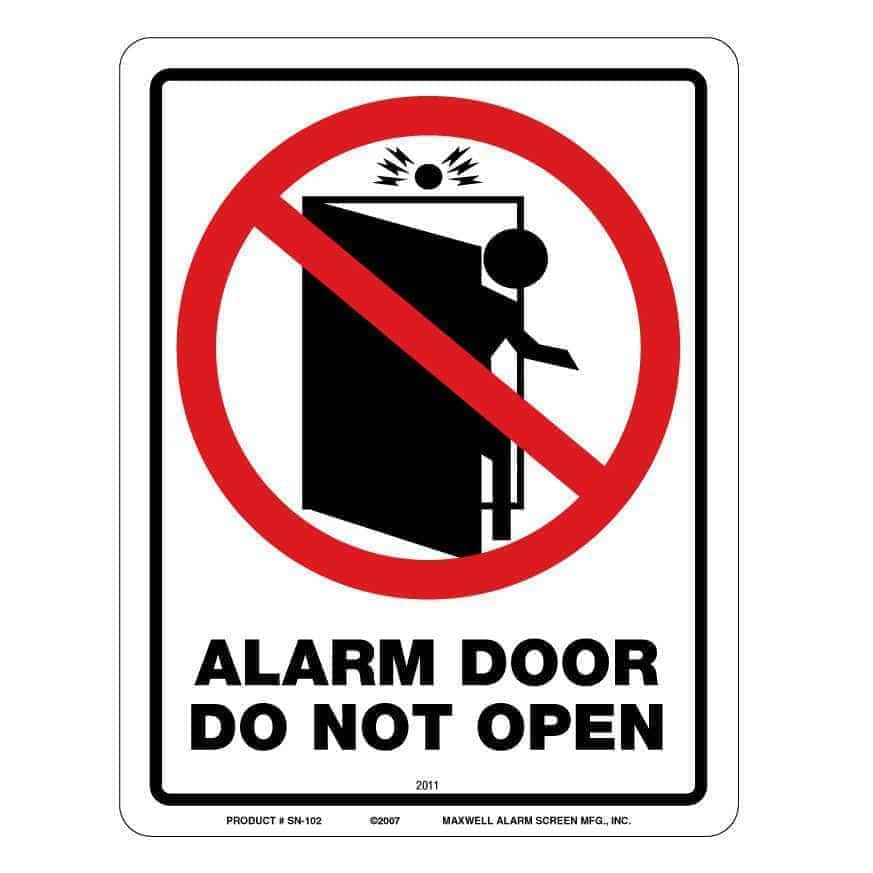
    We all can’t put up a sign like this on the side of our homes to deter potential criminals. Therefore, we use home security systems to keep crime out of our homes. Home security systems allow you to monitor the home environment and provide alarms or alerts when something is amiss.
    A home alarm can provide great peace of mind whether you (or your kids) are home alone or when you’re away and no one is at home. The “something amiss” that is monitored by your home alarm can be almost anything you might care to know. These days there are monitors, alarms, and detectors for almost everything that might go on, in or around your house and your property–including break-ins or vandalism by criminals, trespassers, or thieves.

    Monitoring Methods and Options for Your Home Security System

    You can monitor and protect your home outside and inside with one or several of the following as part of your home security system:

    • Driveway alarms (activated when a car passes a motion detector/sensor or when a car drives over a specially equipped hose on the ground)
    • Personal alarms (panic transmitters can be carried in the pocket or worn around the neck or wrist so you can summon help quickly)
    • Panic buttons (can be installed in certain rooms so that help is alerted when you press the button)
    • Intercoms (allow you to talk to and/or see a visitor who has approached your door or rung your doorbell)
    • Window sensors (to detect when a window or door is opened)
    • Glass break sensors
    • Flood or water level sensors
    • Dummy video surveillance systems are also an option and as an effective theft deterrent
    • Alarm signage can also act as a deterrent whether or not you have a security system installed in your home

    These systems are not only for detecting intruders, burglars, or life-threatening situations. You can also use the equipment to monitor, for example, if an elderly parent or sick child might need to call you to their room. An intercom system would work well for this. You can use motion detection and/or video to make sure pets don’t go into your bedroom and there are many other practical household uses for home security systems. Make sure to let your homeowner’s insurance company know if you install a home burglar alarm because they may offer a discount.

    Alert Methods for Home Security Alarms

    Home burglar alarms offer several options for alerting you of an intruder, trespasser, or movement. Options to consider include:

    • Audio alarms in the home that the intruder, you, and neighbors can hear
    • Silent alarms
    • Visual alarms such as a light that flashes (good as an aid to the hearing impaired or for use in loud environments)
    • Alerts sent to your email or smartphone whether you are in the house, out in the back yard, in the garage, or out of town
    • Alerts sent directly to a professional security company or home security monitoring service. (These services will usually investigate by contacting you and/or sending police or fire department as needed.)

    Home Burglar Alarm Systems: Choosing Hard-Wired or Wireless

    The installation and functional details of your system depend upon which of, and how many of, the above types of Monitoring Methods (listed above) you choose to have in your house, driveway, garage, and other areas of your property. You can also opt for an entirely wireless system, where all components run on batteries or are plugged into the wall. Or you can instead choose a hard-wired home security system where each component is wired into your home’s electrical supply with a battery backup. You can also choose a hybrid system as well, that has hard-wired and wireless components.

    How Wireless Home Security Alarms Work

    Wireless home alarm systems generally consist of three basic components:
    Sensors/transmitters: These are listed under the Monitoring Methods above, such as a window sensor or motion sensor. These devices are placed strategically around and inside the home to detect and alert you to signs of trouble. Different sensors are designed to “lookout” for different things and trigger the alarm if it happens. For example, some alarm sensors are triggered if a door or window is opened, alarms are triggered if the glass is broken, if there’s movement in the room, or if carbon monoxide or smoke is detected. When triggered, the sensor acts as a transmitter and sends an alert signal to the receiver(s).
    Indoor, plug-in receivers: The sensor/transmitters in a wireless system typically send alarm signals to indoor receivers plugged into an electrical wall outlet in your home, placed within range of the transmitters (cameras, motion detectors, etc.). The alarm must be set loudly enough that you can hear it throughout the house–or pick up the alert on your portable receiver if you’re in the backyard, for example. Most systems give you the option to add extra receivers (if you need the alert sound to travel further in a larger home.) You would then install (or plugin) additional receivers in more than one location of the house.
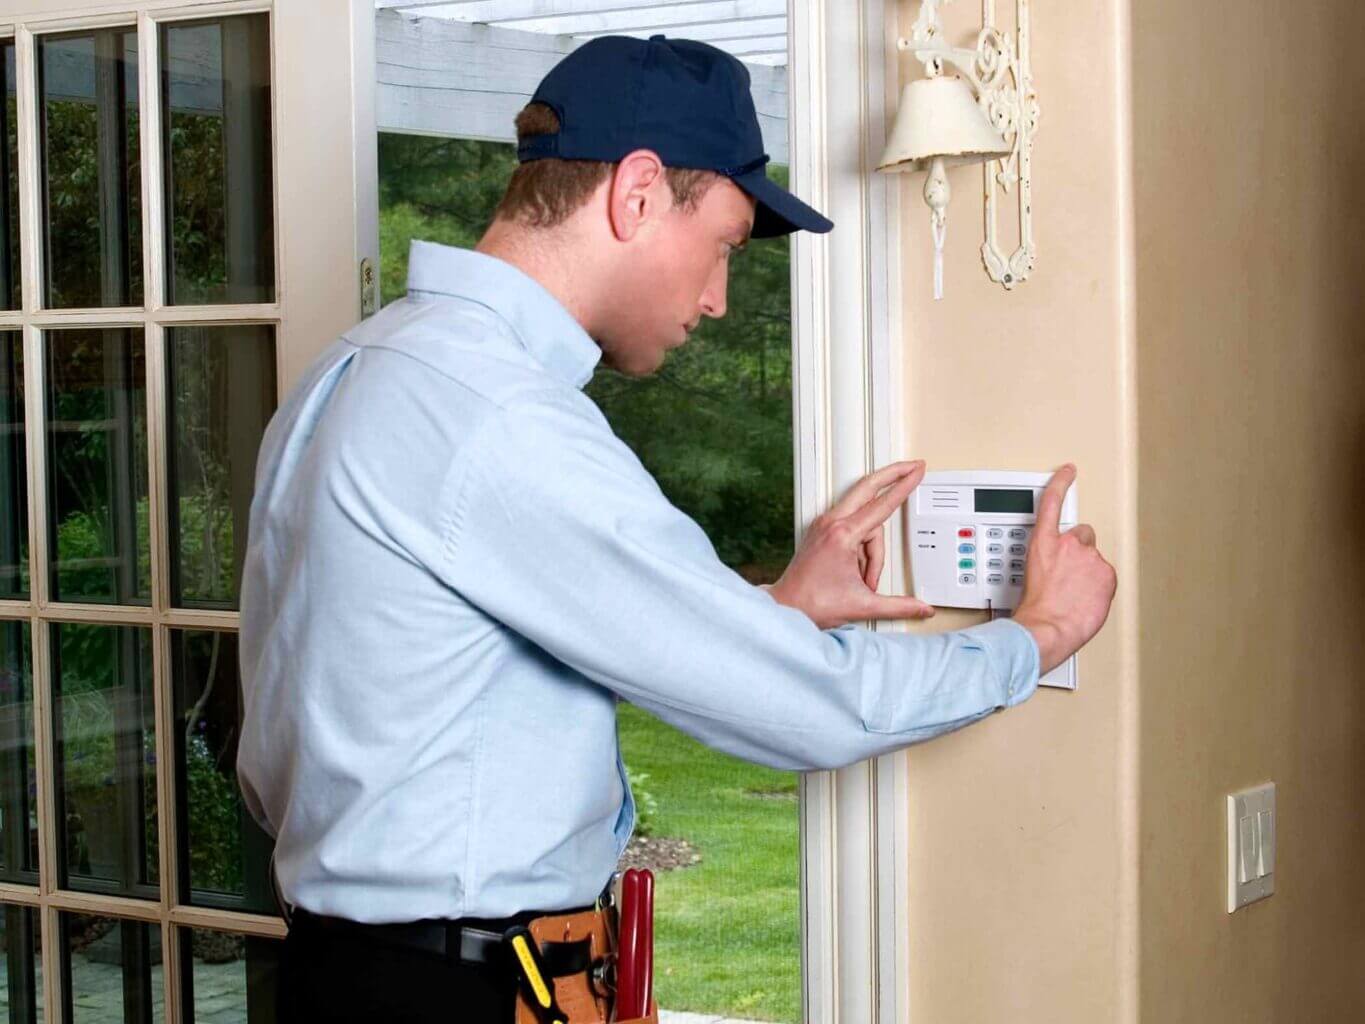
    Control Panel: This is the nerve center of the home security system, which manages sensor activity and sends an alert to you via the method you’ve chosen–and may also notify an alarm monitoring company. You use the Control Panel to arm or disarm the alarm system, as well as to customize your settings. You would likely arm and disarm it with an alarm code entered into the keypad. Many home alarms have settings for “staying at home” and “away.” The stay-at-home mode might not activate motion sensors, for example, but would still keep glass break sensors armed. You might also have a remote control or be able to control the alarm on your smartphone or laptop.

    How Hard-Wired Home Security Systems Work

    Hard-wired home alarm systems usually operate on a closed circuit. When the electrical circuit is broken (when a window is opened and its sensor is tripped, for example) it triggers the alarm to sound.

    • The window sensor consists of two parts (one on the window casing and one on the window frame or sill). The two parts are lined up when the window is closed. One half contains a magnet and the other contains the actual switch. This window sensor is part of the closed-circuit system connected to a key switch/control panel, alarm buzzer/bell, and battery.
    • When the magnet and switch are pulled apart when the window is opened — the switch/circuit is opened, triggering the alarm. Simply closing the window does not restore the circuit and doesn’t stop the alarm sound–until either the battery runs down or someone switches off the circuit with a key or by using a keypad code.
    • The electronic switch built into the alarm sounder is turned on by breaking the window sensor’s magnetic-switch loop. A key-operated switch in the sounder circuit (or a keypad with a code) is the only way to silence the alarm sounder. A physical key (or keypad code) also allows you to turn the alarm system off when it’s not needed.
    • The electronic parts that make up the alarm’s sounder are mounted on a circuit board. Underneath the circuit boards is a coil and plunger that strike the bell or activate an electronic sounder. Below the coil are “breaker points” that cause the plunger to vibrate rapidly, striking the bell to make the alarm/buzzer sound.

    Wired systems require a bit more work to install, but you won’t need to use batteries except as a backup. Warning: You must first cut the electricity supply to your house, before working with the wiring. You could opt to hire a professional installer or connect the system components to the control panel by stringing wire along the baseboards of your home.

    How to Choose the Best Home Security Alarm

    Things to consider when selecting a home alarm system:

    • Transmission distance (for wireless components): What is the distance from where the transmitter(s) will be installed to the receiver? Make sure to purchase a wireless system with enough range.
    • Signal interference (for wireless): Test to be sure there are no interference or signal transmission problems caused by walls or large furnishings between sensors and receiver.
    • Type of notification: You may want to choose an alarm sophisticated enough to provide unique alarm sounds for each different area you are monitoring with window sensors, driveway, front door video, etc.
    • Number of receivers and transmitters needed: How many driveways, windows, doors and other entry points do you want to monitor?
    • Mobility: Choose a home alarm system that offers a portable wireless alarm receiver if you need to move around a large home or spend lots of time outdoors.
    • Battery life: Check the battery life of your wireless alarm or any wireless components in your system.
    • Durability/versatility: Check to see if the transmitter is waterproof and if your video camera will work in the dark. (Infrared motion detectors should work in the dark.) Make sure to choose durable components for the best long-term performance, especially on any components that you will be installed outdoors.
    • Integration: If you add any components to your security system later, make sure they are compatible with your already-installed system.

    Whether you’re looking for better home security and peace of mind–or if you just need a warning before a visitor reaches the door, visit 1800Doorbell.com. We have a wide selection of wired and wireless home security systems and components (including useful dummy cameras) and a staff of experts, ready to help you select the best home alarm system for you. Give us a call today!

  • How to Install a Home Alarm System

    How to Install a Home Alarm System

    Bureau of Justice Statistics, the US violent crime rate hovers around 23 victimizations per thousand people. The property crime rate is about 130 victimizations per thousand households. Depending upon where you live, your rate may be much higher or lower, but statistics don’t make a difference if a crime happens to you or your family. It’s always better to feel safe (and to be safe) in your home. That’s why alarm systems are big business and there are thousands of systems to choose from.

    Choosing and Installing a Home Alarm System

    With all the choices on the home alarm market, making a choice and getting your chosen home alarm system installed can be confusing. You should start by thinking about your home’s layout and size, along with what areas are most likely entry points for an intruder or burglar. Your budget must also factor into the solution.

    Low-Tech and Low-Budget Home Alarms: The Simplest to Install

    Signage: The simplest and most low-tech home alarm solution is also the easiest to install. We’re talking about a deterrent system. You might opt to purchase home alarm signage for your lawn or to post it on your fence or garage. Even if you go no further, you will cause any thief to think twice and hopefully move right along.

    Dummy video cameras: A professional burglar or someone who is desperate to get into your home, however, would require additional home security measures beyond just home

    alarm1s sign alarm door dont open 1 1

    security signage. Next in price and ease of installation is the dummy camera or dummy video surveillance. (Sometimes security cameras are referred to as CCTV or closed-circuit television systems.) Dummy security systems are very popular and many of the surveillance cameras you see on homes in your neighborhood may be non-functional and fake. This is an economical solution to help keep your family, home, and property safe.

    Installing a Dummy Security System: A Simple Theft Deterrent

    If you opt for the deterrent effect of a dummy video camera system, you only need a few tools to prepare: a ladder, screwdriver, lawn or wall signs, home security window labels, and fake video camera(s). You can choose fake security cameras that are appropriate for indoor or outdoor use.
    To install your dummy video security system, just attach the camera(s) to areas outside your home where they are visible, but out of reach so that potential intruders cannot break or spray paint the camera lens. You might want to install dummy video cameras on your porch high above the entry door, at your front gate, at the back door, or anywhere on your property. Then you can strategically place security signs and window stickers around the house and property.

    Wireless Security Systems: Easy to Install and Economical

    The next type of home burglar alarm you might want to consider to protect your home is a wireless system. Wireless systems offer several functions which you can add depending on your home layout and needs. Many wireless home alarm systems come with window sensors and/or glass break sensors which set off alarms if windows are breached. You may also opt to include motion detection as part of your wireless security system. You can use wireless motion detectors for theft protection, but also to monitor whether kids or pets are entering or leaving a particular room of the house. Driveway alarms are also popular if you like to be warned whenever someone is approaching your home or driving up the driveway. These are excellent for homes that have a long driveway leading up to the house. It’s especially important to be notified of a car entering your driveway if you live in a rural area where it’s not common for people to drive in and out.

    How to Install an Alarm System in Your Home: Installing Wireless Security Systems

    For this installation project, you will need the components you have chosen for your home alarm system, which may include: door/window sensors (each sensor is in two parts — you need enough pairs to install on each window or door that you want to protect). Motion sensors for each room entrance and/or the front and back doors. You may also opt to include security cameras. You will also be installing a control panel or keypad to control everything. You may also use home security signs and window labels.

    Door and Window Alarm Sensor Installation: Wireless

    • Select the best location(s) for your wireless security sensors (also sometimes called motion sensors). Protect those areas that seem tempting to thieves, such as windows, front and back doors, large pet doors, and/or garage doors.
    • Make sure the range from each sensor (the transmitter) to the sensor base (the receiver) is adequate. Transmitters have limited ranges and they may be less than stated on the box. Signals from the transmitters must go through walls, large furniture, etc. that may not have been included in the test the manufacturer used to determine the average range.
    • Install both parts of each window sensor. The larger half is the transmitter and the small one is the magnetic component that completes a closed circuit. When the circuit is broken as the window or door opens, the alarm sounds or light flashes, and/or your video camera is automatically switched on (in some systems).
      • Screw in the sensor to the doorjamb or window frame.
      • Place the magnet on the windowsill or door frame so that it is even with the sensor.
      • Drill pilot holes to screw the magnet into the door/window.

    Installing a Home Alarm: Wireless Motion Detector Installation

    An infrared motion detector works by sensing temperature changes. Because of this, be sure not to install them facing a window that gets direct sunlight. You may want to install motion sensors a few feet up from the floor. (Pets under 40 pounds don’t usually cause a false alarm because sensors aren’t sensitive enough to detect them, but just to avoid any chance of this problem, install sensors above their height.)

    • Choose your installation point with a clear, unobstructed view of the whole room.
    • Mount the sensor plates securely to minimize any vibrations and false alarms. Use screws where possible and use drywall anchors for hollow walls.

    Installing the Wireless Control Panel for Your Home Alarm System

    • Just plug the control panel into a wall outlet and connect it to a phone jack, if necessary. (Some systems use wireless signals to send alarms to a smartphone or laptop.)
    • Program the control panel according to the manufacturer’s instructions.
    • Once you have programmed the home alarm system, the panel will set off an audible alarm and/or a flashing light, or call you or email you if a window/door sensor is breached.
    • Remember to activate your home’s window and door sensors before going to bed or leaving the house. If your system includes a smoke detector, CO detector, or flood detector, these always stay on.

    Advantages of Installing a Home Alarm System

    Any type of home security system mentioned here can help prevent:

    • Theft, burglary, or property crimes
    • Home invasions and violent crimes at your home
    • Trespassing on your property
    • Vandalism
    • Home insurance claims to your theft or property damage insurance–or liability claims if someone is injured on your property
    • And more

    Advanced Features for Home Security Systems

    • Glass breakage sensors
    • Flood sensors
    • Video cameras for home security
    • Carbon monoxide (CO) detectors and smoke alarms
    • Settings that allow different home and away modes for the security system
    • Key chain remotes are available with some home alarm systems
    • Battery backups keep the home alarm system activated, even if your electrical power is out
    • Panic buttons allow you to set off the alarm yourself if you see someone breaking in
    • Professional security monitoring (when a professional security company monitors the alarm–then alerts you and the police or fire department)
    • Alert options such as sound, lighting, text messaging, phone calls, or email if your home security system goes off

    You can even get doorbells that provide extra security for your home. Choose a doorbell with an intercom system, for example, that allows you to safely see or talk to the visitor at your door–providing an extra measure of safety before you open your door.
    At 1800Doorbell.com we sell dummy video security cameras that are easy to install, and budget-friendly, acting as an effective deterrent to help keep your home or business safe. We also offer driveway alarms and motion sensors. Please contact us for more information. Order home alarm systems conveniently online or call 1-800-DOORBELL (366-7235).

  • Choosing the Range of Your Wireless Door Chime

    Choosing the Range of Your Wireless Door Chime

    sending smoke signals as a doorbell notification
    • What is “wireless range”
    • The “published range” versus the actual range
    • Factors that interfere with the range
    • Tips on improving range

    What is Wireless Range When it Comes to Door Chimes?

    When talking about wireless door chimes, entrance alerts, and driveway alarms, the wireless range of products is defined as the distance, usually in feet, from the transmitter to the receiver. Doorbell transmitters are the pieces in a kit that will generate and send a wireless signal to the receiver.  For door chimes, transmitters are the push button, the part a visitor presses when they ring your doorbell. For entry alerts and driveway alarms, the transmitters are built-in with a motion, magnetometer, or contact-based sensor.  When these sensors are triggered, the transmitter sends a signal to the receiver. Door chime receivers are battery-operated or plugin units that receive the transmitted signal and play a tune, tone, melody, or other doorbell sounds.

    The Published Range vs. the Actual Range of Wireless Products

    When manufacturers publish the wireless range of products, they have to use a standardized way to determine the range.  For testing purposes, they use line of sight, which is essentially the unobstructed distance in a straight line, usually determined in a lab environment. Although this isn’t how consumers will use the products, it’s the easiest way to ensure manufacturers are measuring the range the same way this gives an apples-to-apples comparison.  In most situations there will be at least one wall between the doorbell transmitter and the receiver, but if manufacturers published ranges this way, how would you know if it was a brick wall, or a thinner, dry-wall constructed wall? How does this affect your decision?  If the distance from the doorbell button to the receiver is 150 ft., and you purchase a common wireless door chime kit with a published range of 150ft., chances are you will have reliability issues.  On the other hand, if the published range of a kit is 75ft., but you only need 20ft., chances are you won’t have any issues.

    Factors That Interfere with Wireless Door Chime Range

    • walls
    • building materials
    • mounting material you mount the transmitter on
    • surrounding environmental factors
    • other wireless devices

    Walls Will Reduce the Range of Your Wireless Device

    The most obvious factor that will interfere with the range of a system is a wall.  The type of material the wall is made of will play more of a factor.  The general rule of thumb is that each wall a signal passes through will diminish the signal by 20%.  For example, if you have a sensor at the driveway entrance with a receiver plugged into an outlet in a room adjacent to the exterior of your home, that’s one wall the signal needs to penetrate.  If the product has a published range of 1,000 ft., one wall takes the range down to 800ft.  If the receiver is behind another wall, even an interior wall, the signal will diminish by another 20%.  Another 20% off 800ft. is now 640ft.  If the wall is solid concrete, you need to take 30%-40% off, steel, 50% off.  These numbers are not set in stone, but they do provide a general idea of how signals are diminished. I took a call yesterday from a lady who purchased the Carlon Wireless Kit, RC3250.  She wanted to mount the wireless doorbell button on a wrought-iron gate.  She called and said sometimes the doorbell would ring and sometimes it wouldn’t.  I asked how far it was from the doorbell button to the receiver and she said it was less than 100ft., therefore the product should work as advertised. Ultimately, the problem was the range.  Not only was the exterior wall of her home stucco, which automatically reduced the signal by 30ft. (taking it down to 120ft.), the push-button was mounted against a solid wrought-iron gate, another factor to consider.

    The Mounting Surface Matters

    The fact that these transmitters are wireless poses another issue to consider and that’s what you mount it against.   When triggered, the transmitters emit a wireless signal that the receiver needs to pick up.  When metal is directly under the product, problems occur because the wireless signal will bounce off the metal.  Weaker signals will lose a tremendous amount of range due to this bouncing around, while stronger signals will not be as effective. In the case above with the wrought-iron gate, we were already stretched to the max because of distance, and exterior wall material, the metal right up against the transmitter was too much for this system to handle. This is why we typically recommend commercial applications purchase a motion-based entrance alert versus a door/window contact entrance alert.  Door/window entrance alerts sit right up against the door frame, which is usually metallic in commercial applications.  A motion sensor sits a few inches away from the metallic frame, which is usually enough for the wireless signal to emit uninterrupted.

     Surrounding Environment and Other Wireless Devices

    Other environmental factors will play a role in the effective range of your wireless device, however, under normal circumstances, they are not as important as walls and mounting surfaces.  When I refer to environmental factors I am talking about any outdoor elements that could interfere.  Trees, hills, rocks, etc. will play a role, but in many cases, there are easier ways to overcome these obstacles than dealing with unmovable factors like walls. Trees between the receiver and transmitter won’t play a major role unless it is an extremely heavily treed area.  Hills and valleys should not play a major role unless there is a huge dirt hill right next to the transmitter. Neighboring wireless devices could also cause some interference, but privacy codes help alleviate this problem.  Simple adjustments to the privacy codes on your doorbell will usually eliminate this issue.  We have an entire article that covers this topic here: How to Avoid Doorbell Interference by Changing your Privacy Codes.

    Tips On Improving Wireless Range

    In most cases, there are some basic things you can do to ensure you are getting the maximum range of your product.  These tips won’t work in every case, but when making your decision on what product to purchase, or deciding if you need to return your product, think about these tips and see if they work.

    1) Make sure the product you have is within the published range of the product.  I know this sounds simple, but in many cases, this isn’t something people think about.  If the distance from the doorbell button to the receiver is 100ft., don’t get a doorbell kit with a range of 75 ft. Our driveway alarm systems are available with a variety of wireless ranges.  If you know the distance from where you place the sensor to where you place the sensor is 600ft., I would not go with a product like the WMA-3000 which has a range of 650 ft.  I would get a product like the Di2000S-A Driveway Alarm with a range of up to 1,000 ft.  Another option would be to move the sensor closer to your home or try to move the receiver to the closest exterior wall facing the sensor.

    2) Place your receivers closer to a window or wooden exterior wall.  I would recommend upgrading your system to a stronger one, but if the range is close (when considering interference) then simply placing your receiver closer to an exterior window of your home might do the trick.  The only caveat to this is making sure it is an exterior window or wall.  If your home is brick, for example, it is easier for the signal to penetrate glass than brick.

    3) Moving the transmitter off a metallic surface is another tip to consider.  If you want a wireless doorbell system but the door frame, we recommend placing a wooden shim in between the push button transmitter and the surface.  A thin piece of wood should do the trick.  By doing this, it lifts the transmitter from the surface giving the wireless signal just enough room to escape the interference from the metal.  Many users who have screen doors face this problem and in almost every case, wood, or even a piece of cardboard helps.

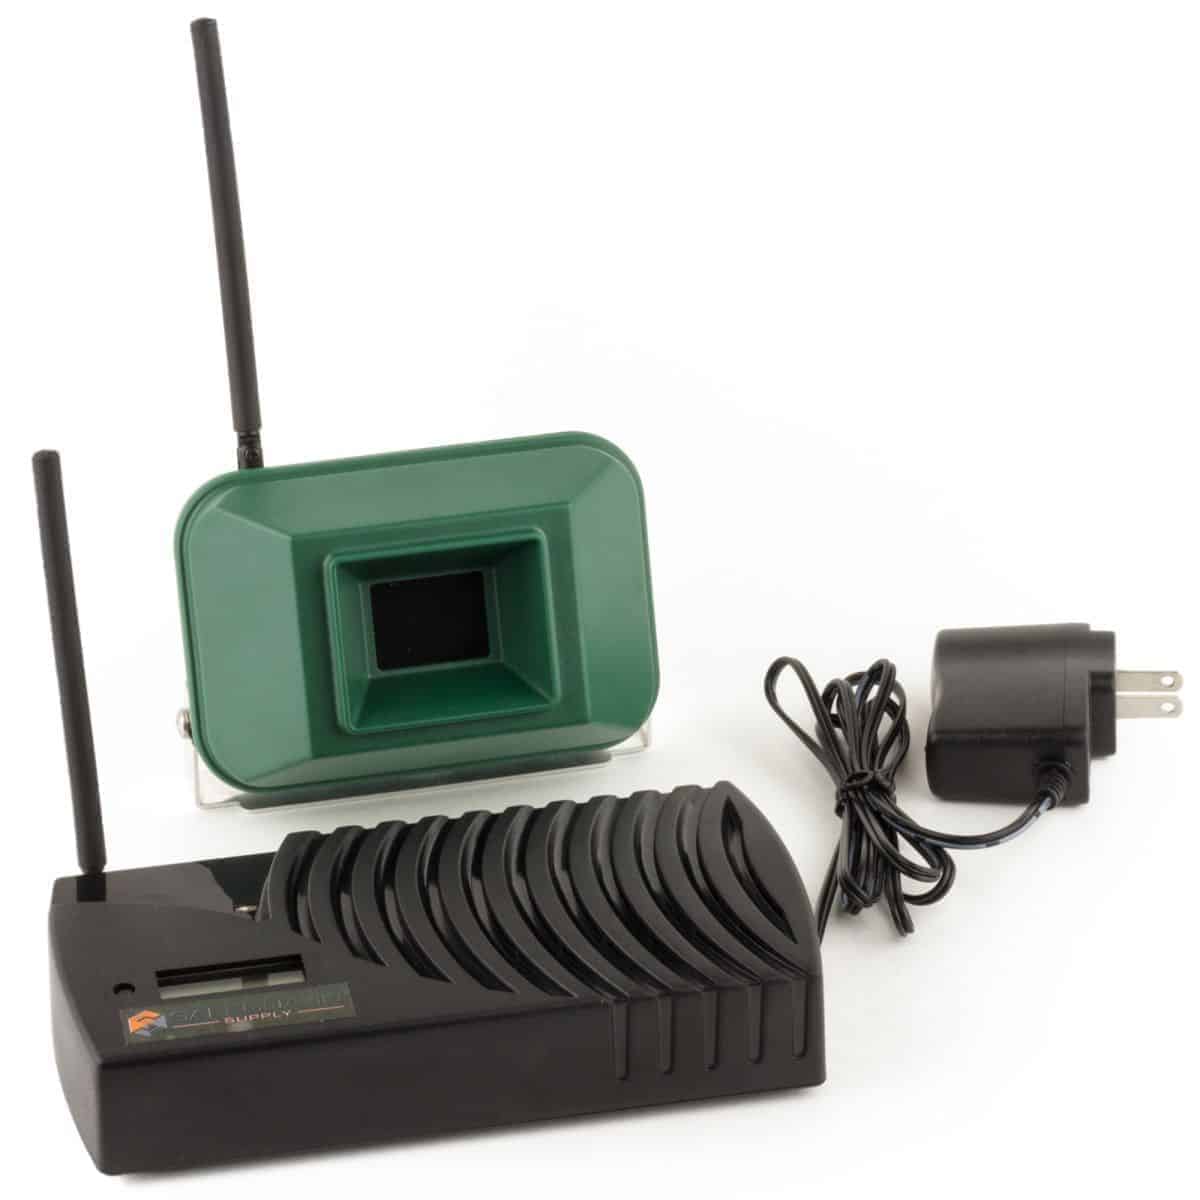
    4) Get a High Powered Wireless Doorbell. Unless you are trying to install a wireless doorbell system where the receiver is inside a solid concrete enclosure (like a bomb shelter) a higher-powered doorbell system will often do the trick. Here are the top two long-range wireless door chime systems that we carry.

    choosing-range-wireless-door-chime
    License: Creative Commons

    The LRA-D1000 is the most popular long-range system that we carry.  With a published range of up to 1,000 ft. from the push button to the receiver, this product usually has more than enough range to get the job done.  The kit ships with one battery-powered receiver (optional plug-in receiver sold separately) and one push button.  Additional buttons are also available. This product will play several different melodies and also have visual indicators, one that flashes an LED strobe and one that flashes a Roman Numeral that corresponds to the zone the transmitter is associated with.

    The ERA-UTDCR Commercial Door Chime System – our most powerful door chime system with a published range of up to 4,000 feet!  This kit ships with one push button and one receiver.  This system uses a “universal transmitter” the ERA-UTX that may be used as a push-button OR a door/window contact.  It communicates with the ERA-DCRX plug-in receiver. This transmitter is great because of its versatility.  This transmitter is great because of its versatility.  Another great feature of the ERA-UTX is the NO and NC inputs that allow you to integrate it with other devices.  For example, you could wire a decorative wired doorbell button to the transmitter and when the wired button is pressed, the wireless transmitters send a signal to the receiver.   The receiver is expandable and has four different tones it plays.   It is also compatible with additional receivers, and other types of sensors like motion sensors, door/window contacts, and magnetometer sensors.


    We hope this article provided you with a basic understanding of wireless transmission ranges as published by manufacturers.  These principles will hold when evaluating the range for just about any wireless product. For more information about this topic, our products, or anything else, please feel free to contact us.

  • Changing the Sound on Your Wireless Door Chime

    Changing the Sound on Your Wireless Door Chime

    Changing the tune or melody of your wireless doorbell chime is slightly different for each model and depends on the manufacturer. Whether you’re installing a new door chime or fixing a problem with an existing wireless door chime, it’s helpful to know the basics of the manufacturer who designed your product.

    If you know how to change the sound of a doorbell on a Carlon or Dimango wireless product, you will know how to change it for most of the products they manufacture.

    Below is information on how to change or repair the tune or melody for the door chimes found on secure.1800doorbell.com by brand or manufacturer.

    doorbell and door chime sound options

    Changing the Melody on GE 7-Sound Door Chimes

    GE wireless chimes use dip switches inside the cover of the wireless push button. Dip switches are small switches you push up or down to denote “on” or “off.”

    The GE wireless push buttons have three dip switches designed to change the tune. The chart below shows where the dip switches are located inside the cover and what the combination of the dip switches needs to be for the specific tune to play.

    To move the dip switches, take a small screwdriver to slide the dip switch up or down. For example, to play the “Cuckoo Clock” sound, make sure dip switch one is “on,” dip switch two is “off” and dip switch three is “on.”

    Note: when moving the dip switches for tune selection, make sure you are moving the dip switches associated with tune selection and not the ones for “house codes” which are privacy codes.

    Changing the Melody on Honeywell Wireless Chimes

    Changing the tune or melody on a Honeywell wireless chime product is similar to the way you would change the tune on a GE 7-Sound Chime (see section above).

    For these products, you use a small screwdriver to pry off the doorbell push button cover. Inside you will see a dip switch, labeled “C” with the ability to move it to “1,2, or 3.”

    1= Westminster Chime

    2=Ding Dong (set by default)

    3=Ding

    How to Change the Tune Your Heath Zenith Wireless Chime Plays

    Changing the specific melody or sound your Heath Zenith emits is fairly straightforward, but is more involved than most models and brands featured on secure.1800doorbell.com. First, rather than using dip switches, you will need to change jumper settings. Second, you will have to change these jumper settings in both the wireless push button and the wireless receiver.

    Although changing jumpers may appear to be difficult, it is easy with a set of tweezers.

    Remove the cover from the Heath Zenith wireless push button. Once you have removed the cover, locate the jumpers just to the right of the push button battery. Jumpers 1-7 are for privacy codes so we do not recommend changing them unless you have to. If you do change them, please make sure you match the jumpers in the push button with the Jumpers of the wireless receiver or the system will not be able to communicate. Only Jumper 8 is for changing the doorbell chime.

    See the image below to see what the jumper setting should be for your wireless Heath Zenith Door Chime:

    Changing the Tune on the DC-1000 by Dakota Alert

    The easiest product, as far as changing the door chime is involved, is the DC-1000 by Dakota Alert. To do so, open the front cover of the door chime receiver. Once opened, located the small button with the small musical note located above the button. If you see the larger volume button, the music selector button is the under and to the right of the volume button. To change the tune, simply press the button and the unit will cycle through the available tunes.