1800doorbell

Category: DIY Doorbell FIxes

  • How to Install a Wireless Doorbell

    How to Install a Wireless Doorbell

    generic installing wireless button
    generic installing wireless button

    If you’re considering a wireless doorbell for your home or business location, you’ll be happy to know that wireless doorbell installation is very simple. You may be asking, How to Install a Doorbell Camera.”

    Compared to installing a hard-wired system, installing a wireless doorbell is a breeze. With a wireless doorbell system, you won’t need any electrical knowledge or wires (of course) nor will you need a transformer. However, there are a few tips and tricks that can help you speed through the installation job and make sure your wireless doorbell operates just the way you want it to.

    Wireless Doorbell Instructions for Installation

    Learning how to install a wireless doorbell is fairly easy, but it is important to first do some planning: choose the location for the receiver. The receiver is the indoor part of the wireless doorbell system, sort of like a speaker, that will chime to alert you that someone is pressing the doorbell at your front door, back door, or any door on your property. At the end the day, the most critical step is pairing a wireless doorbell.

    You want to make sure of 3 things When Installing a Wireless Door Bell:

    1. That the receiver is within range of the transmitter(s), which is/are the doorbell button(s). You may have multiple doorbell transmitters, one at each of your home’s various entrances, and you need to make sure a receiver (wherever you’re planning to install it inside) is well within the stated range of your particular wireless doorbell model.
    2. That the receiver is within hearing distance: Make sure you can hear the doorbell from wherever you are in the home or even outside in the back yard (or in the stock room or storeroom is you’re installing in your business.) Estimate if this fits the system you’re thinking about. You may want to purchase extenders to ensure you can hear from anywhere in the house.
    3. Get extenders if necessary to increase doorbell signal range: If you have a big home (or office or factory), you may want to get a doorbell extender: to give your wireless doorbell a longer signal range. An extra transmitter will “forward” the signal from a spot near the door to a receiver further away. This way you can cover your whole premises and/or you can even purchase a wireless doorbell with the portable receiver to take with you when you work in the backyard garden or garage.

    How to Install Wireless Doorbell Buttons

    • Insert battery: Wireless doorbell buttons from 1800Doorbell.com usually come with long-life batteries already installed. Doorbell buttons typically require small round lithium batteries.
    • Look for any location markings, in either numbers or words for the “Front” door and the “Rear” or “Back” entrance door on the buttons.
    • Choose a spot for installation where the doorbell button is visible and within easy reach, typically at about 4 feet above the floor. This is the maximum practical button height for wheelchair access, so you could opt to go a bit lower. Fitting a doorbell button is a critical step for visual purposes. It will still function correctly no matter how it looks, but you want it looking good.
    • Adapt installation for your surface: Wood, vinyl, aluminum doors, and door sills are all acceptable surfaces to attach a doorbell button. For metal doors or door frames, however, you may need to place a wooden shim behind the doorbell button to prevent signal interference from the metal. For masonry or brick installation, you may need a plastic shield before under the button, between it and the masonry, for a secure hold when screwing in.
    • Attach with adhesive strip or screws: Wireless doorbell buttons are often installed using the adhesive strip on the back of the button assembly. You can usually also install the wireless doorbell button with two screws.

    Installing Wireless Doorbell Receivers

    The receiver is the part of the wireless doorbell system that will receive the radio waves emitted by the transmitter (button) when a visitor presses it. Then it will play the appropriate doorbell chime or sound so that you’re alerted. As you read through the installation instructions for your wireless doorbell, remember to follow the manufacturer’s instructions if they differ. In general, most wireless doorbell receivers are installed in this manner:

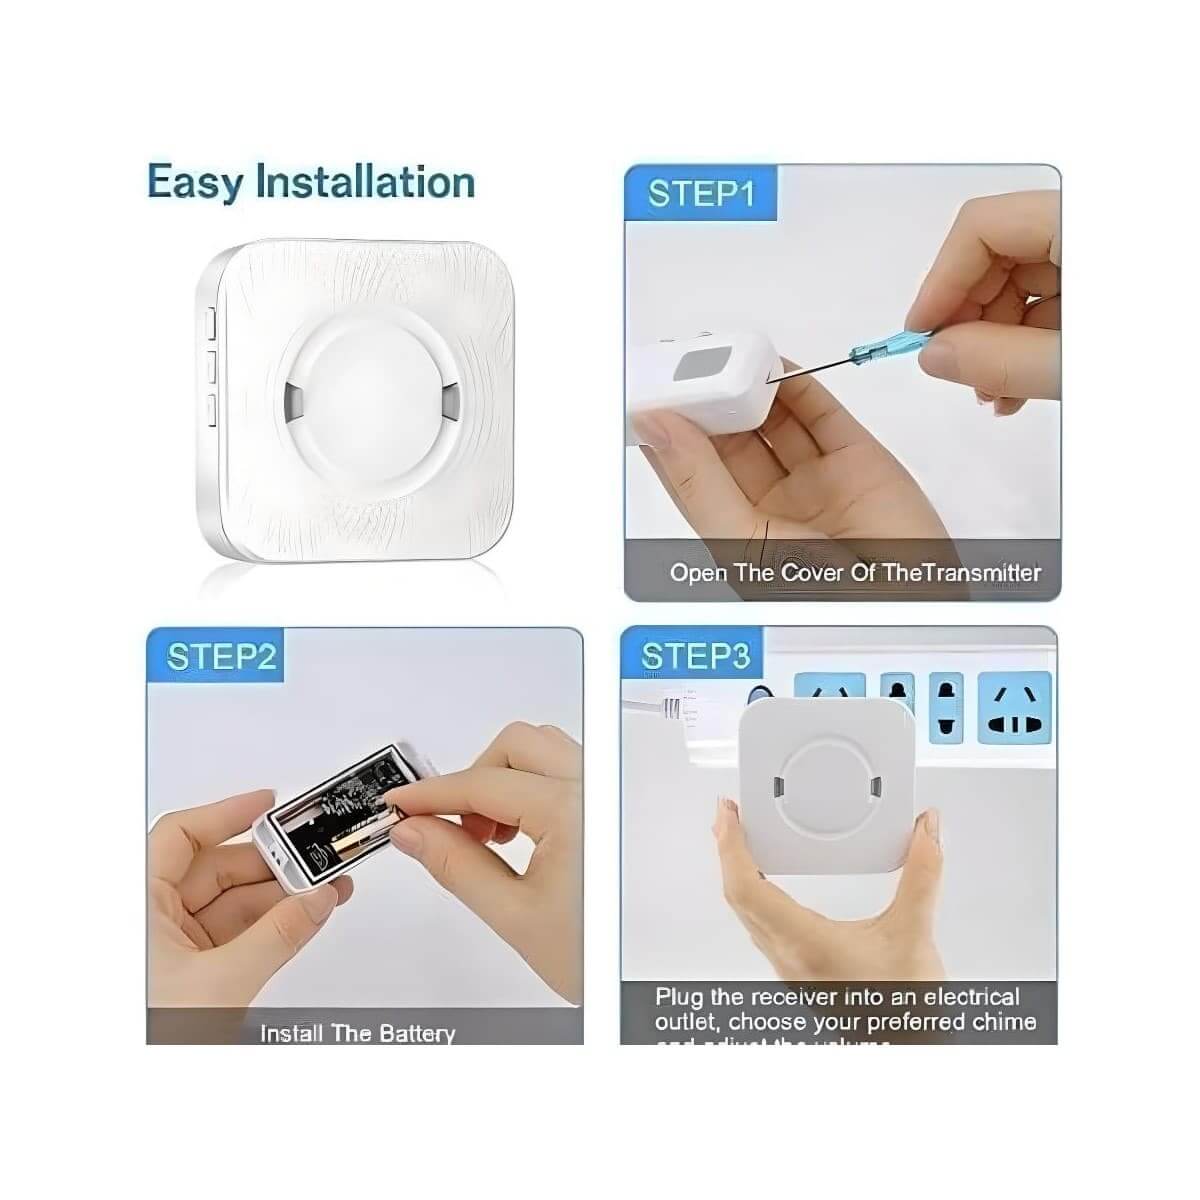
    • First insert any batteries required by your wireless doorbell receiver. BATTERIES: Often 3 AA batteries are needed for the doorbell receiver unit and may only need to be replaced every year or two.
    • Sync with transmitter button. Press the chime control button and select the chime module. Go to push button/transmitter outdoors and press the button. This action synchronizes both the outdoor doorbell push button and the indoor chime unit. You can pair multiple push buttons to the same door chime receiver unit.
    • Select your sound choice for the front door and one for the back door, if applicable. This lets you know which door to answer. The receiver inside the home often also has a small visual icon that lights up to tell you which door is being activated.  This varies by product and manufacturer.  We have an entire article about this topic you can see here: “Changing to Tune on Your Wireless Door Chime”
    • Set volume.
    • Plug the receiver into an electrical wall outlet, if necessary, although some run on battery power. Plug-in doorbell receivers are extremely convenient to install.
      OR
      Insert batteries:
      Battery-powered units have more options for installation placement and can be placed higher on the wall than your typical plug-in model, for example. Some come with a mounting bracket or holder that you screw into the wall. Then you can take your receiver unit out when you want to change the chime sounds/volume or to replace batteries (which should only be needed every year or two).
    • Test to be sure the signal reaches from the front (and back) doorbell buttons to the receiver. Take the receiver to the spot where you plan to plug it in or mount it to the wall inside your house for an accurate test. If the sound does not come through when the button is pressed, you need to move the receiver to an outlet closer to the door. Or you might instead try removing any large furniture or another item that may be interfering with the signal. You may want to use a second receiver to extend the doorbell sound and signal further into the home.
    • If the doorbell is mistakenly activated by a nearby remote control, change the doorbell to another channel or frequency. Most doorbells offer several channels for this purpose.

    Wireless Doorbell Advanced Features

    Now that you have an idea of how to install a wireless doorbell, you can browse the different types available and make a selection. To choose the best wireless doorbell for your home or business, think about what advanced features you might want, including:

    • Multiple tunes or melodies so you can change at will.
    • Decorative wireless doorbell receivers and stylish doorbell buttons so that your doorbell can complement your decor.
    • Long-range transmission of up to 1000 feet.
    • Visual alarm can alert you to the doorbell in a loud environment or provide a visual doorbell alert for hearing impaired persons.
    • Additional security and convenience features like:
      • Extra doorbell push buttons (also called switches or transmitters) – one for each entrance.
      • Extenders, extra doorbell receivers to forward the signal further into and throughout the home.
      • Portable receiver: that you take with you when you’re going to the backyard or elsewhere.
      • Event log that tells you when the doorbell rang, and where, if you missed anything. It would also record the time and location if a motion detector went off if your system is so equipped.
      • Cameras
      • Intercom(s) for voice communication, such as a wireless portable intercom with video
      • Motion sensor to sense someone before they push (or so that they have no need to push) the doorbell button. BATTERIES: Motion sensors often use a rectangular 9-volt battery.
      • Window sensors to notify you of a window break-in.
    • And more options.

    Ways to Use Versatile Wireless Doorbells

    Wireless systems are flexible and portable, meaning you could use your wireless doorbell system in other places and for other purposes, including:

    • Portable system: Take the button, motion sensors, and receivers out of your home and use them in your business or even take them with you to a vacation rental.
    • Call system: You could even use your “doorbell” as a call system, giving the button unit to, for instance, a sick child or elderly relative to use when they need to call for assistance when you’re in another part of the house.
    • Pets or Kids: Use a motion detector to sense when someone enters or leaves a room.
    • Garage: You could also use the motion detector to alert you if someone enters your garage, for instance, if you leave the door open after driving your car into the garage.
    • Driveway: You might also place a motion detector at the end of a long driveway, to let you know that someone is driving up to the house. There are also purpose-built driveway alarms that use a hose or a ground probe to trigger the alarm/chime when cars drive over it or pass by it.

    If you’d like assistance in choosing the best doorbell for your needs, call on 1800Doorbell. If you need wireless doorbell installation support, contact us at 1800Doorbell.com. The doorbell experts on our customer service line are happy to help.
  • Doorbell Repair – How to Fix a Broken Doorbell or Doorbell Button

    Doorbell Repair – How to Fix a Broken Doorbell or Doorbell Button

    Most doorbells are easy to figure out. But you’ve been too busy to take on the task of repairing your doorbell or doorbell button.

    Perhaps you’re unsure how to start, especially the complicated hardwired doorbell.

    You’ve got two realistic choices: 1) troubleshooting and fixing the unit – or 2) simply replacing it with an easy-to-install wireless decorative doorbell for your home or perhaps choosing a small and sleek wireless doorbell chime for your business.

    With a new, wireless door chime, you can update your current doorbell with a new one that provides many different sound choices to fit your personality and your home’s decor and ambiance—or sounds to help you brand your business. You can also go for a manual or vintage doorbell.

    For convenience and simple installation, consider battery-operated wireless doorbells with your choice of designs and features.

    The Sad Tale of the Broken Doorbell

    In the current situation, with a broken unit, you’re probably frustrating the friends visiting your home and missing essential customers for your business.

    Here’s what may be happening: There’s a handy button to the right of the front door that beckons any visitor to push it, hopefully, whether it’s working or not. So, your visitor pushes it. Just put yourself in the shoes of the person waiting at your door.

    In a perfect scenario, when visiting someone’s home, you immediately hear the bell ringing inside the residence as soon as you press the button. You take a step back and wait for the door to open. Sometimes, a person appears in the doorway, opening it to welcome you. But, too often, no one appears, so you approach the doorbell button again and press it – slightly firmer than the first time. You may even hold the faulty doorbell button down for an extended period. If you’ve had a really bad day, most likely you ring the bell 2-3 times in rapid succession – because YOU NEED this door to be opened, but still – nothing.

    Are you pressing the right button? Is it disconnected? Perhaps the volume is too low?

    At this point, you start banging on the doorbell, pressing it hard multiple times (okay, let’s be honest, you press it like it’s connected to your oxygen tank, and you need to press it to breathe). You press that doorbell with your elbow, and you might even kick it, but nothing happens.

    FINALLY, you start banging on the door as if that crazy guy is chasing you from the Texas Chainsaw Massacre, and you NEED TO BE LET IN NOW. At last, you start to hear some activity from within the dwelling !!!! Finally…


    Your friend answers the door and looks at you perplexed, wondering what all the crazy banging is about, and he lets you in.

    Turns out his doorbell isn’t working. Maybe it got rained on one too many times? (You could suggest your friend replace it with a weatherproof doorbell.) All bets are that your buddy knows his door chime isn’t working, and if you ask, he will probably say it’s too hard to replace a hardwired doorbell. After reading this article, you’ll know all about doorbell repair – and you can tell him because that’s what friends are for, “It’s time to fix your doorbell, dude.”

    Problems with a Hardwired Doorbell: Troubleshooting Guide for Your Door Chime Repair

    When your standard wired unit is busted, your problem will be in one of 4 areas:

    • The button itself (outdoors)
    • The chime or bell that serves as a speaker should be emitting the sound of your chime (indoors – you may have more than one)
    • The doorbell wiring (connecting all parts) OR
    • The transformer (connects the doorbell to your home’s wiring)

    Safety note: Don’t do anything – other than multi-meter testing – with the doorbell transformer without first cutting off power. If electrical work needs to be done, call in a licensed electrician due to shock or fire hazards if work is not done correctly and to code.)

    To cut power, remove the appropriate fuse, trip the correct circuit breaker, or throw the main electrical switch to shut off all electricity in your home.

    If you would rather not check all of your existing doorbell components to find the problem and have a big home or area to cover, consider a long-range wireless doorbell.
    If you are short on time or patience, you can avoid this repair task entirely – by purchasing a wireless doorbell. They are multi-functional, inexpensive, easy to install, and have various sounds and features.

    Got a Broken Doorbell? How to Fix a Hard-Wired Doorbell

    If you’re planning to fix your doorbell, here are the tools you will need:

    • Multimeter circuit tester (purchase a basic meter for about $20 at hardware stores)
    • Screwdriver
    • Wire stripper
    • Cotton swabs
    • Vacuum
    • Flashlight (optional)

    Test the existing doorbell button

    • Remove any screws and the button housing/faceplate from your door casing.
    • Unscrew the terminal screws on the backside of the button assembly. This will free the button from the wires connecting it to your house (there are usually 2 wires).
    • Set the multimeter to “continuity.”
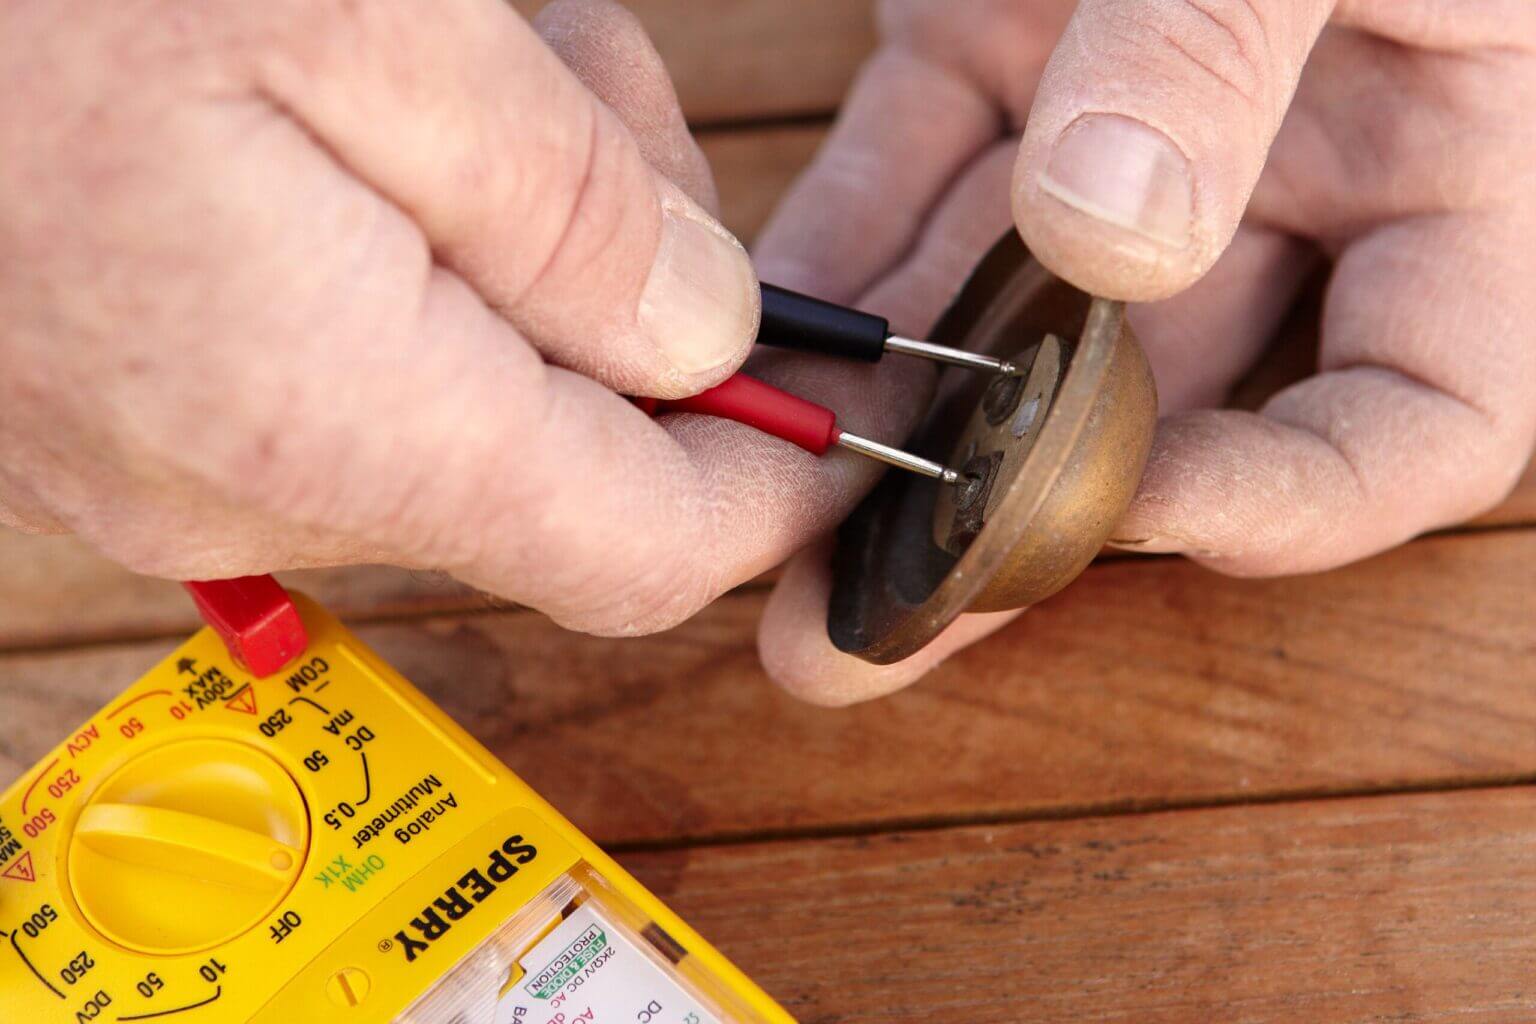
    • Touch the meter’s probes to each of the terminal screws on the back of the button. Now press the button.
    • If the meter’s needle does not move, the button will die, and you must install a new one.
    • Put the housing, dead or alive, to the side momentarily.
    “Testing


    Test the wires behind the doorbell.

    • Holding the insulated area of the wires, touch together with the two wires now protruding from your door frame.
    • If the doorbell rings when wires touch or cross, go to “How to install a new doorbell button” or reattach your old one if it passed the test.
    • If your door chime does not sound when wires are crossed, proceed to the next troubleshooting step.

    Test the transformer that “steps down” your home’s higher voltage to the low voltage needed by the doorbell.

    • Locate the doorbell transformer near your main electrical panel.
    • Set the multimeter to “voltage”
    • Touch multimeter probes to the screws where the doorbell’s (small gauge) wires are attached.
    • Call an electrician to replace the transformer if the meter reading is less than 16 volts.
    • If your meter reads about 16 volts – all is well – the transformer is not the problem.

    Test the doorbell chime or speaker
    Remove the cover from the bell. It may be a decorative door chime attached to a wall or a plain, functional door chime cover.

    • Loosen the terminal screws (there will be two or more) in the chime assembly on the wall or baseboard.
    • With the multimeter on the “voltage” setting, touch the meter’s probes to the wires. If you hear a humming sound, try cleaning the inside of the chime with a cotton swab and even vacuuming it to remove any dust.
    • Ask an assistant to push the button outside. If the multimeter shows current flowing but the chime doesn’t ring, replace it with the chime.
    • If there’s no current flowing, your wiring is faulty.

    Look for a loose wiring connection.

    • If everything checks out ok so far, it’s time to test/look for a loose connection somewhere along the length of the bell wiring between the transformer and wall chime or between the chime and outdoor button.
    • Trace along the bell wiring, looking for loose terminal screws, wire disconnection, or damage.
    • If you don’t see anything wrong, check each wiring segment with your multimeter set to “continuity,” as described below.

    Test wiring circuit segments

    • Disconnect the wires at the transformer, de-energizing the doorbell circuit.
    • Then disconnect the transformer wiring at the wall chime and twist them together.
    • Go back to the transformer and touch the multi-meter tester probes to the wires’ bare ends. If the meter does not register, there’s a break in that wiring section.
    • If that segment is good, check the next segment.
    • When you find the problem area, you can splice or rewire it with an 18-gauge wire.
    • If much of the wiring is under baseboards or inaccessible, run a new segment of doorbell wiring and ignore/bypass the old wiring segment.

    Installing a New Hardwired Doorbell

    How to install a new doorbell button (for hard-wired doorbells)

    • Wrap the two wires sticking out of the door frame around the terminal screws (either wire can attach to either screw) on the new button and tighten the screws.
    • Fasten the new button assembly to your door frame so it’s ready to use.

    How to install a new doorbell chime or speaker (for hard-wired doorbells)

    • Before disconnecting any wires, label them with strips of masking tape: “F” for the front door, “B” for the back doorbell, and “T” for the transformer.
    • Attach each wire to the corresponding labeled terminal.
    • Push the classic or fancy doorbell button outside to make sure the chime works, then put the cover on.

    A doorbell is a straightforward and sturdy household appliance. It will typically function tirelessly day in and day out, announcing all your guests, from your childhood friends (or your children’s friends) to the dreaded door-to-door salesman.
    But sometimes, the doorbell stops working, which is usually due to a broken doorbell button. We’ll start by going through the diagnostic procedure to determine if your doorbell button is the problem, but if you’ve already isolated the button, skip down to How to Fix a Doorbell Button.

    Is It the Doorbell Button?

    Most doorbell systems are very reliable. Wired door bell systems can last for decades without problems. (Old crank doorbells were pretty reliable, too, but they’re so old now that most have quit working by now.) When the bell stops working, it’s usually the doorbell itself, which can become worn by constant use.
    For a wired system, unscrew the unit from the wall. Typically, this involves two screws. You might also have to cut away caulk or excess paint from around the doorbell.

    If you have multiple doorbells, detach them all. When you pull the doorbell away from the wall, you’ll see two wires connected to the back. First, check to see that these wires are secure. If the unit is securely fastened to the wall, one will unlikely come loose, but stranger things have happened. If you have more than one button wired to your doorbell, a loose wire at one of the buttons can stop both from functioning. Often, these are wired with a common ground, and neither doorbell will work if the common ground is disconnected at one of the buttons.
    “A

    In a doorbell system, the button closes the circuit between these two wires, allowing electricity to travel through them and trigger the door chime. Disconnect one of the wires to test whether the button is the problem. You don’t have to turn the power off for this because, unlike most systems in your home, the power is stepped down by the doorbell to a safe 16 or even 12 volts (V) with very few amps. Even if you turn the power off, you must also turn it back on for the next part: touch the bare end of one wire to the bare end of the other. If the chime sounds, it’s the button that’s the problem. If the chime doesn’t sound, the doorbell is not the problem.

    You don’t have to turn the power off for this because, unlike most systems in your home, the power is stepped down by the doorbell to a safe 16 or even 12 volts (V) with very few amps. Even if you turn the power off, you must also turn it back on for the next part: touch the bare end of one wire to the bare end of the other. If the chime sounds, it’s the button that’s the problem. If the chime doesn’t sound, the doorbell is not the problem.

    If the chime doesn’t sound, it’s not the doorbell that’s the problem.
    If you have multiple doorbell buttons wired to the same chime, make sure you disconnect only one wire at a time to avoid accidentally disconnecting the common ground.

    You can also test the doorbell with a multimeter or ohmmeter. Your doorbell is an open circuit that closes when you push the button. With your doorbell disconnected, touch your ohmmeter leads (or the leads of a multimeter set to resistance, marked “Ohm” or Ohm) to both the wire connections on the doorbell. Then, push the doorbell button. Resistance should jump from infinity (no connection) to some small resistance level. If it doesn’t, the doorbell will not close the circuit properly.

    For a wireless doorbell button, there are two potential problems other than a broken doorbell button that might be causing the problem. If the button has never worked, it might not be appropriately coded. Look in the compartment on the back of the receiver and inside the button itself. You should see a series of metal pins, some of which have small black blocks on them. Make sure the configuration of these blocks matches in both places. If you think they’re right but it’s still not working, try turning one the other way and matching them up again–often, the proper orientation for the code blocks isn’t clear.
    If a wireless button used to work but isn’t now, the problem is likely the battery. If replacing the battery doesn’t work, you have a broken button.

    What about a Hot Button?

    The button shouldn’t feel hot. If it does, you may have an incorrect button for your doorbell transformer. All doorbells have a transformer that steps down the voltage before it goes to the doorbell, but older models only stepped down the voltage from the 120 V line voltage to 24 V or 36 V. When a doorbell is designed for the modern 16 V or 12 V is put on this old line, it can get hot.


    Typically, you only feel the heat if the button has a light on it, but any time the voltage is mismatched between the doorbell and itself, it can damage the button, causing early failure.


    To determine the proper voltage for your doorbell button, take a multimeter and touch it to both wires. Read the voltage and get a doorbell appropriate for your system’s voltage. Or, if you want to keep your current button (it is the most visible component of the whole system), you can replace the entire doorbell with one that matches the button.

    How to Fix a Doorbell Button

    Whether it’s an old doorbell or a unique one with a style you love, there are a few ways to fix a broken doorbell button.
    If the part you depress is broken (the button proper in your doorbell button unit), you can often find an inexpensive replacement button with a depressor the same size and shape. If you do, just replace the broken one with the whole one—make sure it’s the same on the back, too.


    Most old doorbell buttons have a simple mechanism inside. When the button is down, it pushes a circuit closed. This mechanical system is simple and resilient, but it can be hard to fix when it breaks. You have to find something that will allow the contact to close the circuit when it’s depressed, and most of these components aren’t commonly sold, so you might have to make a piece for it.


    Modern doorbells have a diode in the button. This allows voltage to continue traveling through the doorbell after the button is released, which helps the doorbell chime to continue until the tone is finished. You can replace the diode by unscrewing the screws holding the current one in place, putting a new one in, and replacing the screws.

    It’s typically not possible to repair a wireless doorbell button since it is often just a single printed circuit board.
    Once you’ve fixed your doorbell button, it will likely stay functional for a long time. If not, each time you fix it, you will get a lot faster.


    Don’t put up with that crazy friend banging on your door—and don’t miss an important visitor to your home or business. At secure.1800doorbell.com, we’re happy to help. For more doorbell guidance, visit our doorbell FAQ page. Contact us online or call us at 1-800-366-7235.

  • How Does a Doorbell Really Work?

    How Does a Doorbell Really Work?

    Want to find out how your specific brand and model of doorbell work? We have instructional videos on many of our product pages. For instance, here’s the Carlon model RC3250 doorbell.

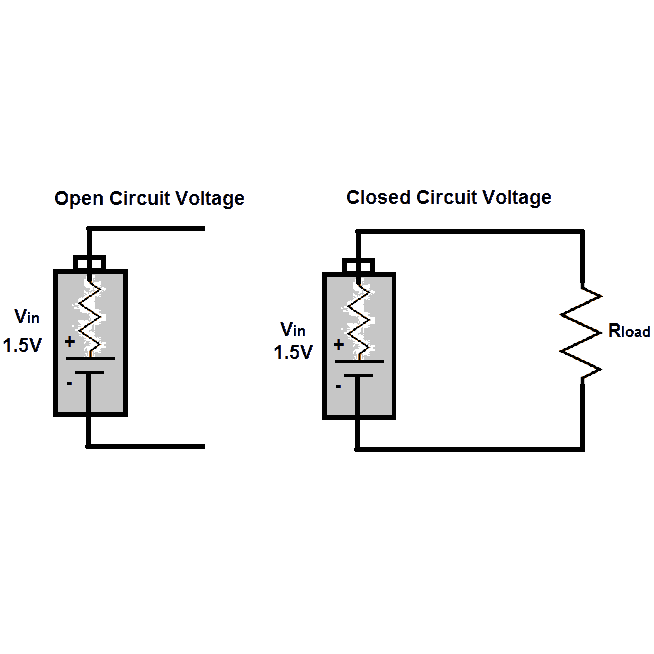
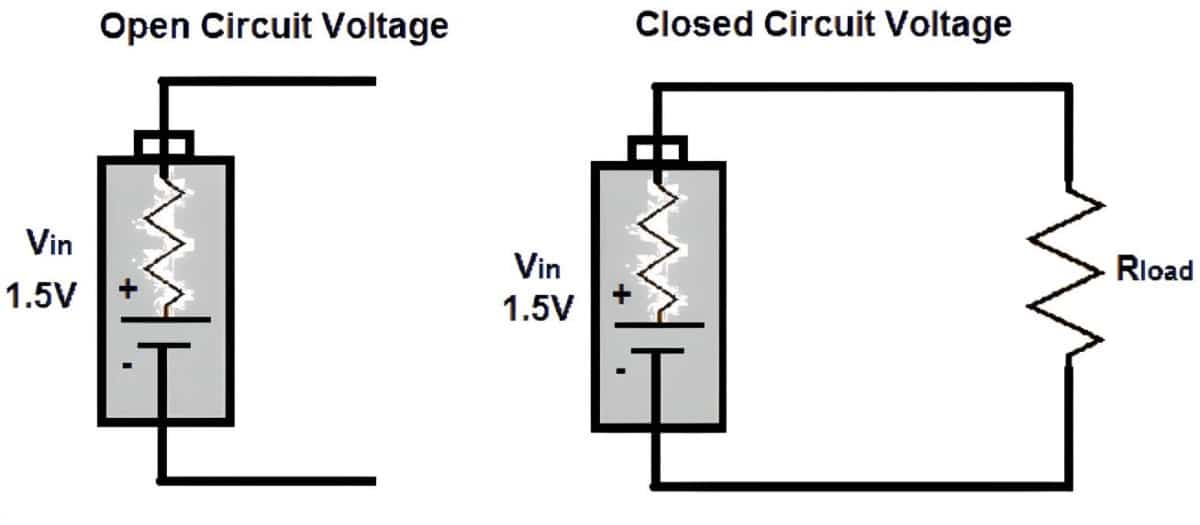
    closed circuit diagram

    Chime style:
    Inside this bell are 2 vertical bars of different types/thicknesses of metal, which make different sounds when struck. The vertical metal bars act as “bells” to make the familiar ding and dong sounds. Separating the 2 vertical bars are batteries, a spring, and a small electromagnetic clapper or hammer – to do the striking. The magnetic hammer is a cylinder inside a horizontal plastic tube. This “cylinder-in-tube” setup is just like a piston or small battering ram – and is called a solenoid. To operate:

    • Press the door chime button (which acts as the switch) completing the circuit.
    • The electromagnet activates – it pulls the piston or metal inner cylinder (clapper or hammer) to the right, which compresses a spring.
    • The sudden movement of the metal cylinder (the clapper/piston) and the collapsing spring allows the clapper to strike the right-hand bell (vertical metal bar) making the ding sound.
    • As the metal cylinder (clapper) hits that right-hand metal bar, it breaks the circuit, switching the electromagnet off – so the spring then re-expands suddenly.
    • This sharply snaps the metal cylinder (hammer/piston) back the other way, striking the left-hand chime (vertical bar) and making the dong sound.
    • The vertical metal chime bars vibrate as the sound dies out – for that little extra drama!
    • A doorbell with an almost endless choice of sounds and advanced features? Check out the iChime programmable doorbell with 50 sound choices. You can even record several sounds of your own with this hard-wired chime.

    Multiple chimes for apartments or office buildings: Electric doorbells for multi-unit dwellings or offices will complete one of many circuits – to ring the bell in the selected apartment number only, as you press the button. In older buildings, you may find around or cool rotary style. These were patented back in the 1930s. To operate this type of chime, you first turn the dial to select the apartment/office you’re visiting. Then you press the button in the center to get the circuit going and ring the bell.

    Wireless or electronic styles: Wireless electronic doorbells use a special kind of circuit – called an integrated circuit. How do these work?

    • Pressing the push button causes a recorded digital sound to be transmitted. The button is battery-powered and the system is wireless.
    • The doorbell button/switch acts as a transmitter, sending a radio signal for a distance of up to about 300 ft. to the receiver/speaker in your home.
    • The signal reaches your indoor battery-powered ringer/receiver or speaker – which emits a sound. This indoor speaker plugs into a wall outlet – or you can carry a portable transmitter with you to the backyard.

    Most wireless chimes offer several different radio channels, so you can use a different one than your neighbor to avoid mix-ups! There are several quality advanced wireless doorbells for the hearing impaired that offer visual signals in addition to audible features.
    Wireless Style Advantages:

    • No wiring: Wireless doorbells require no wiring. Hard-wired styles need to be hooked up to the electrical system in your home and may require an electrician. The coordinating button uses a small battery that lasts a long time.
    • Amplified reach: These modern wireless bells make it easier to hear, even if you are far away in the backyard, for example. Many people with large homes choose wireless doorbells – you can carry the battery-powered ringer (also called a receiver or speaker) with you when you are far from the front door of your house. You can also install (plugin) extra speakers throughout the house. Here are some excellent options to extend the range of your doorbell.

    When you need help selecting a new style that’s perfect for your home or business needs, call on the experts at 1800Doorbell.com.

    We can also help you with troubleshooting your old/existing chime and offer guidance on the installation of new ones. Call us today at 800-366-7235 or contact us online at 1800Doorbell.com!

  • How to Avoid Interference with Your Neighbor’s Doorbell

    How to Avoid Interference with Your Neighbor’s Doorbell

    This is a question that seems to come up frequently with many of our customers. Usually, what spurs the call is someone’s door chime randomly chiming without anyone at the front door or a neighbor using their device and it causes your chime to ring. To understand why this happens, we first need a very basic understanding of the wireless door chime and how communication between the door chime transmitter (wireless push button) and the receiver work.

    Understanding How the Push Button and Receiver Speak to Each Other

    Technically, the doorbell button is a wireless transmitter. When the visitor at your front door pushes the button, the button transmits a wireless signal to a wireless door chime receiver. The transmitter and receiver are communicating on a specific frequency so they can communicate effectively. If your neighbor, for example, has a wireless product that is operating on the same frequency, interference could be the culprit and cause your door chime to ring “randomly.”

    The FCC only allows certain “usable” frequency bands available for public use, so a wireless doorbell frequency change can be tricky. We are all familiar with our car radio tuner. When you find the radio station you want to listen to, you are essentially making sure your radio receiver is tuned into the frequency of your favorite radio station’s broadcast.

    For cost reasons, most manufacturers use the 300MHz to 433MHz bands for their doorbell frequency range. The actual communications between the two devices (or multiple devices) occur on sub-frequencies (or channels) within the given frequency band. If two close-by products are operating on the same frequency, interference may occur.

    Wireless doorbells, and almost all other wireless products for that matter, therefore operate within a given frequency range. For example, we have a doorbell that operates at 315 MHz when it transmits a signal from the push button to the wireless receiver. If some other device within the range of the transmitter and receiver is operating on that same frequency, those signals will interfere with each other.

    This is the same problem that happens when a neighbor’s device randomly seems to ring your device– or when a baby monitor picks up people talking. Or how about a walkie-talkie; you put it on a channel and can hear other people talking on that same channel. All of these things are occurring because it’s all happening on the same frequency.

    Change Your Privacy Codes to Prevent Doorbell Interference

    Most wireless doorbells and/or chimes on the market today have what are called “privacy codes” or channel selectors. Privacy codes provide the ability to change the actual operating frequency of the wireless doorbell. When I mentioned earlier that we have a doorbell that operates at 315 MHz, in reality, it operates within a given range of around 315 MHz. Privacy codes on the back of the receiver and the back of the doorbell transmitter enable you to manually change the operating frequency.

    A good way to think of it is after changing the privacy code, the transmitter sends a signal at 315.5 MHz. When the receiver has privacy codes and they are set to 315.5 MHz, those two components are operating at the same frequency. The likelihood of another device operating at 315.5 MHz is slim.

    Changing the privacy code on a product, whether it is a receiver or a button, will change the operating frequency of that product. If you have a button and a receiver, for example, you must change the privacy code on both products, or else they won’t be able to communicate with each other.

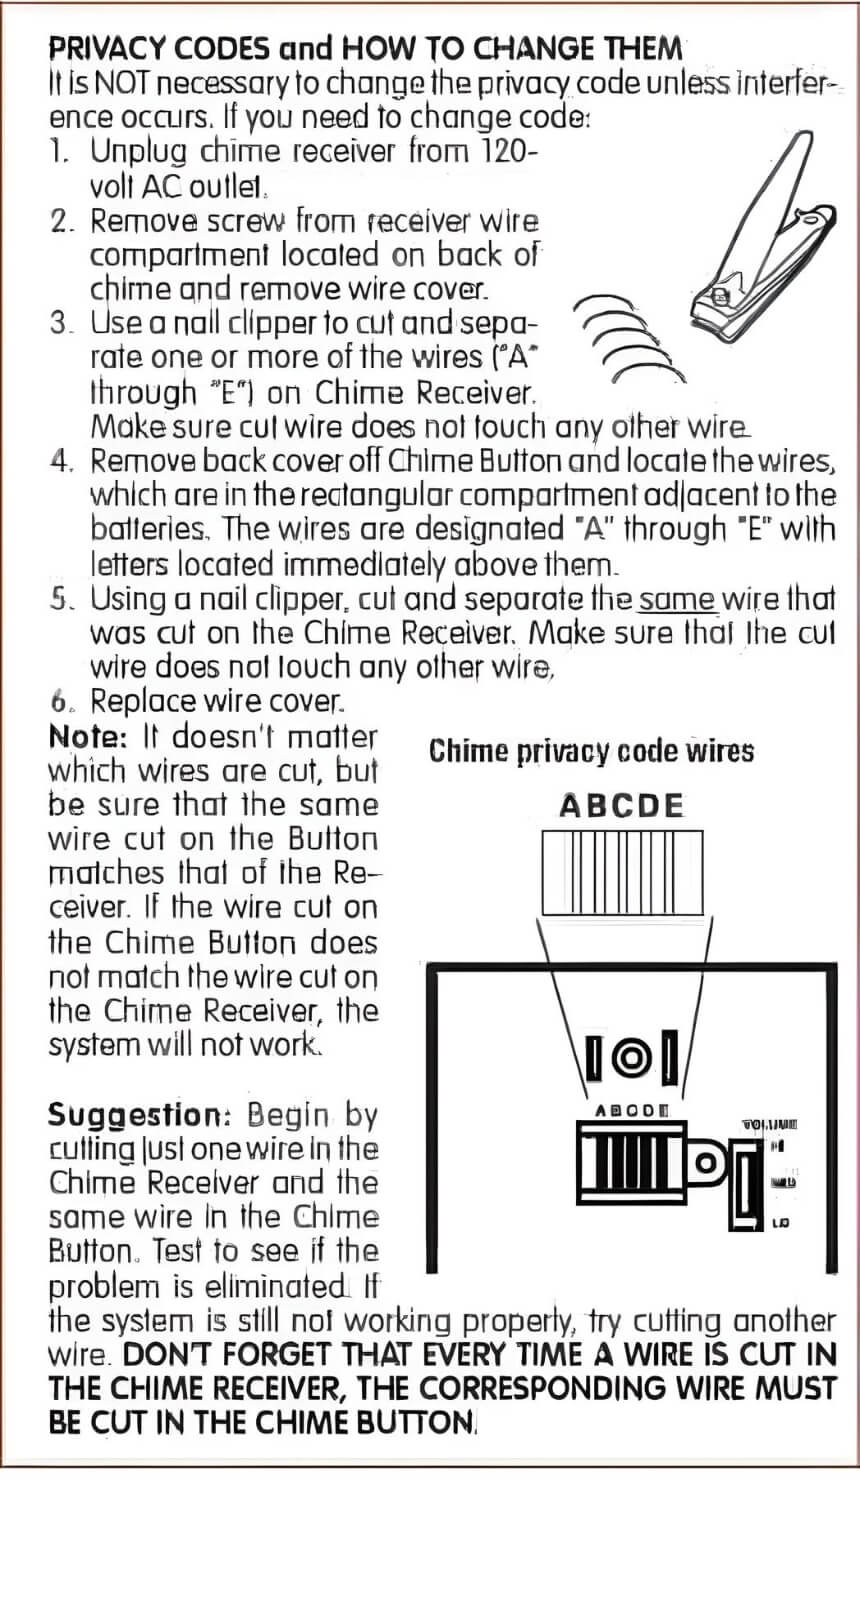
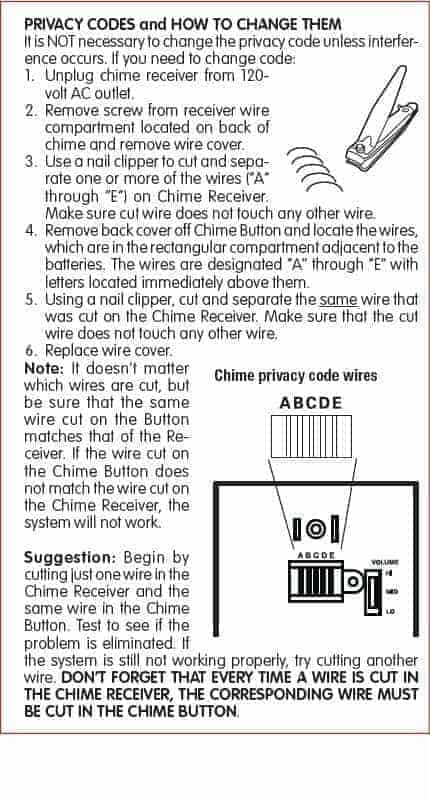
    Privacy codes will help avoid interference, and they also enable you to do things like pair specific push buttons with certain receivers. A business may want to have a push-button work with a receiver in the receptionist’s office and have a different push-button work with the receiver in the warehouse manager’s office. By selecting privacy codes and matching the devices to the respective components, you are ensuring that your chimes operate correctly.  All wireless Carlon door chimes use small copper wires to change privacy codes.  Take a look at the image below that illustrates what they look like and how to change them:

    Changing Privacy Codes on a Carlon Wireless Doorbell

    Changing The Security Codes On Heath Zenith Wireless Chimes

    Heath Zenith Wireless Chimes use radio frequency to communicate between the push button or transmitter and the chime unit, also known as the receiver.

    Our chimes are designed with 128 different security code possibilities to help ensure that they will work in any environment. However, on rare occasions, outside interference or another wireless product may cause your chime system to operate when no one is pressing the push button.

    By simply removing, adding, or repositioning a jumper or flipping a switch or two, depending on the model of your chime or push button, you can quickly and easily find a code setting with no outside interference.

    Be sure to read and follow all the instructions and warnings included with your chime and push button. You can also download a PDF version of your manual as well as view other informational videos at www.hzsupport.com.

    Your new push-button will have eight jumpers or DIP switches. Some Heath Zenith Wireless Chimes will also have eight jumpers or DIP switches. Position 8 determines the chime tune selection and does not affect the code setting. See your manual or find additional videos on our website that will discuss tune selection.

    Jumpers or switches 1 through 7 are used to program security code for your chime system. Positions 1 through 7 must match exactly on the push button and the chime for them to communicate with each other.

    Any changes made to one unit must also be made to the other unit. Locate the jumpers or DIP switches on the chime base. If the chime has a removable cover, the jumpers or DIP switches will be located behind the cover.

    If the chime does not have a removable cover, then the jumpers or DIP switches will be located on the rear of the chime or in the battery compartment.

    If the chime is a plug-in-style chime, remove the chime from the AC power source and open the small panel on the rear with a screwdriver. Now open the push button by carefully inserting a small screwdriver into the slot at the bottom of the push button and twisting.

    The cover will pop off and the jumpers or DIP switches are located on the circuit board. If the jumpers or DIP switches have not been changed yet, you will notice that there are three jumpers on pins 5, 6, and 7, or DIP switches 5, 6, and 7 are in the on position.

    As a matter of convenience for the customer, all Heath Zenith chimes and push buttons are shipped with security code settings in these three positions. So any push button or chime you purchase will work together straight out of the package.

    To change a security code, add, remove or simply move the jumpers on your chime in any combination. Now make the same changes to all push buttons that you want to work with the chime. As an example, you can move the number 7 jumper to the number 1 position on both the chime and the push button.

    If your push button has DIP switches instead of jumpers, you can move the number 7 jumper to the number 1 position on the chime and the push button, switch the number 7 DIP switch to off and the number 1 DIP switch to on.

    Anytime you experience interference with your chime, simply change the security code on both the chime and any push buttons until the interference goes away.

    Just remember, whatever changes you make to locations 1 through 7 on the chime, you will need to make the same changes on all push buttons.

    The instructions that come with your chime will explain how to set it up or find additional videos on our website that will show you how to set up and use your new Heath Zenith chime as well as other products available for your home.

    Your security code has now been changed. You can now enjoy your new chime system without interference from an outside source.

    We know this is a confusing topic.  If your product is experiencing interference from other devices and you need help changing privacy codes, please give us a call at 1-800-366-7235 or email us at info@secure.1800doorbell.com. We will help you sort it out and help you get your product working the right way.

  • Using a New Push Button for an Old Carlon Chime

    Using a New Push Button for an Old Carlon Chime

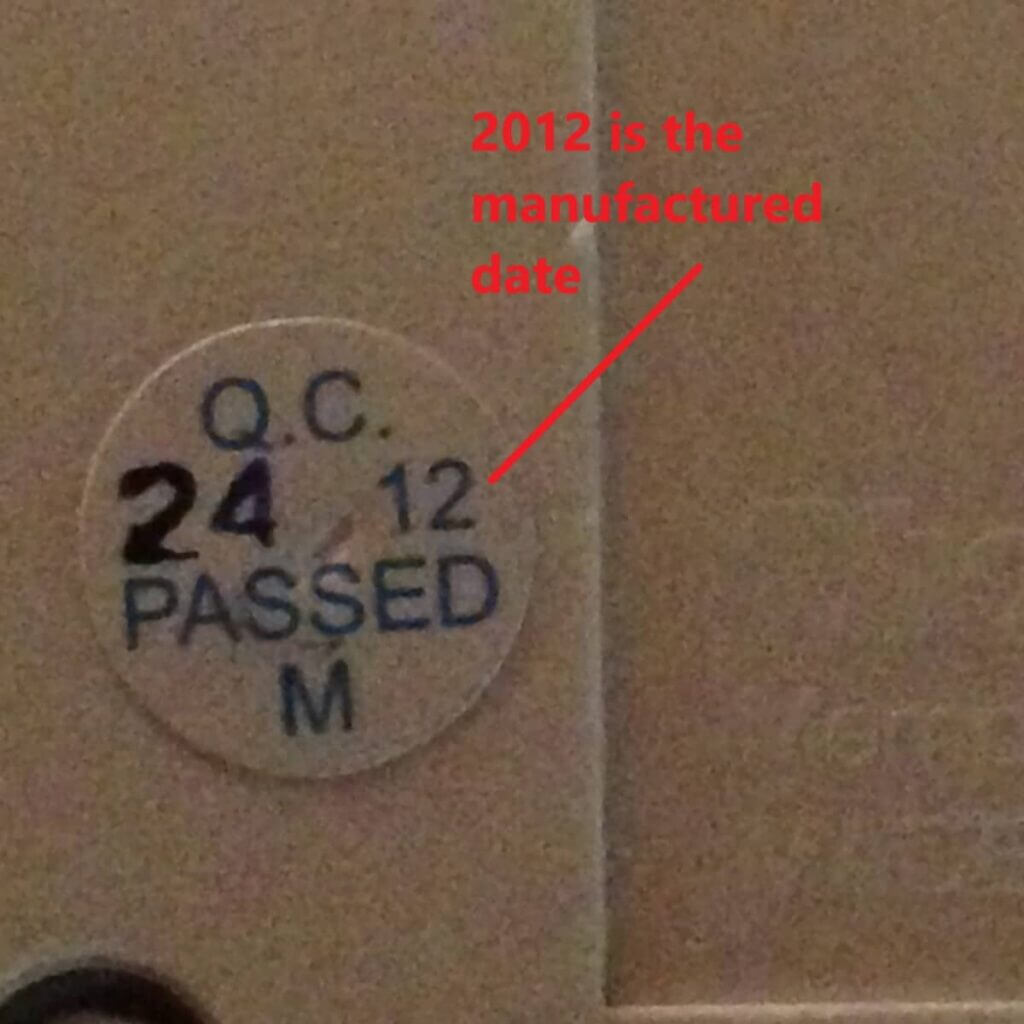
    If you have a Carlon, Thomas & Betts, Lamson & Sessions, or Dimango Wireless Door Chime.  Before purchasing any wireless doorbell transmitter, you need to check the QC numbers to make sure your receiver is not “outdated” and will be compatible with the buttons. If any component in your current system is manufactured before 2000, then IT WILL NOT be compatible with any wireless Carlon products featured on this website.

    You should see a small white sticker on the back of the Carlon/Dimango product. On this sticker, you will see QC with a four-digit code right under it.

    There will be two sets of numbers. (xx-xx) The second set of numbers must be 00, 01, 02, 03, etc., or higher. If they are in the ’90s (99, 98, 97, etc), they are NOT compatible. Unfortunately, the receiver and button would both need to be replaced.

    Carlon Wireless Door Chime QC Date for Compatibility

    Products manufactured by Carlon AFTER THE YEAR 2000 use a technology named Surface Wave Acoustic or SAW which increased connectivity and increased battery life.  Although this improved the products it made products featuring this technology incompatible with those that did not. Locate the small sticker on the back of the receiver with the QC information.

  • I Can’t Find My Doorbell Transformer

    I Can’t Find My Doorbell Transformer

    What is a Wired Doorbell Transformer?

    At a basic level, to understand the role a transformer plays, you simply need to look at the word itself “transformer.”  When you have electricity coming into your home, it comes in at 120V.  This is too much voltage to power a simple device like a doorbell, as almost all of them function at 12V or 16V.  So what role does a transformer play?  It transforms the electricity from 120V to 12V, something your low-voltage door chime can handle.

    To shop our collection of the most common wired door chime and wired doorbell chime transformers, please visit our doorbell transformer page.  This page features a small chart that details the basic features of each wired doorbell.  Please feel free to call or email us if you need help selecting the right wired doorbell transformer.

    How Are They Used in Wired Doorbell Systems?

    The typical system is wired like this:  The door chime low-voltage transformer is wired into your home’s electrical system.  Next, a wired doorbell push button is mounted beside the front door.  There is a bell wire that runs from that push button to the doorbell transformer.  Next, the wired doorbell itself is also wired to the doorbell transformer.  The circuit is closed, but when the front doorbell button is pushed, the electrical circuit is completed, and the doorbell chimes.


    Most wired doorbells will use a doorbell transformer to power the system.  There are battery-powered wired doorbells that will use batteries, thus bypassing the need for a transformer, but these systems have some limitations.  Most notably, these types of doorbells (wired battery-powered) don’t play well with lighted doorbell buttons because the power draw of the lighted button will quickly drain the batteries. In most cases, you will need a doorbell transformer IF you have or need a wired doorbell, especially if you have a lighted button outside.

    There Are a Variety of Other Uses for Doorbell Transformers

    A large variety of the products we carry at secure.1800doorbell.com are low-voltage types of products and operate at 12V.  For example, we carry 12V Strobe Lights that may be used to signal when charged or counters and tickers that work off of 12V.

    Doorbell Transformers Play an Important Role with Extend a Chimes


    A very popular category of products we carry is known as doorbell extenders, most under the brand name of “extend-a-chime.”  These products allow you to extend the listening range of your wired doorbell system by looping into your wired doorbell, transmitting a wireless signal that stimulates a wireless door chime receiver to chime.


    The critical element of these types of extenders is the wireless transmitter, such as the ERA-EXKIT.  Using the supplied instructions, you simply wire this small transmitter into your existing doorbell transformer.  When the doorbell button is pushed, a wireless signal is created, along with your existing doorbell sound, which is received by an accompanying doorbell receiver.  This allows you to add wireless receivers, both plug-in and battery-operated versions are available, throughout your home.

    One of our most popular products is the ERA-EXKIT which is designed for the hard of hearing who have an existing wired doorbell and have trouble hearing it.  In this kit, a doorbell extender transmitter wires into the user’s existing wired doorbell transformer, so that a flashing doorbell receiver with a strobe light is signaled.

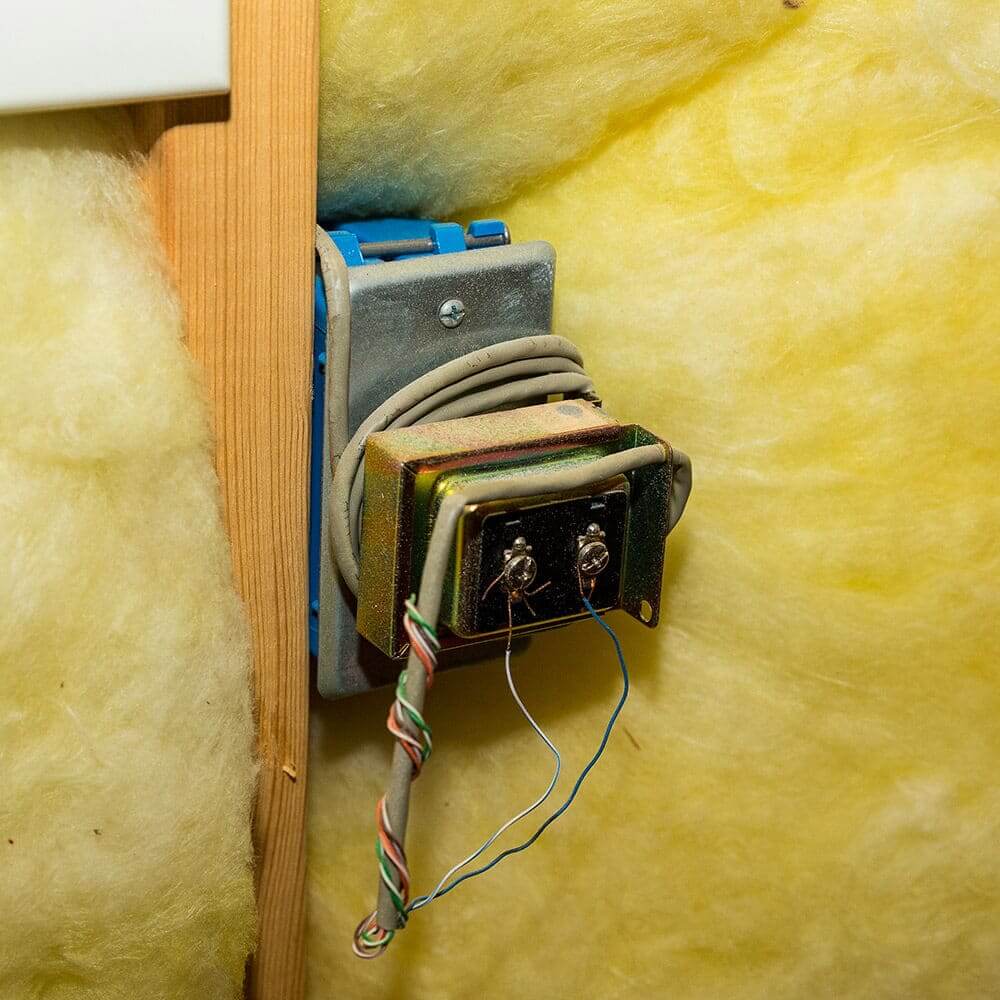
    I Can’t Find My Doorbell Transformer – Where are Door Chime Transformers Located?

    That’s a tough question and there isn’t a blanket answer.  It depends on where the electrician, who installed your wired doorbell, put it.  Over the years we have seen some seemingly random places doorbell transformers have been found. When you say “I can’t find my doorbell transformer,” it is usually, in one of three places.

    • In the garage – look around in the garage when you cannot find your wired doorbell transformer. Sometimes it is mounted near the garage door motor or recessed in a side wall near the circuit breaker box or electrical panel. If you see two wires coming out of the ceiling or wall, trace those wires to see if it leads you to your doorbell transformer.
    • In the attic – a similar situation to the garage, sometimes the doorbell transformer is in the attack and mounted to a rafter. This is not very common but when people say I can’t find my doorbell transformer and I’ve looked everywhere, the attic could be a hiding place.
    • In the wall near the wired doorbell – we’ve seen some situations when you can’t find your transformer and it is located underneath the wired chime box (in the foyer for example), recessed into the wall. Take the chime box cover off and remove the chime mechanism from the wall where it could be hiding.

    Installing a Doorbell Transformer

    The appropriate time for you to install doorbell wiring is when the ceilings and walls are in their preliminary phase of construction or during remodeling. If you are installing a doorbell in your finished house, a wireless doorbell is the best choice for you as you do not need to cut through the walls of your house for the installation of the wiring. Doorbell wiring in new houses is a very easy task.

    Wiring for doorbells is of low voltage which uses about 12 volts. The size of the wire is 18-gauge which is called the doorbell wire. With this fact, you can never go wrong in installing the wiring of your doorbell.


    In installing the wire of the doorbell, the wire should be run to the back of each buzzer to the so-called doorbell transformer. The wiring of the doorbell requires a doorbell transformer that can be connected to a circuit with 20 volts of power. The doorbell transformer helps in reducing the electric voltage by 12 volts.

    Turn Off The Electricity BEFORE You Touch the Transformer!

    You have to make sure that the electricity is turned off before wiring your doorbell transformer into the power station. The breaker should also be turned off and tell members of the family about your task. The doorbell transformer has a neutral screw and a hot screw. The one called the hot screw is where the black wire should be connected and the white wire is connected to the screw for the neutral. Through this wiring, power will be provided to the doorbell transformer. A single neutral wire and hot wire will run from the doorbell transformer into the so-called chime box.


    The wiring of the doorbell will utilize hotlines which are usually two in number that will run into the doorbell from the box for the chime. If the buzzer is going to control two areas, then the doorbell will have two chimes different from one another for you to determine the right door to open. The wire will connect to the doorbell transformer containing 2 hot screws dedicated to each doorbell.  It will also connect to every doorbell with the use of the 2 hot cables. When the button of the doorbell is pushed, the current of the electricity will be completed by the circuit so that the buzzer will chime.

    See the Doorbell Transformers on secure.1800doorbell.com


    For additional information about our wired doorbells and transformers, please feel free to contact us.