Struggling to Hear Your Doorbell? Here’s How to Fix It
We’ve all been there—you’re expecting a package delivery or guest, but your wired doorbell is barely audible from the back of the house. Maybe you’ve missed important deliveries or kept visitors waiting simply because you couldn’t hear that faint chime. The good news? You don’t need to replace your entire doorbell system. Doorbell extenders offer a straightforward solution that works with your existing setup.
Whether you’re dealing with a large home, background noise, or hearing difficulties, a doorbell extender can bridge the gap between your front door and wherever you spend your time. These devices essentially give your current doorbell a voice that carries throughout your entire home.
In this guide, we’ll walk through the different types of doorbell extenders available, help you choose the right one for your situation, and show you how to set it up. We’ll also tackle the most common questions people have about extending their doorbell’s reach.
The installation process is simpler than you might think—no need to call an electrician for most setups. Whether you’re tech-savvy or prefer straightforward solutions, there’s likely an option that will work for your home and budget.
Ready to never miss another doorbell ring? Let’s explore how doorbell extenders can solve your hearing problems once and for all.
Understanding Doorbell Extenders
A doorbell extender works like an amplifier for your existing doorbell system. Think of it as adding extra speakers throughout your home that all respond when someone presses your doorbell button. The beauty is that you keep your current doorbell exactly as it is—the extender simply multiplies its reach.
There are two main approaches to extending your doorbell’s range, and the right choice depends on what type of doorbell you currently have:
Sound-Triggered Extenders: These clever devices literally “listen” for your doorbell’s chime and then repeat that sound through additional speakers. They work great with traditional mechanical doorbells that produce that classic ding-dong sound.
Wire-Connected Extenders: These tap directly into your doorbell’s electrical circuit, detecting when current flows through the system. They tend to be more reliable and work well with both traditional and modern doorbell systems.
Both types can work with multiple receivers, so you can place chimes in your basement workshop, upstairs bedroom, or anywhere else you might not hear the original doorbell.
The result is a doorbell system that follows you around your home, ensuring you’ll always know when someone’s at the door.
ERA-EXTX Doorbell Extender
ERA-RXPG Plugin Receiver with Strobe
Why Doorbell Extenders Make Sense
The practical benefits of a doorbell extender go beyond just making things louder. In larger homes, even a loud doorbell can get lost in the distance between floors or around corners. If you work from a home office, spend time in a basement, or simply enjoy relaxing in a back bedroom, your current doorbell might as well be silent.
Modern doorbell extenders also offer features that weren’t available in the past. Many include adjustable volume controls, so you can set different levels for different rooms. Some offer multiple chime options—maybe you want the traditional ding-dong in the living room but prefer a simple beep in your office. Visual alerts like flashing lights can be incredibly helpful for anyone with hearing difficulties or when you’re in a noisy environment.
How the Technology Works
Behind the scenes, a doorbell extender creates a simple communication network in your home. The basic setup involves a transmitter that connects to your existing doorbell system and one or more receivers that you place where you need to hear the chime.
When someone presses your doorbell button, your original chime sounds as usual. Simultaneously, the transmitter detects this activity—either by sensing the electrical current or hearing the sound—and immediately sends a radio signal to all connected receivers. These receivers then produce their own chime, creating a coordinated announcement throughout your home.
The whole process happens so quickly that the sounds appear to be simultaneous. Most systems use standard radio frequencies that work reliably through walls and floors, typically providing coverage for several thousand square feet.
Weighing Your Options
Like any home improvement, doorbell extenders have both advantages and limitations worth considering. On the positive side, they work with virtually any existing wired doorbell, the installation is usually straightforward, and you can expand the system by adding more receivers as needed.
The main considerations involve placement and power. Plug-in receivers need to be near electrical outlets, which might limit where you can put them. Battery-powered options offer more flexibility but require occasional battery changes. Some systems also require the transmitter to be wired into your doorbell circuit, which might need an electrician if you’re not comfortable with electrical work.
Range can be another factor in larger homes or those with thick walls, though most quality systems provide adequate coverage for typical residential situations.
Common Questions Answered
What’s the simplest way to make my doorbell louder?
A doorbell extender with plug-in receivers is usually the easiest solution. You can have additional chimes throughout your home without rewiring anything. If you want to keep things even simpler, look for sound-triggered extenders that don’t require any connection to your existing doorbell wiring.
How far can I extend my doorbell’s reach?
Most residential doorbell extenders provide reliable coverage up to 1,000-4,000 feet, depending on the system and your home’s construction. This is typically more than enough for even large homes. If you have an unusually large property or outbuildings, look for commercial-grade systems with extended range capabilities.
Can I add a chime to my second floor?
Absolutely. This is one of the most common uses for doorbell extenders. Simply place a receiver upstairs wherever you spend time. Wireless receivers make this especially easy since you won’t need to run any cables between floors.
Is it okay to have multiple chimes going off at once?
Modern doorbell extenders are designed to handle multiple receivers without timing issues. Unlike trying to wire multiple traditional chimes (which can cause problems), wireless extender systems coordinate all the chimes to sound together properly.
Can I adjust the volume on my doorbell?
While most traditional wired doorbells don’t have volume controls, doorbell extenders often do. This means you can set the perfect volume level for each room where you place a receiver.
What else can I do to improve my doorbell’s effectiveness?
Beyond extenders, consider the location of your current doorbell chime. Sometimes moving it to a more central location helps. For outdoor doorbells, ensure the button mechanism is working properly—a weak button press might not trigger the chime reliably. Also, if you have a battery-powered doorbell, fresh batteries can make a significant difference in performance.
Making the Right Choice
Missing visitors and deliveries because you can’t hear your doorbell is frustrating, but it’s a problem with a straightforward solution. Doorbell extenders offer a practical way to extend your doorbell’s reach without replacing your entire system or running new wires throughout your home.
The key is choosing the right type for your situation. If you have a traditional mechanical doorbell and want the simplest installation, a sound-triggered extender might be perfect. If you want the most reliable performance and don’t mind a bit of wiring, a hardwired extender could be the better choice.
Either way, you’ll end up with a doorbell system that works throughout your entire home, ensuring you never miss another important visitor or delivery. For more information about specific extender options, check out our doorbell extender selection.
Are you tired of your outdated doorbell? Do you want to add a touch of modern convenience to your home? Look no further! In this comprehensive blog, we will take you on a step-by-step journey to unleash your inner DIY expert and guide you through the installation process of wired doorbells.
Are you worried about the complexities of the installation? Don’t be! We understand that tackling electrical projects can be intimidating, but we’re here to simplify the process and empower you with the knowledge and skills to install a wired doorbell system.
Throughout this blog, we’ll address common pain points, such as understanding the components of a wired doorbell, choosing the right equipment, and navigating the wiring process. We’ll provide clear instructions, and valuable tips, and answer any burning questions you may have.
So, if you’re ready to revolutionize your home with a sleek and functional wired doorbell, grab your tools, and let’s get started on this empowering journey. By the end of this blog, you’ll have the confidence to tackle any wired doorbell installation project.
Short Summary
Understand the components and workings of wired doorbells, empowering you to confidently install a wired doorbell system.
Learn how to choose the right wired doorbell for your home, ensuring a sleek and functional upgrade.
Follow a step-by-step installation guide, simplifying the wiring process for a hassle-free installation.
Troubleshoot common installation issues and enhance your wired doorbell system with doorbell extenders and chimes.
Understanding Wired Doorbells
Wired doorbells are a popular choice for homeowners who prefer a reliable and traditional way to receive visitors at their front door. Unlike wireless doorbells that use radio frequencies to communicate, wired doorbells rely on a physical connection between the doorbell button and the chime unit inside your home. Let’s dive deeper into the key components of a wired doorbell system.
1.1 Components of a Wired Doorbell System
To grasp the functioning of a wired doorbell, it’s crucial to understand the different components involved:
1.1.1 Doorbell Button
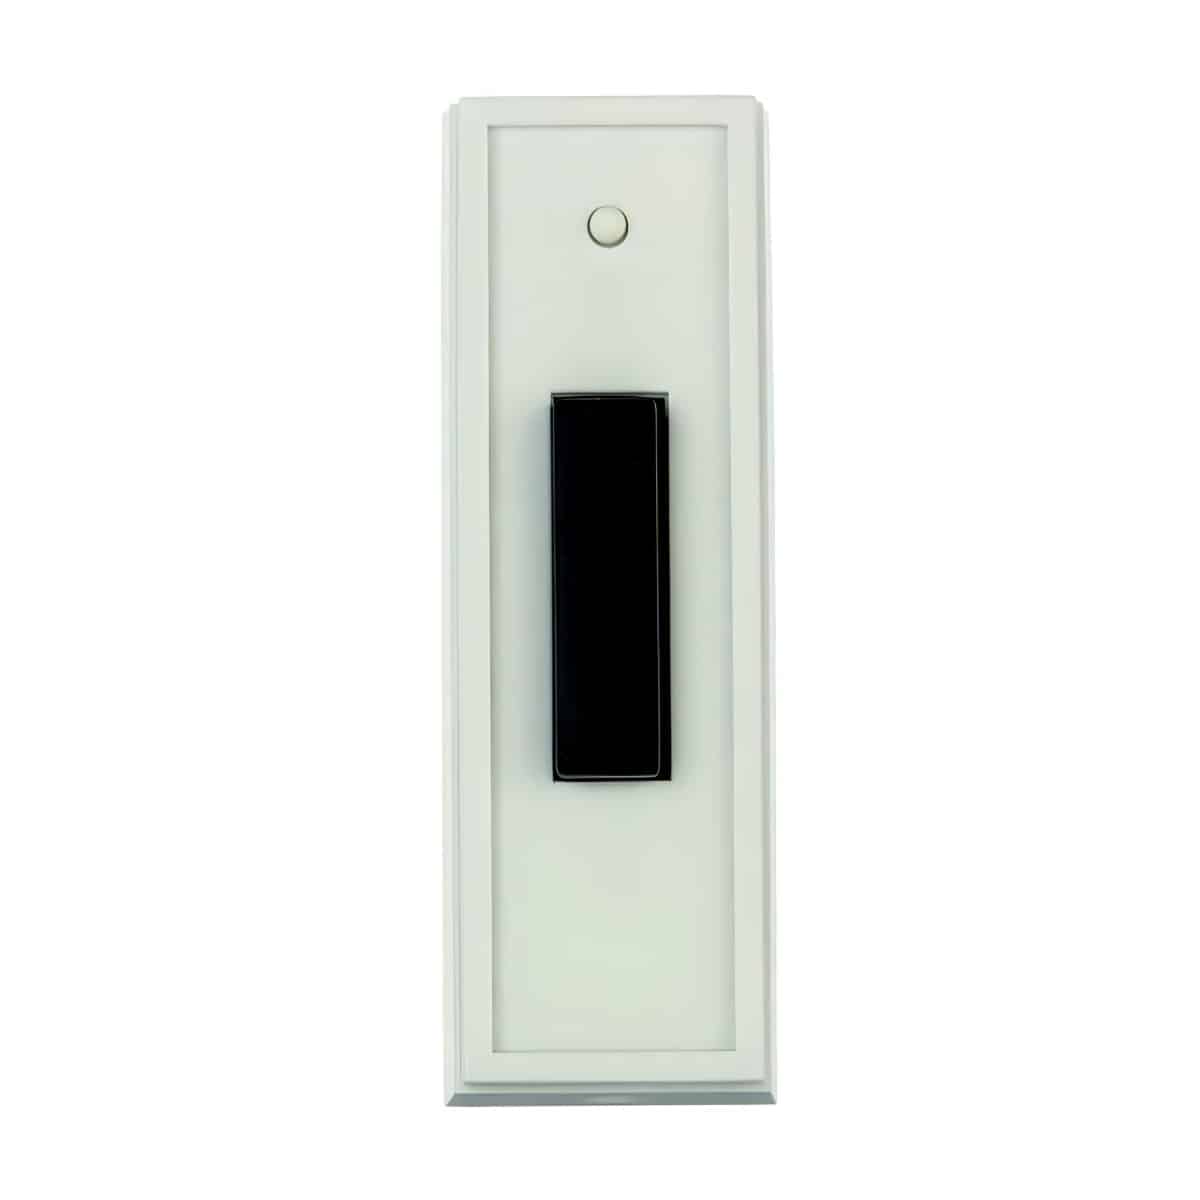
The doorbell button is usually installed near your front door, allowing visitors to announce their arrival. It consists of a push button that activates the doorbell when pressed.
The doorbell chime is the indoor unit that emits the traditional “ding-dong” sound when someone presses the doorbell button. It is typically mounted on a wall inside your home, often in a hallway or foyer.
ICH1735-OB Wired Doorbell With Backlight LED
1.1.3 Doorbell Transformer
The transformer is a critical element that converts the high voltage from your home’s electrical system to a lower voltage suitable for the doorbell operation. It ensures the safe and efficient functioning of the doorbell system.
DH905-16V-10VA Wired Doorbell Transformers
1.1.4 Doorbell Wiring
The wiring connects the doorbell button, chime, and transformer together to form a complete circuit. This wiring system allows the electrical current to flow, activating the chime when the doorbell button is pressed.
1.2 Installation Steps for a Wired Doorbell
Now that you have a basic understanding of the components, let’s walk through a step-by-step installation guide for a wired doorbell system:
1.2.1 Turn Off Power
Before beginning the installation process, ensure that you turn off the power at the circuit breaker to avoid any electrical accidents.
1.2.2 Locate the Transformer
Identify the location of the transformer in your home’s electrical system. The transformer may be found near your electrical panel or in a different area, depending on the wiring setup.
1.2.3 Mount the Doorbell Button
Choose a suitable location near your front door to mount the doorbell button. Ensure it is securely attached to the wall or door frame using screws or adhesive.
1.2.4 Connect the Wiring
Following the manufacturer’s instructions, connect the wiring from the doorbell button to the transformer and the chime unit. Use electrical
2. Choosing the Right Wired Doorbell
When it comes to selecting a wired doorbell for your home, it’s important to consider a few key factors. By taking the time to evaluate your needs and preferences, you can ensure that you make the right choice. Here are some important considerations to keep in mind:
2.1. Doorbell Style Options
Traditional Chime: If you prefer a classic and timeless look, a traditional chime doorbell might be the perfect fit for you. These doorbells typically come with a bell push and a chime box that produces a pleasant, familiar sound when pressed.
Contemporary Design: For those who prefer a more modern aesthetic, consider a wired doorbell with a sleek design. These doorbells often feature clean lines and minimalist styles that can complement a wide range of home exteriors.
Before purchasing a wired doorbell, it’s crucial to ensure that it is compatible with your home’s existing infrastructure. Here are a few things to check:
Voltage: Determine the voltage requirements of your doorbell system, as some wired doorbells may require a specific voltage range to function properly.
Wiring Compatibility: Make sure the doorbell you choose is compatible with your current wiring setup. Some doorbells may require specific types of wiring, such as bell wire or doorbell wire. For example, Craftmade recommends 18 AWG wires for all doorbell installations.
Transformer Size: Check if your home’s electrical system can accommodate the transformer needed to power your doorbell. It’s important to choose a transformer that can handle the voltage requirements of your doorbell. We’ve got a guide that may help on our wired doorbell transformers page. For most wired doorbell setup, a standard 16V, 10VA transformer works well. However, if you are using two wired doorbells (not push buttons, but doorbells), or using a video doorbell camera as the push button, you would want to use something with a higher VA, like the T1630 by Craftmade which is a 16V, 30VA transformer.
2.3. Additional Features and Options
Sound Customization: Some wired doorbells offer customizable chime options, allowing you to select the sound that suits your preferences.
Integration with Smart Home Devices: If you have a smart home setup, consider a wired doorbell that can integrate with your existing devices. This way, you can receive alerts and manage your doorbell remotely.
Night Vision and Recording Capabilities: For added security, choose a wired doorbell with night vision and recording capabilities. This allows you to capture and store footage of any activity at your front door.
💡 key Takeaway: When choosing a wired
3. Essential Components of a Wired Doorbell System
When it comes to installing a wired doorbell system, understanding the essential components is crucial. By familiarizing yourself with these key elements, you’ll be well-equipped to tackle the installation process with confidence. Let’s take a closer look at the components that make up a wired doorbell system and their importance in creating a functional and reliable setup.
1. Doorbell Button:
The doorbell button is the first component that your visitors will interact with. It is typically mounted near your front door and acts as the trigger for the doorbell chime. When pressed, it sends an electrical signal to the chime, signaling someone’s presence at your door. Choose a doorbell button that matches your aesthetic preferences and ensures durability to withstand various weather conditions.
2. Doorbell Chime:
The doorbell chime is the audible component of the system that produces the familiar chime or melody when the doorbell button is pressed. It is usually located inside your home and is responsible for alerting you to visitors. Modern doorbell chimes offer a range of customizable sounds, allowing you to personalize your doorbell’s tone. Ensure your chosen doorbell chime is compatible with your doorbell system for seamless integration.
3. Wired Doorbell Transformer:
The transformer is a crucial component that converts the voltage from your home’s electrical system to a lower voltage suitable for your doorbell system. This ensures the safe and efficient operation of your wired doorbell. Before installing a transformer, you must determine the voltage requirements of your specific doorbell system. It’s important to choose a transformer that matches these requirements to prevent any damage to your doorbell or electrical system.
4. Door Bell Wiring:
The wiring connects all the components of your doorbell system, creating a complete electrical circuit. It carries the electrical signals from the doorbell button to the doorbell chime, allowing for proper functioning. It’s important to use doorbell-specific wiring, often referred to as bell wire, which is specifically designed for low-voltage applications. Ensure the wiring is properly insulated and protected to prevent any short circuits.
5. Power Source:
While the power source is typically your home’s electrical system, it’s important to ensure that the doorbell system has its own dedicated circuit breaker. This helps protect your system from electrical surges and ensures it operates independently. Additionally, consider installing a backup power source, such as batteries or a generator, to ensure your doorbell system remains operational during power outages.
4. Preparing Your Doorbell Installation
Before you start installing your wired doorbell, it’s important to properly prepare the area and gather the necessary tools and materials. This section will guide you through the necessary steps to ensure a smooth and successful installation.
1. Assess Your Doorbell Location:
Examine your front door area and choose the ideal location for your wired doorbell. Consider visibility, accessibility, and functionality when selecting the placement.
Ensure that your chosen location has access to an electrical outlet or an existing doorbell wiring system. If you don’t have an existing wired doorbell setup, you may need to hire a licensed electrician to install one for you.
It’s advisable to check your local regulations and codes regarding doorbell installation, as certain jurisdictions may have specific requirements.
2. Gather the Required Tools and Materials:
Screwdriver (flathead and Phillips)
Voltage tester
Wire strippers
Wire nuts
Electrical tape
Drill and appropriate drill bits
Doorbell kit (including bell push, chime box, transformer, and wiring)
Anchors and screws (if needed)
3. Turn Off Power:
Safety should always be a top priority when working with electrical circuits. Before beginning the installation process, locate the circuit breaker that controls the power to your doorbell or doorbell transformer.
Switch off the power to avoid any risk of electrical shock during the installation process.
4. Remove the Old Doorbell (if applicable):
If you are replacing an existing doorbell, find the doorbell chime box inside your home and disconnect it from the power source by removing the wires connected to it.
Carefully remove the old push button switch from the exterior wall, ensuring no damage or excessively disturbing the wiring.
5. Prepare Doorbell Wiring:
If you don’t have existing doorbell wiring, this step may not be necessary if you’re using a wireless doorbell instead. Skip to the next step.
Strip the ends of the doorbell wires using wire strippers, exposing about half an inch of the copper wire.
If you’re connecting new wires, guide them through a protective conduit or electrical tubing from the doorbell push button location to the chime box. Ensure the wires are securely fastened and hidden along the path.
6. Attach the Doorbell Push Button:
Attach the push button switch to
5. Step-by-Step Installation Guide for Wired Doorbells
Installing a wired doorbell may seem like a daunting task, but with this step-by-step guide, you’ll be able to unleash your inner DIY expert and have a fully functioning doorbell in no time. Follow these clear instructions to ensure a successful installation:
1. Gather the Necessary Tools and Materials
Before starting the installation process, make sure you have all the tools and materials required. This includes a wired doorbell kit, bell wire, a doorbell transformer, a doorbell push button, a chime box, wire connectors, a screwdriver, a voltage tester, and wire strippers.
2. Locate an Appropriate Installation Spot
Decide on the ideal location for your wired doorbell. Typically, it should be positioned near your front door for easy access. Ensure there is an existing electrical box nearby to connect the doorbell transformer.
3. Turn Off Electricity
Before proceeding with any electrical work, turn off the circuit breaker that supplies power to the area where you’ll be installing the doorbell. Verify that the power is off by using a voltage tester.
4. Connect the Doorbell Transformer
Locate the doorbell transformer usually found near your home’s electrical panel. Connect one end of the bell wire to the front terminal of the transformer and the other end to the doorbell push button.
5. Attach the Doorbell Push Button
Mount the doorbell push button on the exterior wall near your front door. Make sure it is securely fastened and level. Use wire strippers to remove the insulation from the ends of the bell wire, and then connect them to the push button terminals.
6. Connect the Chime Box
Next, connect the chime box to the bell wire. The chime box is typically situated inside your home, near the doorbell. Strip the ends of the bell wire, and carefully connect them to the corresponding terminals on the chime box.
7. Test and Secure the Connections
After all the connections have been made, it’s crucial to test the doorbell to ensure everything is functioning correctly. Turn the circuit breaker back on, and press the doorbell push button. If you hear the chime sound, congratulations! Your wired doorbell installation is successful. If not, double-check all the connections and troubleshoot accordingly.
💡 key Takeaway: Installing a wired doorbell may seem complex, but following these step-by-step instructions will help you achieve a successful installation. Make
6. Troubleshooting Common Installation Issues
Sometimes, even with the most thorough preparation and careful execution, you may encounter some challenges during the installation of a wired doorbell. Don’t worry! We’ve got you covered with some troubleshooting tips to help you overcome common issues that may arise.
1. Insufficient Power Supply:
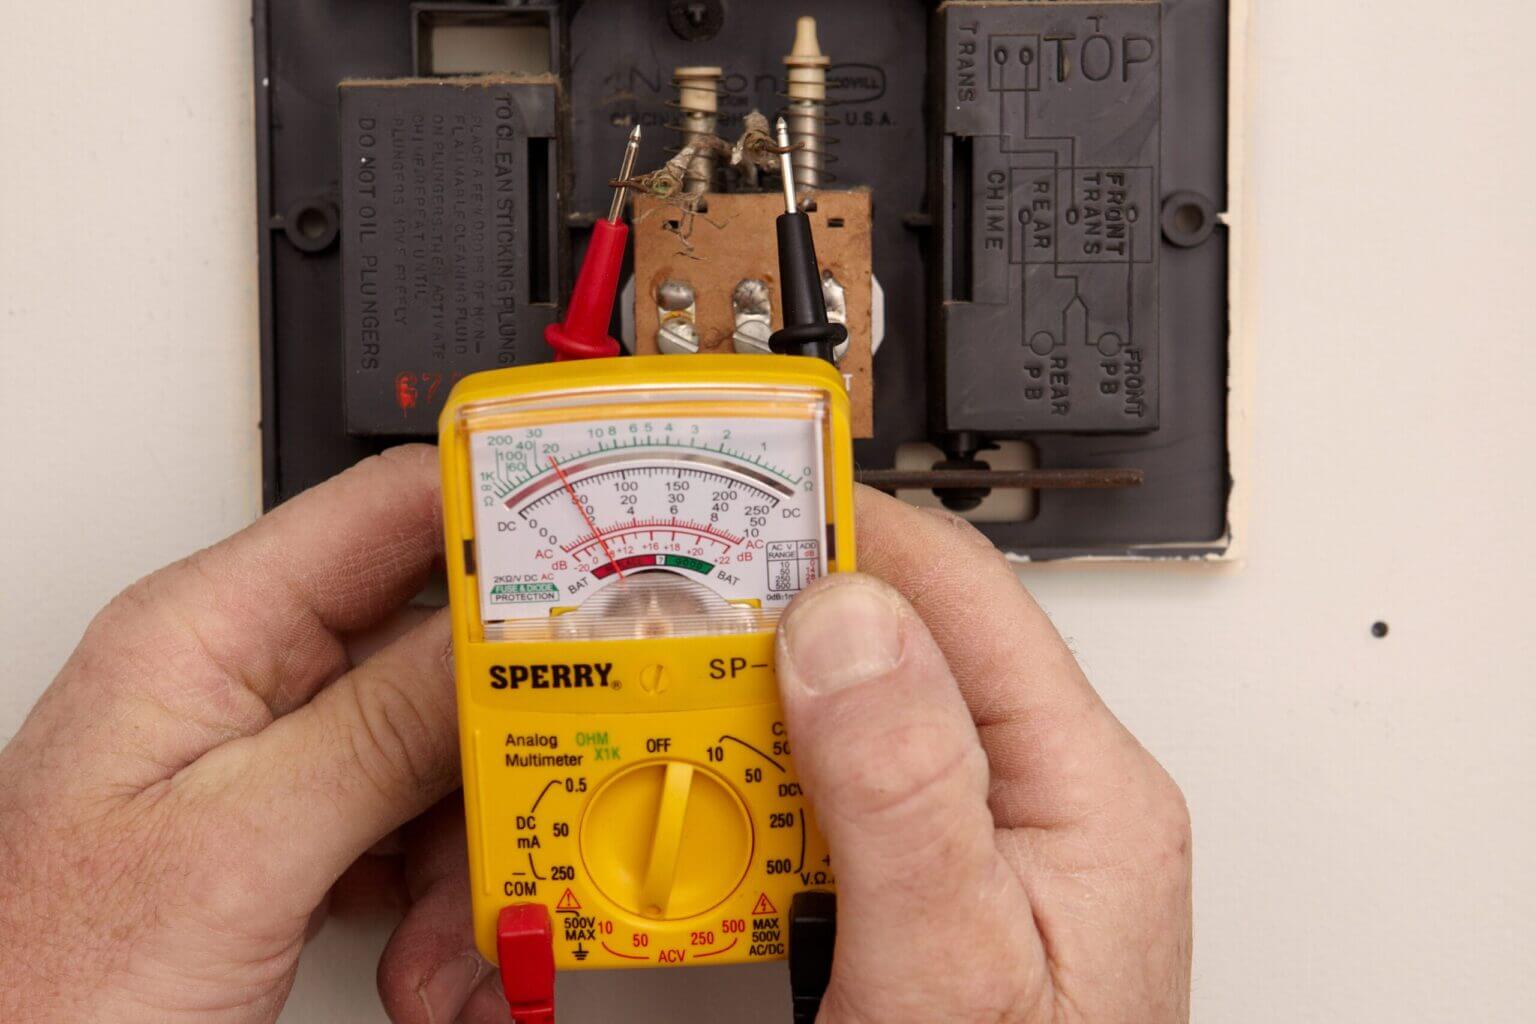
If your doorbell isn’t working or is behaving erratically, the first thing to check is the power supply. Ensure that the doorbell transformer is providing sufficient voltage. Use a multi-meter to measure the voltage output. If the voltage is lower than the recommended range (typically 16-24 volts), you may need to replace the transformer with a higher voltage rating.
2. Loose or Incorrect Wiring Connections:
Faulty or loose wiring connections can cause your wired doorbell to malfunction. Double-check all the connections, especially at the doorbell button, chime box, and transformer. Ensure that the wires are tightly secured in the appropriate terminals. Use a wiring diagram or the manufacturer’s instructions for reference to ensure correct wiring connections.
3. Faulty Doorbell Button:
If your doorbell isn’t producing the desired response when pressed, the doorbell button itself might be the culprit. Check for any signs of damage or corrosion on the button. If necessary, replace the button with a new one, ensuring proper wiring connections.
4. Chime Box Issues:
If your wired doorbell isn’t producing any sound or has a weak, distorted sound, it could be due to a problem with the chime box. Verify that the chime box is connected correctly and that the chime unit is in working condition. Sometimes, a worn-out chime mechanism may require replacement.
5. Electrical Circuit Problems:
Electrical issues within your home’s electrical system can also affect the performance of your wired doorbell. If you suspect an electrical problem, such as a tripped circuit breaker or a faulty electrical outlet, consult a professional electrician to resolve the issue.
6. Compatibility and Settings:
If you are installing a smart doorbell or a video doorbell, ensure that your home’s Wi-Fi network is compatible and has a strong signal in the installation area. Familiarize yourself with the device’s settings and follow the manufacturer’s instructions for proper configuration.
Remember, troubleshooting can vary depending on the specific model and brand of your wired doorbell. Always refer to the manufacturer’s documentation for detailed troubleshooting guidance tailored to your specific device.
💡 key Takeaway: Troubleshooting common installation issues with
7. Enhancing Your Wired Doorbell System
Once you have successfully installed your wired doorbell, there are several ways to enhance its functionality and convenience. Take your doorbell system to the next level with these expert tips and recommendations:
1. Upgrade to a Smart Doorbell: Consider upgrading your wired doorbell to a smart doorbell system. Smart doorbells offer advanced features such as video recording, motion detection, and smartphone integration, allowing you to conveniently monitor and interact with visitors even when you’re not at home.
2. Add a Doorbell Camera: Enhance your security by installing a doorbell camera. These cameras provide a real-time video feed of your front door, allowing you to see who is visiting or if any packages have been delivered. Look for a doorbell camera with night vision capabilities for clear visibility even in low-light conditions.
3. Install a Doorbell Chime: If your wired doorbell system doesn’t already have a chime, consider adding one. A doorbell chime produces an audible sound whenever the doorbell button is pressed, ensuring you never miss a visitor. Choose a chime that complements your home’s décor and offers various sound options.
4. Connect to a Ring Chime: For added convenience, connect your wired doorbell system to a Ring Chime. The Ring Chime is a separate device that plugs into a standard power outlet and alerts you with a pleasant sound whenever the doorbell is pressed. This way, you can hear the doorbell even if your smartphone is not within reach.
5. Consider the Ring Protect Plan: If you’ve opted for a Ring video doorbell, consider subscribing to the Ring Protect Plan. This plan offers additional benefits such as video recording storage, advanced motion detection settings, and extended warranty coverage. Choose a plan that best suits your needs and provides added peace of mind.
6. Ensure Proper Wiring and Electrical Connections: Regularly inspect your wired doorbell system to ensure all wiring and electrical connections are secure and functioning properly. Loose or faulty connections can result in your doorbell system not working correctly. If you’re unsure about the wiring or electrical aspects, it’s best to consult a qualified electrician.
💡 key Takeaway: By enhancing your wired doorbell system with smart features, cameras, chimes, and additional devices like the Ring Chime, you can elevate the functionality and convenience of your doorbell, providing increased security and peace of mind.
8. Maintenance and Care for Wired Doorbells
Taking proper care of your wired doorbell is essential to ensure its longevity and optimal performance. Regular maintenance can help prevent any issues that may arise and keep your doorbell working smoothly. Follow these simple steps to maintain and care for your wired doorbell:
1. Regular Cleaning:
Dust and debris can accumulate on the doorbell button and the chime, affecting its functionality. Clean these components regularly using a soft, dry cloth to remove any dirt or grime.
For stubborn stains or dirt, you can use a mild cleaning solution and a soft brush to gently scrub the surfaces. Just be careful not to get the electrical parts wet.
2. Check and Tighten Connections:
Over time, the wires and connections of your wired doorbell may become loose due to vibrations or external factors. Regularly inspect the connections and ensure they are secure.
If you notice any loose wiring or connections, tighten them using a screwdriver, making sure they are secure but not overly tightened.
3. Test the Doorbell:
Periodically test your wired doorbell to ensure it’s functioning correctly. Press the doorbell button and listen for the chime or any sounds indicating that it’s working.
If the doorbell doesn’t ring or produces an unusual sound, it may be an indication of a problem. Troubleshoot the issue or seek professional assistance if required.
4. Check the Doorbell Button:
Examine the doorbell button for any signs of wear or damage. If the button is cracked or worn out, consider replacing it to maintain both the functionality and aesthetics of your doorbell.
Ensure that the button is properly aligned and easy to press. If it feels sticky or unresponsive, clean it as mentioned in step1.
5. Protect from the Elements:
If your wired doorbell is installed outdoors, it’s essential to protect it from the elements. Consider installing a doorbell cover or housing to shield it from rain, snow, or excessive sunlight.
Ensure that the cover doesn’t obstruct the doorbell button and allows for the smooth operation of the device.
6. Pay Attention to Wiring:
Inspect the wiring of your wired doorbell periodically. Look for any signs of damage or wear, such as frayed wires or exposed insulation.
Replace any damaged wiring promptly to maintain the safety and functionality of your doorbell. If you’re
9. Resources for Further Assistance
If you’ve encountered any challenges or if you’re looking for additional information on installing a wired doorbell, here are some valuable resources that can assist you:
1. Online Tutorials and Videos:
Check out YouTube channels dedicated to home improvement and DIY projects. Many experienced homeowners and experts create detailed video tutorials on installing wired doorbells. Look for channels with high ratings and positive reviews to ensure you’re getting accurate information.
(keyword: online tutorials, YouTube channels)
2. Manufacturer’s Website:
Visit the website of the manufacturer of your wired doorbell. Most reputable brands provide comprehensive installation guides, step-by-step instructions, and FAQs that address common installation issues. These resources are often available for free download and can be a valuable reference throughout the installation process.
Join online forums and communities dedicated to home improvement and electrical installations. These platforms allow individuals to share their experiences, ask questions, and receive guidance from experts and fellow DIY enthusiasts. Participating in these communities can not only provide you with additional knowledge but also offer support and advice tailored to your specific situation.
If you prefer a more personal approach, visit your local home improvement store or electrical supply store. The staff at these locations are knowledgeable and can provide guidance on the specific components you’ll need for your wired doorbell installation. They may also recommend professionals or electricians who specialize in doorbell installations if you decide to seek professional assistance.
(keyword: local store assistance, home improvement store, electrical supply store)
5. Professional Electrician:
If you’re uncertain about any aspect of the installation process or if you prefer to have an expert handle it, it’s always a good idea to consult a professional electrician. They have the necessary experience, knowledge, and tools to ensure a safe and correct installation. While this option may come with an additional cost, it guarantees a hassle-free and efficient installation.
(keyword: professional electrician, safe installation)
Remember, it’s essential to evaluate the reliability and credibility of the resources you choose. Always cross-reference information and seek guidance from trusted sources to ensure the accuracy of the advice you receive.
💡 key Takeaway: Utilize online tutorials, manufacturer’s resources, online forums, local store assistance, and professional electric
Conclusion
In conclusion, learning to install a wired doorbell is a great way to unleash your inner DIY expert. By following the step-by-step guide provided in this blog, you can confidently tackle this project and enhance the functionality and security of your home. Take advantage of the detailed instructions and tips shared to ensure a smooth and successful installation process. From choosing the right doorbell to wiring it correctly, we’ve covered all the essential steps to help you complete this project with ease. Don’t let intimidating electrical work hold you back. With the right tools and knowledge, you can take control of your home’s doorbell system and make it work for you. Whether you’re replacing an old doorbell or installing a new one, this guide has provided everything you need
Doorbell Installation FAQ
What is included in a wired doorbell system?
A wired doorbell system typically includes a doorbell button, a transmitter, a receiver, and a wiring kit.
What is the best way to mount a wired doorbell?
There are many ways to mount a wired doorbell, but the most common way is to use a mounting bracket. You can buy a mounting bracket or build your own.
What are the drawbacks of a wired doorbell?
Wired doorbells have several drawbacks, the most common of which is that they can be easily hacked. Another drawback is that they can be difficult to install.
What is a wired doorbell?
A wired doorbell is a type of doorbell that uses an electrical connection to send a warning signal when the door is opened.
What are the benefits of a wired doorbell?
A wired doorbell gives you the ability to monitor your property from anywhere in the world and can provide peace of mind by letting you know if anyone is at your door when you’re not home.
Do wired doorbells require an internet connection?
Yes, wired doorbells typically require an internet connection in order to function. This is because the system relies on a cloud-based service to send and receive video and audio footage.
How do I reset my wired doorbell?
If the wired doorbell is not functioning properly, you may need to reset it. To reset it, follow these steps: Close the power to the doorbell by turning off the circuit breaker or switch that powers it. Remove the battery (if present)Disconnect the wires from the doorbell by pulling them straight out of the connector. Reconnect the wires to the doorbell in the reverse order. Replace the battery and test the doorbell.
The doorbell, an often-underestimated device, plays a significant role in our homes. It’s our first line of communication with the outside world, announcing visitors, deliveries, or even unexpected guests. With the evolution of technology, doorbell systems have advanced from simple ding-dong mechanisms to sophisticated video and intercom systems. Central to the operation of these systems is the humble doorbell transformer, with tri-volt doorbell transformers offering the versatility needed for modern homes.
DH910 Tri Volt Doorbell Transformer 1
What is a Tri-Volt Doorbell Transformer?
A tri-volt doorbell transformer is designed to convert standard household electrical voltage to the lower voltage levels required by doorbell systems. Household electrical standard voltage can range from 110V to 240V depending on the country, which is too high for doorbell systems. Thus, a transformer is needed to step down this high voltage to a more acceptable level, ensuring the correct operation of the doorbell system and avoiding potential damage from excessive voltage. The term “tri-volt” indicates its ability to offer three distinct voltage outputs, typically 8V, 16V, and 24V, catering to different doorbell models and functionalities.
For instance, a basic doorbell system may only require a 16V output, while a more complex system, such as an intercom or video capabilities, may need a higher voltage, like 24V. Some doorbell systems may also have more than one component that requires electricity, such as a chime, a strobe light, or a camera, and each of these components may require different voltage levels.
The tri-volt transformer is thus designed to be versatile and adaptable, capable of meeting the varying power needs of different doorbell systems. It allows homeowners to upgrade their doorbell system without changing their transformer, providing convenience and cost savings.
In addition, tri-volt doorbell transformers feature easy installation and are usually designed to be compact and unobtrusive. They are typically installed in a discreet location, such as inside a wall or a basement, and connected to the doorbell system’s wiring. The transformer reduces the household’s standard voltage to the selected output voltage, delivering the right amount of power to the doorbell system safely and effectively.
Why Use a Tri-Volt Transformer?
Versatility: One of the most significant advantages is the ability to support multiple doorbell systems, from basic chimes to advanced video doorbells, which may have varying voltage needs.
Cost-Efficiency: Instead of buying a new transformer each time you upgrade your doorbell system, a tri-volt transformer adapts to different requirements.
Safety: It ensures that your doorbell system receives the correct voltage, preventing potential damage from over-voltage.
Step-by-Step Guide to Wiring a Doorbell to a Tri-Volt Transformer:
1. Safety First:
Before starting any electrical work, always turn off the power at the circuit breaker or fuse box to ensure your safety.
2. Determine Voltage Requirement:
Check the voltage requirements of your doorbell. This information is usually found on the doorbell or user manual.
3. Prepare Your Tools and Materials:
Gather all necessary tools, such as wire strippers, screwdrivers, electrical tape or wire nuts, and a multimeter (optional but helpful).
4. Identify Transformer Terminals:
You’ll notice multiple terminals on your tri-volt transformer, typically labeled as 8V, 16V, 24V, and “COM” (common).
5. Connect the Doorbell:
a. If you have a single doorbell chime, connect one wire to the terminal corresponding to its voltage requirement (8V, 16V, or 24V).
b. Connect the other wire from the doorbell chime to the common (or “COM”) terminal.
6. Wire the Doorbell Button:
a. One wire from the doorbell button connects to the chime.
b. The other wire from the doorbell button attaches to the transformer, preferably to the same voltage terminal as the chime.
7. Double-Check All Connections:
Ensure all connections are secure and well-insulated. Exposed wires can be a safety hazard and affect the system’s functionality.
8. Test the System:
After restoring the power, press the doorbell button. If everything is correctly wired, the chime should sound without any issues.
Advanced Tip: Wiring Multiple Devices:
For homes with both standard and video doorbells, the process involves a few extra steps:
Check Combined Voltage Requirements: Ensure the transformer can handle the combined load of both devices.
Connect the Video Doorbell: Similar to the standard doorbell, and one wire goes to the required voltage terminal and the other to the “COM” terminal.
Verify and Test: Double-check all connections and test each device to ensure they’re working correctly.
Conclusion:
Tri-volt doorbell transformers offer the flexibility and adaptability required in our ever-evolving world of technology. Whether you have a simple chime system or a sophisticated video setup, understanding the basics of doorbell transformers ensures your system operates effectively and safely. By following the steps outlined above, homeowners can confidently install and enjoy the benefits of their doorbell systems.
Since secure.1800doorbell.com started back in 1998, we continue to get a common question, “How Can I Make my Old Doorbell Louder?” This is a great question
How Wired Doorbells Work
Most wired doorbells create sound when an internal hammer strikes a small metal plate inside the wired doorbell chime mechanics. When the outside wired push button is pressed, it caused the hammer to strike the metal plate. Most wired doorbells have two hammers and two metal plates. When the doorbell is triggered, the first hammer strikes a plate creating the “ding” sound and a second hammer strikes a second plate to create the “dong” sound. Together, this creates the standard “ding-dong” sound when a typically wired doorbell is activated. If you have a second push button connected (usually on a back or side door), only one of the hammers strikes a plate to create the one-tone, “ding” sound.
Wired Doorbells Aren’t Very Loud
Noting the paragraph above (make an old doorbell louder), the sound is created from a very simple process; a small hammer striking a metal plate inside the doorbell mechanism. It’s not hard to understand why the common wired doorbell isn’t very loud. Most wired doorbells will create a sound in the range of 75-85 dBA. It’s usually loud enough to hear in the basic areas of your home, but if you’re down in the basement or your bedroom watching television, they just aren’t loud enough to hear.
Because of the way wired doorbells are made, there’s not a lot you can do to increase the sound from the wired doorbell itself. Some manufacturers can play with the style of the doorbell in an attempt to create resonance chambers that “echo” the sound a little more, but that might only increase the sound by a few decibels. We go back to the original question posed in this article, how to make a wired doorbell in my home louder?
There is an easy solution and that’s called a “doorbell extender.” These are easy-to-install wireless products that allow you to hear your wired doorbell throughout your home or office. These products offer the benefit of getting to keep the pretty push-button outside to greet visitors and the attractive doorbell in your foyer while making the system easier to hear throughout your home.
What is a Wired Doorbell Extender
“Wired doorbell extenders” work alongside your traditional wired doorbell. When the wired doorbell in your home is triggered, the doorbell extender will transmit a radio signal to a compatible receiver. This compatible receiver is either a plugin or battery-operated wireless door chime receiver that will play a melody or tune when triggered by the transmitter. Virtually all wired doorbell extenders consist of two components, the transmitter, and the receiver.
There are two different flavors of transmitters. One version of the transmitter features a small microphone that essentially listens for a doorbell sound. When this sound is detected, it triggers the unit to send the radio signal to the receiver, which then plays the chime sound. The transmitter is typically mounted near the wired doorbell (usually in the foyer of your home) with the small microphone being close enough to hear the doorbell sound.
The major drawback of this type of system is the occasional false alarm produced when the unit “thinks” it hears a doorbell sound. A doorbell sound on the television, music, or even a random noise it interprets as a doorbell sound could trigger the unit to send the radio signal.
The second type, and the type we carry here at secure.1800doorbell.com, wires into the existing wired doorbell in your home. The same electrical signal that triggers the wired doorbell hammer to strike the metal plate also triggers the transmitter to send a radio signal. This system tends to be much more reliable as it only triggers when the doorbell itself is triggered.
How Basic Wired Doorbells Are Wired In Your Home
To understand the wiring on these products, let’s break down a few wired doorbell terms. First is the wired doorbell push button. This is the button people will see mounted next to the front door of your home. They may be lighted or non-lighted, and all the doorbell extenders we feature on secure.1800doorbell.com work with 2-wired doorbell push buttons (one for the front door and one for the second door, for example.)
Next is the wired doorbell. This is the unit that produces the actual chime sound and is typically hanging in the foyer of your home or in a hallway. A standard wired doorbell that plays the ding-dong sound work well with the doorbell extenders we feature on this site. Intercom-based doorbell systems and most video doorbells tend not to work well with a wired doorbell extender.
The third, and final major piece, is the wired doorbell transformer. This is a small device that wires into the 120 voltage of your home and converts the power into a lower voltage the wired doorbell can handle, usually between 12V-16V. The electrician who installed the doorbell system in your home may have installed the doorbell transformer in the garage, in the attic, or even in the wall behind the wired doorbell.
Wired doorbell systems in your homework in a loop and when the power supply is interrupted, the disruption causes the hammer in the doorbell to trigger. When lifting the cover off your wired doorbell you will see three terminal screws. These screws are typically labeled something like “front,” “second” and “terminal” (they may be labeled differently.) One of the screws is for the front doorbell push button wire, another is for a second door push button wire, and the third is for the wired doorbell transformer. The front doorbell push button will have two wires; one wire into the “front” screw on the wired doorbell, and the other connects to a wire from the wired doorbell transformer. On the doorbell transformer, one wire will connect to the “terminal” screw on the wired doorbell and the other wire will connect to the “font” wire coming off the second wired doorbell push button.
How to Wire a Doorbell Extender
As mentioned earlier in this article, a doorbell extender kit consists of two main components; a transmitter and a receiver. The transmitter is a small device with three wires coming out of it. One of the wires connects to the “font” screw on the wired doorbell, another connects to the “back,” or “second” screw on the wired doorbell, and the third connects to the “terminal” screw on the wired doorbell.
The transmitter comes with a high-powered lithium battery that should last 2-4 years before replacement. This battery is used to power the transmitter to send a radio signal to the compatible receiver when triggered. Once wired into the wired doorbell, the transmitter is may be mounted on top of the doorbell cabinet, beside it, or if there’s enough room, hidden inside the cabinet.
When a visitor pushes the doorbell button outside, the increase in amperage running through the circuit will cause your wired doorbell to chime as usual, and at the same time, trigger the transmitter to send a wireless signal to the receiver.
Ways to Increase the Sound of a Doorbell Extender
The benefit of using wireless systems in your home is that the receivers tend to have more features than the old doorbell that might be installed in your home. For example, models on 1800doorbell feature volume control, strobe light, and the choice of different sound options. In addition to this, the two models we carry have a range of 1,000 ft. (LRA-EXTX) and 4,000 ft. (ERA-EXTX) to guarantee the product has the power needed to traverse long distances and through the building materials found in your home. Another benefit is that you can add additional receivers throughout your home.
For example, you could place a plugin receiver in the kitchen, the garage, the basement, and the upstairs bedroom to ensure you don’t miss a visitor to your home. As long as the receiver is within range, the unit will trigger when a visitor pushes the push button outside your home.
Another important aspect is the fact that you can mix and match receiver types, along with different transmitters and sensors to augment your system as long as they are in the same model line. For example, if you were to purchase the ERA-EXKIT, you can add desktop receivers, motion sensors, wireless push buttons, driveway monitors, as well as more plugin receivers to grow your system.
Choosing the Right Doorbell Extender System
There are two different model lines or series of doorbell extenders featured on 1800doorbell. For the most part, the systems are very similar and come down to the wireless range of the system.
ERA-EXKIT Wireless Door Chime Extender
If you have a larger home or office or want to put a receiver in a basement or detached garage, you may want to use the ERA series of products.
The ERA series of products by Safeguard Supply was created to cater to the commercial industry. Commercial locations tend to have larger distances to traverse and thicker building materials such as brick, concrete, and even steel rebar, and the 4,000 ft. wireless range of this series makes it ideal. If you are ever thinking of adding additional sensor types, like an outdoor driveway monitor, and you have a larger yard, you may also want to go with this product line.
LRA-EX1000S and LRA-EX1000 Wireless Doorbell Extenders
The wireless range of both of these kits (from the transmitter to the receiver) is up to 1,000 ft. Keep in mind, that whenever we mention a wireless range, this is always the distance measured in a laboratory. This line of sight is measured with zero interference and although all real-world usage of the product will have interference, this product is ideal for smaller and mid-sized homes. Since the extender is located inside the home, the 1,000 ft. range should work for most homes of this size. The difference between the ERA-EX1000S and the ERA-EX1000 is the receiver type, plugin, and desktop respectively.
Having a doorbell for your large warehouse or business is one of those things you probably haven’t given much thought to unless you worked in a larger facility and missed delivery or someone knocking on the door. This is something I never really thought too much about until I started working at secure.1800doorbell.com. Door bells are an important part of any business’s infrastructure.
For example, if you work in a warehouse or office building without one people might not get their product delivered to them on time and missed opportunities for communication with customers can be lost! 1800Doorbells helps companies find out what type is best suited for them through our customer service representatives who will talk things over so don’t hesitate to contact us today
With a traditional retail store, we would have been required to keep our doors open. The security considerations for this made it clear that wireless doorbells and entrance alerts were going to be necessary in order to ensure adequate safety of both employees as well as customers coming into contact with the business while they’re still on-site or delivering goods directly outside your front doorstep!
When working in a warehouse, one of my favorite things was sitting at my desk and watching people come to work. The feeling you get when someone rings your doorbell or delivers something right outside is amazing! But it always struck me as odd that builders never put wired doorbells inside their commercial spaces- especially since they’re so close together (and can easily hear each other).
The doorbell is one of those things that every property owner needs to have. It’s not just for warehouse tenants but also so people can come to check out your facility without ringing or knocking on any doors, they’ll know if someone was here!
Office Buildings and Warehouse Spaces Require Longer Range Wireless Door Chimes
If a wired doorbell is not installed at your location and you want one, running the bell wire and installing the wired doorbell isn’t as feasible as you may think. Almost all commercial warehouses are constructed with brick, cinder blocks, or poured concrete. How do you run wire through these materials? On top of that, it’s not YOUR building, and the owner may not appreciate or approve of you drilling holes through walls.
Wireless doorbells are here to solve all of your tenant’s problems! Wireless chime products have been around for years, but you have to be careful and make the right choice.
Quality, reliable door chimes for business are perfect for landlords who don’t want their tenants trying to install their own wired doorbell system. In just seconds you can install these units- no electrician required.
Commercial Property Will Interfere with Wireless Door Chime Signals
In the past, the thing holding wireless chimes back was trying to use low-powered, residential-grade wireless doorbells in a commercial environment. This problem is solved thanks to new technology long-range radio technology at a low cost.
Specifically, wireless doorbells did not have the range, or power, needed for commercial applications. The products used in commercial applications, such as re-barb, concrete, steel, etc., will have a negative impact on the wireless range of a product.
The rule of thumb we tell customers is that for every wall in a commercial application the wireless signal has to penetrate, the signal will degrade by 30% each time it passes through the wall. In this example, we will use the standard wireless door chime or doorbell you would get from a box store retailer.
A standard 150 ft. wireless chime would actually have a range more like this in a facility with two walls between the front door and an office:
300 ft. x .70= 210 ft. range after penetrating the first wall.
If there is a second wall, take the 210 ft. and degrade that signal by 30%. 210 ft. x .70= 145 ft.
This is a pure line of sight as well. You also need to factor in other environmental factors that could be interfering with the wireless signal.
The image below is an example of how a wi-fi signal is degraded by building materials.
Although we are dealing with a lower frequency signal it gives a general idea of signal degradation and why you need a much stronger signal for a doorbell for business use than you would for residential doorbell use.
Our products tend to penetrate a little better due to their lower frequency, but you get the idea.
A wireless system with a range of 150 ft. may work fine in most residential environments but we find it simply isn’t enough in a commercial application.
Compare those numbers with a business wireless doorbell like the ERA-UTDCR which has a range of up to 4,000 ft. Remember in our scenario above where the wireless signal will need to penetrate two walls.
4,000 ft. x .70=2,800. Next take another 30% off that number and you get a wireless chime with a range of 1,960 ft. which is typically more than enough for warehouses.
The ERA-UTDCR is a long range wireless doorbell system with a range of up to 4,000 feet.
The system is expandable, meaning you can add more receivers and more push buttons, extending the listening area and the doors covered.
Another great feature about the ERA-UTDCR is that it’s compatible with a wide range of products such as a PIR sensor, a doorbell push button, outdoor PIR sensors you can use to monitor the driveway, and much more.
secure.1800doorbell.com offers a variety of wireless chime products for your home’s front porch doorbells, including long range systems that work well in large buildings and residential applications where coverage is needed throughout the building; we also carry short-range models perfect if you only want an alert on one specific room (or floor). To find out more about our different options visit us today.
There are many reasons to replace a decorative doorbell button. I mean, who doesn’t want a kitschy-cool pineapple doorbell button? – It’s all too beautiful! The good news is that replacing a doorbell button is usually straightforward.
How to Install a Doorbell Button: Wired Doorbells
The short video below by our friend Dennis Coffey demonstrates how to replace or install a doorbell button.
Please note that if you are uncomfortable installing electrical products, please hire a qualified electrician.
First, choose a replacement wired doorbell button. If you want a different style of doorbell button, make sure the replacement will fit. Be prepared, for example, to at least add a little paint around a new rectangular doorbell button if you’re replacing a round doorbell button.
Other times, the space might have been specifically designed for the doorbell, and it might require more intervention than you want to make a replacement.
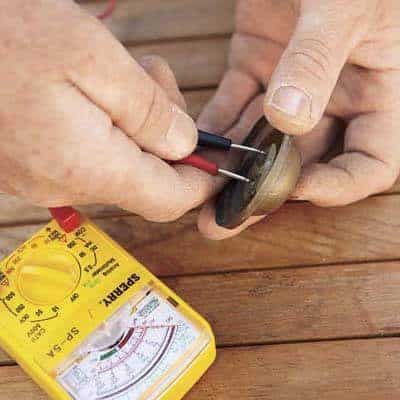
Note: If you have an older doorbell, test the voltage across the button before selecting a replacement. All doorbells have a door chime transformer that reduces the voltage from the house line (120 volts (V) and normally 15 amps) to something much less. This makes it safe to touch the wires that lead to the doorbell button but not other wires in the house or the doorbell.
However, current doorbells use a smaller voltage (16 V or 12 V) than earlier doorbells, which use a higher voltage (36 V or 24 V). When a doorbell button rated for a lower voltage is installed in a higher voltage doorbell, the doorbell can get hot, especially if the doorbell button has a light in it.
Next, remove the old doorbell from the wall by unscrewing it. If you haven’t previously removed it for testing, you might have to cut away caulk or paint. Now, unscrew the wires. As we mentioned above, you don’t have to turn the power off for this because the voltage is very low, but if it makes you feel safer, there’s no harm in turning the power off.
If the wires seem to want to slip back into the house, a clothespin or other large clip can be used to hold them outside the wall so they don’t go in—fishing them back out can be nearly impossible.
Now screw the wires onto the new doorbell. It doesn’t matter which wire goes where. So long as both have good connections, the bell should work fine. Twist the wire around the screw in a clockwise arc so that the wire has more connection and the action of the screw pulls the wire in rather than pushes it out.
If the doorbell has a light on it, this should be lit up when you connect the wires. Test the button before you put it back on the wall. If it doesn’t work, check the connections on the wires. If these seem fine, disconnect and touch one to the other to ensure you get a tone. If you don’t, you likely forgot to turn the power back on before trying your test.
If the doorbell is working, put caulk around the back of the doorbell before securing it in place. This will keep air and bugs from using your doorbell as an entry and exit. Once the caulk is dried, you can touch up the paint around the doorbell as necessary.
How to Install a Doorbell Button: Wireless Doorbell
Once you select your new wireless doorbell button, you must ensure it is coded properly before it will work for your receiver. Open the doorbell button and look for a series of metal pins in two rows. Typically, they will have some black plastic blocks on them, but sometimes, these aren’t in place on a new wireless doorbell button.
Now open the compartment on your receiver. You should see a similar arrangement of pins with black plastic blocks. Match the blocks on your new doorbell button.
Then, replace the receiver in the socket (if necessary) and push the button. If the button doesn’t work, it’s possible you misaligned the two units when trying to match them up—it can be hard to tell which way to hold them—so try a mirror image on the new button.
If it still doesn’t work, maybe the factory-installed battery is faulty. Try a new battery. If it still doesn’t work, the wireless doorbell button may be defective.
If you are installing a new wireless doorbell, attaching the wireless doorbell button to the wall can be challenging. For many surfaces, such as wood, you can just put screws through the holes provided in the backing of the doorbell button.
If you’re lucky, the screw holes on the back of the wireless doorbell button might even match those from an old wired doorbell button. Other times, you may have to put a block of wood in to allow you to screw the new doorbell where the old one was.
Two-sided tape works well on many smooth surfaces, such as wood, aluminum, or vinyl siding. Often, this comes with the wireless doorbell button, but you may have to buy it separately.
Other surfaces, such as stucco or brick, can be a bit more challenging to attach the button to. If the brick is relatively smooth (especially if it’s painted), you should try two-sided tape, but if it’s rough or has grooves in it, it’s probably not worth the effort.
In this case, one good solution is poster putty, such as you might have used in your college dorm room or rental property where you weren’t allowed to put holes in the wall. Some brands are better than others, but if you try a few, you’ll find one that grips the rough surface and can hold your wireless doorbell button up quite well.
If you want a secure hold for your wireless doorbell on these surfaces or if you don’t want to bother with the trial-and-error of poster putty, you can secure the doorbell with screws. Masonry screws usually are too large for the holes on the back of a wireless doorbell button, so you have to drill holes and place anchors. This is a bit more work, but on the plus side, you won’t have to worry about your doorbell falling occasionally, as tends to happen with double-sided tape or poster putty.
A Doorbell for All Seasons
Once you figure out how easy it can be to replace your doorbell button, you might decide that just one doorbell button is not enough. You could have different doorbells for different seasons or just one you pull out for that particular holiday party.
Okay, so most people aren’t that obsessed with their doorbells, but we’re just saying – if you are, it’s not that hard of a thing to do. Certainly more accessible than a new haircut – and if you don’t like it, you don’t have to wait for it to grow back!
We hope you enjoyed this article and that it helped you figure out how to install your doorbell button. Please feel free to call us if you need any assistance or have any questions. We always recommend contacting a licensed contractor if you don’t have experience working with electrical installations.
There are many reasons to replace a doorbell button. First, if it’s broken, replacing it is usually easier than fixing a doorbell button. Other times, though, you might just think it’s time for a more decorative doorbell button. I mean, c’mon, who doesn’t want a kitschy-cool pineapple doorbell button? – It’s all too beautiful!
On the other hand, if you’re considering a wireless doorbell for your home or business location, you’ll be happy to know that learning how to install a doorbell is very simple…especially wireless doorbell installation. Compared to setting up a hard-wired system, installing a wireless doorbell is a breeze. With a wireless store doorbell system, you won’t need any electrical knowledge or wires (of course) nor will you need a transformer. However, there are a few tips and tricks that can help you speed through the job and make sure your wireless doorbell operates just the way you want it to.
Wireless Doorbell Instructions for Installation
Learning how to install a wireless door chime unit is fairly easy, but it is important to first do some planning: choose the location for the receiver. The receiver is the indoor part of the wireless system, sort of like a speaker, that will chime to alert you that someone is pressing the doorbell at your front door, back door, or any door on your property. You want to make sure of 3 things:
That the receiver is within range of the transmitter(s), which is/are the doorbell button(s). You may have multiple doorbell transmitters, one at each of your home’s various entrances, and you need to make sure a receiver (wherever you’re planning to put it inside) is well within the stated range of your particular wireless doorbell model.
That the receiver is within hearing distance: Make sure you can hear the doorbell from wherever you are in the home or even outside in the back yard (or in the stock room or storeroom if you’re setting up your business.) Estimate if this fits the system you’re thinking about. You may want to purchase extenders to ensure you can hear from anywhere in the house.
Get extenders if necessary to increase the doorbell signal range: If you have a big home (or office or factory), you may want to get a doorbell extender: to give your wireless doorbell a longer signal range. An extra transmitter will “forward” the signal from a spot near the door to a receiver further away. This way you can cover your whole premises and/or you can even purchase a wireless doorbell with a portable receiver to take with you when you work in the backyard garden or garage.
How to Install Wireless Doorbell Buttons
Insert battery: Wireless doorbell buttons from 1800Doorbell.com usually come with long-life batteries already installed. Doorbell buttons typically require small round lithium batteries.
Look for any location markings, in either numbers or words for the “Front” door and the “Rear” or “Back” entrance door on the buttons.
Choose a spot for installation where the wireless doorbell button is visible and within easy reach, typically at about 4 feet above the floor. This is the maximum practical button height for wheelchair access, so you could opt to go a bit lower.
Adapt to your surface: Wood, vinyl, aluminum doors, and door-sills are all acceptable surfaces to attach a doorbell button. For metal doors or doorframes, however, you may need to place a wooden shim behind the doorbell button to prevent signal interference from the metal. For masonry or brick installation, you may need a plastic shield before under the button, between it and the masonry, for a secure hold when screwing in.
Attach with adhesive strip or screws: Wireless doorbell buttons are often mounted using the adhesive strip on the back of the button assembly. You can usually also mount the wireless doorbell button with two screws.
Installing Wireless Doorbell Receivers
The receiver is the part of the wireless doorbell system that will receive the radio waves emitted by the transmitter (button) when a visitor presses it. Then it will play the appropriate doorbell chime or sound so that you’re alerted. As you read through the installation instructions for your wireless doorbell, remember to follow the manufacturer’s instructions if they differ. In general, most wireless doorbell receivers are installed in this manner:
First, insert any batteries required by your wireless doorbell receiver. BATTERIES: Often 3 AA batteries are needed for the doorbell receiver unit and may only need to be replaced every year or two.
Sync with the transmitter button. Press the chime control button and select the chime module. Go to push button/transmitter outdoors and press the button. This action synchronizes both the outdoor doorbell push button and the indoor chime unit. You can pair multiple push buttons to the same door chime receiver unit.
Select your sound choice for the front door and one for the back door, if applicable. This lets you know which door to answer. The receiver inside the home often also has a small visual icon that lights up to tell you which door is being activated. This varies by product and manufacturer. We have an entire article about this topic you can see here: “Changing to Tune on Your Wireless Door Chime”
Set volume.
Plug the receiver into an electrical wall outlet, if necessary, although some run on battery power. Plug-in doorbell receivers are extremely convenient to install. OR Insert batteries: Battery-powered units have more options for installation placement and can be placed higher on the wall than your typical plug-in model, for example. Some come with a mounting bracket or holder that you screw into the wall. Then you can take your receiver unit out when you want to change the chime sounds/volume or to replace batteries (which should only be needed every year or two).
Test to be sure the signal reaches from the front (and back) doorbell buttons to the receiver. Take the receiver to the spot where you plan to plug it in or mount it to the wall inside your house for an accurate test. If the sound does not come through when the button is pressed, you need to move the receiver to an outlet closer to the door. Or you might instead try removing any large furniture or another item that may be interfering with the signal. You may want to use a second receiver to extend the doorbell sound and signal further into the home.
If the doorbell is mistakenly activated by a nearby remote control, change the doorbell to another channel or frequency. Most doorbells offer several channels for this purpose.
Wireless Doorbell Advanced Features
Now that you have an idea of how to install a wireless doorbell, you can browse the different types available and make a selection. To choose the best wireless doorbell for your home or business, think about what advanced features you might want, including:
Multiple tunes or melodies so you can change at will.
Decorative wireless doorbell receivers and stylish doorbell buttons so that your doorbell can complement your decor.
Additional security and convenience features like:
Extra push buttons (also called switches or transmitters) – one for each entrance.
Extenders, and extra doorbell receivers to forward the signal further into and throughout the home.
Portable receiver: that you take with you when you’re going to the backyard or elsewhere.
Event log that tells you when the doorbell rang, and where, if you missed anything. It would also record the time and location if a motion detector went off if your system is so equipped.
Cameras
Intercom(s) for voice communication, such as a wireless portable intercom with video
Motion sensor to sense someone before they push (or so that they have no need to push) the doorbell button. BATTERIES: Motion sensors often use a rectangular 9-volt battery.
Wireless systems are flexible and portable, meaning you could use your wireless doorbell system in other places and for other purposes, including:
Portable system: Take the button, motion sensors, and receivers out of your home and use them in your business or even take them with you to a vacation rental.
Call system: You could even use your “doorbell” as a call system, giving the button unit to, for instance, a sick child or elderly relative to use when they need to call for assistance when you’re in another part of the house.
Pets or Kids: Use a motion detector to sense when someone enters or leaves a room.
Garage: You could also use the motion detector to alert you if someone enters your garage, for instance, if you leave the door open after driving your car into the garage.
Driveway: You might also place a motion detector at the end of a long driveway, to let you know that someone is driving up to the house. There are also purpose-built driveway alarms that use a hose or a ground probe to trigger the alarm/chime when cars drive over it or pass by it.
The good news is that most of the time replacing a button is an easy thing to do.
How to Install a Doorbell Button: Wired Doorbells
First, choose a replacement wired doorbell button. If you want a different style of doorbell button, make sure the replacement is going to fit.
Be prepared, for example, to at least add a little paint around a new rectangular doorbell button if you’re replacing a round doorbell button. Other times, the space might have been specifically designed for the doorbell and it might require more of an intervention than you want to make a replacement.
Note: If you have an older unit, test the voltage across the button before selecting a replacement. All doorbells have a transformer that reduces the voltage from the house line voltage (120 volts (V) and normally 15 amps) to something much less, which makes it safe to touch the wires that lead to the doorbell button, but not other wires in the house or the doorbell. However, current doorbells use a smaller voltage (16 V or 12 V) than earlier doorbells, which use a higher voltage (36 V or 24 V). When a doorbell button rated for a lower voltage is installed in a doorbell that uses a higher voltage, the doorbell can get hot, especially if the doorbell button has a light in it.
Next, remove the old doorbell from the wall by unscrewing it. If you haven’t previously removed it for testing, you might have to cut away caulk or paint. Now, unscrew the wires. As we mentioned above, you don’t have to turn the power off for this because the voltage is very low, but if it makes you feel safer, there’s no harm in turning the power off. If the wires feel like they want to slip back into the house, a clothespin or other large clip can be used to hold them outside the wall so they don’t go in – fishing them back out can be nearly impossible.
Now screw the wires onto the new doorbell. It doesn’t matter which wire goes where. So long as both have good connections the bell should work fine. Twist the wire around the screw in a clockwise arc so that the wire has more connection and the action of the screw pulls the wire in, rather than pushes it out.
If the doorbell has a light on it, this should be lit up when you connect the wires. Test the button before you put it back on the wall. If it doesn’t work, check the connections on the wires. If these seem fine, disconnect one and touch it to the other to make sure you get a tone. If you don’t, you likely forgot to turn the power back on before trying your test.
If the doorbell is working, put a caulk around the back of the doorbell before securing it in place. This will keep air and bugs from using your doorbell as an entry and exit. Once the caulk is dried, you can touch up the paint around the doorbell as necessary.
How to Install a Doorbell Button: Wireless Doorbell
Once you have selected your new wireless doorbell button, you must make sure it is coded properly before it will work for your receiver.
Open up the button and look for a series of metal pins in two rows. Normally, they will have some black plastic blocks on them, but sometimes these aren’t in place on a new wireless doorbell button.
Now open up the compartment on your receiver. You should see a similar arrangement of pins with black plastic blocks on them. Place the blocks on your new doorbell button so they match the blocks on your receiver. Then replace the receiver in the socket (if necessary) and push the button. If the button doesn’t work, it’s possible you had the two units misaligned when trying to match them up – it can be hard to tell which way to hold them – so try a mirror image on the new button. If it still doesn’t work, maybe the factory-installed battery isn’t working. Try a new battery. If it still isn’t working, the wireless doorbell button may be defective.
If you are setting up a new wireless doorbell, attaching the wireless doorbell button to the wall can be a bit of a challenge. For many surfaces, such as wood, you can just put screws through the holes provided in the backing of the doorbell button.
If you’re lucky, the screw holes on the back of the wireless doorbell button might even match those from an old wired doorbell button. Other times, you may have to put a block of wood in to allow you to screw the new doorbell where the old one was.
For many smooth surfaces, such as wood, aluminum, or vinyl siding, two-sided tape works well. Often this comes with the wireless doorbell button, but other times you may have to buy it separately.
Other surfaces can be a bit more challenging to attach the button to, such as stucco or brick. If the brick is relatively smooth (especially if it’s painted) you should try two-sided tape, but if it’s rough or has grooves in it, it’s probably not worth the effort.
One good solution, in this case, is poster putty, such as you might have used in your college dorm room or rental property where you weren’t allowed to put holes in the wall. Some brands are better than others, but if you try a few, you’ll find one that really grips the rough surface and can hold your wireless doorbell button-up quite well.
If you want a secure hold for your wireless doorbell on these surfaces or if you don’t want to bother with the trial-and-error of poster putty, you can secure the doorbell with screws. Masonry screws are normally too large for the holes on the back of a wireless doorbell button, so you have to drill holes and place anchors. This is a bit more work, but on the plus side, you won’t have to worry about your doorbell falling every once in a while as tends to happen with double-sided tape or poster putty.
A Doorbell for All Seasons
Once you figure out how easy it can be to replace your doorbell button, you might decide that just one doorbell button is not enough. You could have different doorbells for different seasons, or maybe just one that you pull out for that special holiday party.
Okay, so most people aren’t that obsessed with their doorbells, but we’re just saying – if you are, it’s not that hard of a thing to do. Certainly easier than a new haircut – and if you decide you don’t like it, you don’t have to wait for it to grow back!
If you’d like assistance in choosing the best doorbell for your needs, call 1800Doorbell. If you need wireless doorbell installation support,contact us at 1800Doorbell.com. The doorbell experts on our customer service line are happy to help.
A doorbell button. We’ll start by going through the diagnostic procedure for figuring out if your doorbell button is the problem, but if you’ve already isolated the doorbell button, skip down to How to Fix a Doorbell Button.
Is It the Doorbell Button?
Most doorbell systems are very reliable. Wired doorbell systems can last for decades without any problems. (Old crank doorbells were pretty reliable, too, but they’re so old now that most have quit working by now.) When the bell stops working, it’s usually the doorbell itself, which can become worn by constant use. For a wired doorbell system, unscrew the doorbell from the wall.
Typically, this just involves two screws. You might also have to cut away caulk or excess paint from around the doorbell. If you have multiple doorbells detach them all. When you pull the doorbell away from the wall, you’ll see two wires connected to the back.
First, check to see that these wires are secure. If the doorbell is securely fastened to the wall, it’s unlikely one has come loose, but stranger things have happened. If you have more than one button wired to your doorbell, a loose wire at one of the buttons can stop both from functioning. Often, these are wired with a common ground, and neither doorbell will work if the common ground is disconnected at one of the buttons. In a doorbell system, the button closes the circuit between these two wires, allowing electricity to travel through them and trigger the door chime. To test whether the button is the problem, disconnect one of the wires.
You don’t have to turn the power off for this because, unlike most systems in your home, the power is stepped down by the doorbell to a safe 16 or even 12 volts (V) with very few amps. Even if you turn the power off, you also have to turn it back on for the next part: touch the bare end of one wire to the bare end of the other. If the chime sounds, it’s the doorbell button that’s the problem.
If the chime doesn’t sound, it’s not the doorbell that’s the problem.
If you have multiple doorbell buttons wired to the same chime, make sure you disconnect only one wire at a time to avoid accidentally disconnecting the common ground. You can also test the doorbell with a multimeter or ohmmeter. Your doorbell is an open circuit that closes when you push the button.
With your doorbell disconnected, touch your ohmmeter leads (or the leads of a multi-tester set to resistance, marked “Ohm” or Ohm) to both the wire connections on the doorbell. Then push the button. Resistance should jump from infinity (no connection) to some small level of resistance. If it doesn’t the doorbell isn’t closing the circuit properly.
For a wireless doorbell button, there are two potential problems other than a broken doorbell button that might be causing the problem.
If the button has never worked, it might not be coded properly. Look in the compartment on the back of the receiver and inside the button itself. You should see a series of metal pins, some of which have small black blocks on them.
Make sure the configuration of these blocks matches in both places. If you think they’re right but it’s still not working, try turning one the other way and matching them up again–often the proper orientation for the code blocks isn’t clear.
If a wireless button used to work, but isn’t now, the problem is most likely the battery. If replacing the battery doesn’t make the button work, then you have a broken doorbell button.
All doorbells have a transformer that steps down the voltage before it goes to the doorbell, but older doorbells only stepped down the voltage from the 120 V line voltage to 24 V or 36 V. When a doorbell is designed for the modern 16 V or 12 V is put on this old line, it can get hot.
Typically, you only feel the heat if the doorbell button has a light on it, but any time the voltage is mismatched between the doorbell button and the doorbell itself, it can damage the doorbell button, causing early failure. To figure out the proper voltage for your doorbell button, take a multitester and touch it to both wires. Read the voltage and get a doorbell that’s appropriate for the voltage of your system. Or, if you want to keep your current doorbell button (it is the most visible component of the whole system), you can just replace the entire doorbell with one that matches the button.
How to Fix a Doorbell Button
Most of the time, a doorbell is not going to be something you can fix. It’s usually best to just replace the doorbell. (See How to Fix a Broken Doorbell). In some cases, though, you can fix a doorbell that you can’t replace.
Maybe it’s an old doorbell or a unique one that has a style you love, there are a few ways to fix a broken doorbell button. If the part you depress is broken (the button proper in your doorbell button unit), you can often find an inexpensive replacement button that has a depressor the same size and shape. If you do, just replace the broken one with the whole one — make sure it’s the same on the back, too. Most old doorbell buttons just have a simple mechanism inside. When the button is down, it pushes a circuit closed.
This mechanical system is simple and resilient, but when it breaks, it can be hard to fix. You have to find something that will allow the contact to close the circuit when the button is depressed, and most of these components aren’t commonly sold, so you might have to make a piece for it. Modern doorbells have a diode in the button.
This allows voltage to continue traveling through the doorbell after the button is released, which allows the doorbell chime to continue until the tone is finished. You can replace the diode by unscrewing the screws holding the current one in place, putting a new one in, and replacing the screws.
It’s typically not possible to repair a wireless doorbell button, since they are often just a single printed circuit board. Once you’ve gotten your doorbell button fixed, it will likely stay functional for a long time. And, if not, each time you fix it you will get a lot faster.
We hope this article provided you with some helpful information. If you have more questions or need help installing your doorbell button, or any of our products, please feel free to call or email us directly!
Tips for Troubleshooting Your Wired Doorbell or Door Chime Problems: Doorbell Won’t Stop Ringing
Wired doorbells as such are extremely durable and sturdy devices. They rarely develop glitches or go kaput. A good quality doorbell can very well last for 10 to 15 years without developing even a minute fault. However, even the best electrical devices can fail at times and the doorbell is no exception.
A doorbell that doesn’t ring? Spare a thought for the embarrassment. A visitor walks up to your door and rings the doorbell only to realize that it doesn’t ring. Not to mention the fact that you will no longer know when a new visitor turns up at your door unless you have one of those large door knockers. A doorbell that keeps ringing continually? Now that’s a real bummer.
There is no reason that you have to settle in such a situation when you can easily troubleshoot and repair your doorbell. Wait, Einstein, before you grab those screwdrivers and set out to repair them, there are a few things that you would like to know.
Point to Remember When Troubleshooting Your Door Bell
The doorbell is one of the simplest electronic devices that have ever been created. The circuitry is extremely simple but four different components make it function. You need to identify the source of the glitch and then proceed accordingly.
Troubleshooting is eliminating one step at a time in a precise and organized manner. The steps can vary from very easy to advanced. It all depends on your expertise with electrical devices and the kind of tools that you have with you. Do not attempt anything that you are uncomfortable with.
You will need basic tools like screwdrivers, clamps, and needle-nose pliers. There are some other optional tools as well like a voltmeter and a continuity tester.
Doorbells are low-voltage electrical devices and you can troubleshoot them without shutting off the main electric supply or circuit breaker. However, if you are going to test the doorbell transformer (a component of the doorbell circuit that converts 110V electricity to 10 or 12 Volts), then it is recommended that you switch off the power before you begin. The irony of the situation though is that you need to have the power switched on to test most components. So you will have to keep switching it off and on after each step. Always respect electricity and you will avoid any unpleasant incidents.
Troubleshooting Wired Doorbells
Wired doorbells typically contain four components which include the push button which we press to ring the bell, the main doorbell or chime unit, the transformer, and the wires that connect them all. Now let’s locate the source of all the trouble.
Symptom 1: A doorbell that doesn’t ring
What does this mean? Is there no sound at all when you push the button? It’s not playing your favorite doorbell sound? Ask one of your family members or friends to stand near the unit and listen to it carefully when you push the button. If they hear a buzzing sound then it means that the unit is trying to make the sound but is unable to do it either due to lack of voltage or due to some other mechanical problem within it. On the other hand, if there is no sound whatsoever, then it means that the unit has failed.
Step 1: Let’s begin with the push button. The first step is to remove it. Doorbells are usually connected with more than one button in large homes. If you have more than one button, then remove them all. Most buttons are mounted on the door frame with two screws and removing these screws should allow you to push them away from the door frame. Now, you will see two wires that are connected at the back of the push button. Are the connections secure? If either one of the two is loosely connected or disconnected, then this might be the source of the trouble. Reconnect them and test the doorbell again. Does it work? Yes? Pat yourself on the back and go and treat yourself to a cold beer. No? No sweat. Time to go to step 2.
Step 2: Turn off the power if you still haven’t done it and disconnect one of the two wires. (In case of multiple doorbell buttons, disconnect one wire from all of them) Now touch the bare end of the wire to the bare end of the other wire. This process is called shorting the wire. If the bell rings, then the problem lies with the button. It needs to be replaced. In the case of multiple buttons, replacing all of them is recommended but if you are smart and on a budget, then you would replace one of them and retest the system to see if it works. Replacing push buttons is extremely easy. You can buy one at any hardware store, attach the wires, and mount them on the door frame. But, what If the bell doesn’t ring when you touch the bare ends of the wires? Then it is time to move ahead. Reinstall the push buttons and move on to the chime unit.
Step 3: Now we head to more complicated territory and let me advise you that if you are uncomfortable handling wires and circuitry but have managed to pull on so far, then this is probably the right time to call the electrician for the steps ahead to require a detailed understanding of the circuitry and the ability to connect, disconnect, test and probably even replace wires. So are you all set? The first step is to remove the cover. Most people might think that this is extremely simple but it isn’t.
There are several different types of doorbell models and many covers. Some require you to lift it before pulling the cover out there are others that can be pulled straight out. Some are held to the unit with prongs and you will have to depress them before removing the cover. Go gentle with decorative covers as you have the risk of damaging them forever. Once you remove the cover, conduct a visual inspection for any signs of a loose connection or a disconnected wire. If you spot any, then tighten it or reconnect it.
Now, there might be two, three, or more wires and terminal units within the doorbell depending on the model or type of the chime unit. The wires are typically marked ‘F’ for the front and ‘R’ for the rear. Some are even marked with a ‘T’ for trans. Remove the wires for the front and rear push buttons. Now, touch the F wire to terminal F with the power on. If the bell rings, then you have a faulty wire.
You can repeat this test with the Rear wire as well. If both tests fail, then you need to locate a set of twisted wires within the unit. There will be one wire that is connected to the transformer. Disconnect these wires and touch the wire that goes from the transformer to terminal F. If the bell rings now, then either one of the push wires here is defective and needs replacement. You can always install a wireless doorbell in place. It is easy, fast, and hassle-free. If it still doesn’t ring, then it is time to check the transformer.
Step 4: The Transformer There are several ways to test the doorbell transformer. But the most common method used is testing it using the Voltmeter. Set the Voltage range on the Voltmeter to 120 Volts AC. Now measure the voltage between the two terminals on the transformer. A properly functioning transformer will show a meter reading that matches the secondary voltage as marked on it. If the meter reading is higher, then it indicates that the transformer is faulty and needs replacement. On the other hand, if the reading is lower but close, then test again with a lower voltage range on the voltmeter. If it still doesn’t match, then it is time to replace the transformer completely.
You can buy a transformer at most electrical and hardware stores. However, ensure that you buy one of the same voltage and wattage. The electrical information is stamped on it and so are the instructions for installation. Ensure that you follow the instructions carefully to install your new transformer.
Final assessment
Always conduct a visual inspection of the circuit first. On more occasions than not, a loosely connected wire is the culprit and the problem can be solved easily.
Exposed wires (frayed insulation) are another important part of most faulty doorbell circuits. They need to be covered with electricians’ tape. At times, there might be corrosive build-up on the wires. Clean them before reconnecting the wires.
Always clamp the wires together to prevent them from slipping into the siding or trim of a building.
If you are unable to conduct any of the above-mentioned tests or find them too tedious, then you can always replace the chime unit and buy a new one. There are hundreds of new updated models that offer better sound quality, resonance, and a whole new range of chimes.
Symptom 2: A constantly ringing doorbell
Now this one can be a real pain. A constantly ringing doorbell (not a wireless one) indicates a stuck button or wires to the button shorted together. Troubleshooting is easier than you think.
Step 1: The first step is to test the push button. As I mentioned earlier, the button is often the root of most doorbell problems. Disconnect the power to the transformer and remove the button from the doorframe. Now disconnect one of the two wires connected to it. Now turn the power back on. Does the bell still ring continually? If not, then the button is faulty and needs to be replaced. If yes, then the problem lies in the two wires that are connected here. Turn off the power again and inspect the wires for any signs of a short (frayed insulation). Bare wires rubbing together can often trigger this sort of unruly behavior from doorbells. If you can find the short, then cover it with electricians’ tape. If you can’t, then replace the wires completely.
Troubleshooting wireless doorbells
Wireless doorbells are extremely popular because of their flexibility and ease of use. They are extremely easy to install and use. However, at times, they can exhibit strange behavior, especially the low-priced ones that have flooded the market now. No reason for you to break a sweat yet. You can troubleshoot the wireless doorbell easily and restore it to its previous working condition. However, in some extreme cases, the entire unit might need replacement.
Symptom 1: The chime doesn’t sound
Step 1: When the chime doesn’t sound, the first and most obvious thing to check in a wireless doorbell unit will be the batteries. Check the batteries in both the push button and the chime unit. Push buttons that have to add on features like a flashlight or a warm glow light can run out of juice very fast. Replace the batteries and check the unit again. If it works, then you can keep replacement batteries with you. You can also opt for a plug-in unit as it saves you from the hassle of frequent battery replacements. If it still doesn’t ring, then it is time to move on to step 2.
Step 2: Most regular wireless doorbell models have a frequency limit of 75 to 150 feet. This range is ideal for small homes. However, if you live in a large home, then there are chances that you might have accidentally installed the receiver beyond the maximum allowed frequency range. The best way to find this is to shift the receiver to a place that is closer to the doorbell button. Does the chime unit sound now? If yes, then you can permanently mount the receiver at the new location.
At times, you need to try different locations for your receiver to find the spot that gives you maximum signal strength and clarity. The angle at which the receiver is installed can also affect the signal quality.
Have you heard about long-range wireless doorbell systems for your home? These systems have a range of up to 300 feet or more. You can also buy an ‘add-on’ amplifier or extender for your doorbell system. If the doorbell doesn’t ring despite moving the receiver around, then let’s move to step 3.
Step 3: If you have installed the receiver within the frequency limits specified by the manufacturer and the chime unit still doesn’t sound, then the button might be experiencing interference from metal surfaces. Yes, the presence of metal frames or grills often reduces the transmission range in doorbell buttons. If you have mounted the doorbell button on a metal surface or close to it, then you can use wooden shims to separate it from the surface.
Step 4: If you have sweated it out this far but have been unable to locate the problem, then you might need to replace the doorbell unit. At times, people install the doorbell unit outside the home in extreme weather conditions that can disrupt its working or damage it completely. Ensure that you buy only the best quality wireless doorbells that last long and offer quality performance.
Symptom 2: A doorbell that rings randomly
This is an extremely common symptom in wireless doorbells. It occurs because of interference from other frequencies. Garage door alarms, car clickers, other wireless doorbells, or similar devices can trigger wireless doorbells. Imagine running down from your study, only to find that the doorbell was triggered by the vacuum cleaner. Isn’t that frustrating? However, the best way to address this problem is to buy a higher-end model that supports multiple wireless frequencies. Somepopular wireless doorbell models have up to 32 different built-in frequencies that block most external frequencies and save you a lot of unwanted trouble.
Troubleshooting a Video Doorbell
It is outside the scope of this article to provide troubleshooting tips on ring.com, chime, or other popular video doorbells. However, we can say that in most cases when your wired doorbell stops working after installing a ring.com or chime video camera doorbell, more than likely this issue caused by the wired doorbell transformer not having enough amperage for both a doorbell video camera and a traditional wired doorbell.
The doorbell stopped working with my ring.com video doorbell.
The ring doorbell battery keeps dying
Why is my ring chime not working
Does the ring doorbell light stay on
Ring doorbell hardwired losing power
When dealing with any electrical devices, even low-voltage ones like doorbells, please make sure you take basic precautions such as disconnecting all power to the device. If you do not have experience dealing with things like this, please call an electrician.
Visit our product catalog at secure.1800doorbell.com for all your doorbell and door chime needs. Call us at 800-366-7235 for any assistance you may need.
Changing the tune or melody of your wireless doorbell chime is slightly different for each model and depends on the manufacturer. Whether you’re installing a new door chime or fixing a problem with an existing wireless door chime, it’s helpful to know the basics of the manufacturer who designed your product.
If you know how to change the sound of a doorbell on a Carlon or Dimango wireless product, you will know how to change it for most of the products they manufacture.
Below is information on how to change or repair the tune or melody for the door chimes found on secure.1800doorbell.com by brand or manufacturer.
The GE wireless push buttons have three dip switches designed to change the tune. The chart below shows where the dip switches are located inside the cover and what the combination of the dip switches needs to be for the specific tune to play.
To move the dip switches, take a small screwdriver to slide the dip switch up or down. For example, to play the “Cuckoo Clock” sound, make sure dip switch one is “on,” dip switch two is “off” and dip switch three is “on.”
Note: when moving the dip switches for tune selection, make sure you are moving the dip switches associated with tune selection and not the ones for “house codes” which are privacy codes.
Changing the Melody on Honeywell Wireless Chimes
Changing the tune or melody on a Honeywell wireless chime product is similar to the way you would change the tune on a GE 7-Sound Chime (see section above).
For these products, you use a small screwdriver to pry off the doorbell push button cover. Inside you will see a dip switch, labeled “C” with the ability to move it to “1,2, or 3.”
1= Westminster Chime
2=Ding Dong (set by default)
3=Ding
How to Change the Tune Your Heath Zenith Wireless Chime Plays
Changing the specific melody or sound your Heath Zenith emits is fairly straightforward, but is more involved than most models and brands featured on secure.1800doorbell.com. First, rather than using dip switches, you will need to change jumper settings. Second, you will have to change these jumper settings in both the wireless push button and the wireless receiver.
Although changing jumpers may appear to be difficult, it is easy with a set of tweezers.
Remove the cover from the Heath Zenith wireless push button. Once you have removed the cover, locate the jumpers just to the right of the push button battery. Jumpers 1-7 are for privacy codes so we do not recommend changing them unless you have to. If you do change them, please make sure you match the jumpers in the push button with the Jumpers of the wireless receiver or the system will not be able to communicate. Only Jumper 8 is for changing the doorbell chime.
See the image below to see what the jumper setting should be for your wireless Heath Zenith Door Chime:
Changing the Tune on the DC-1000 by Dakota Alert
The easiest product, as far as changing the door chime is involved, is the DC-1000 by Dakota Alert. To do so, open the front cover of the door chime receiver. Once opened, located the small button with the small musical note located above the button. If you see the larger volume button, the music selector button is the under and to the right of the volume button. To change the tune, simply press the button and the unit will cycle through the available tunes.
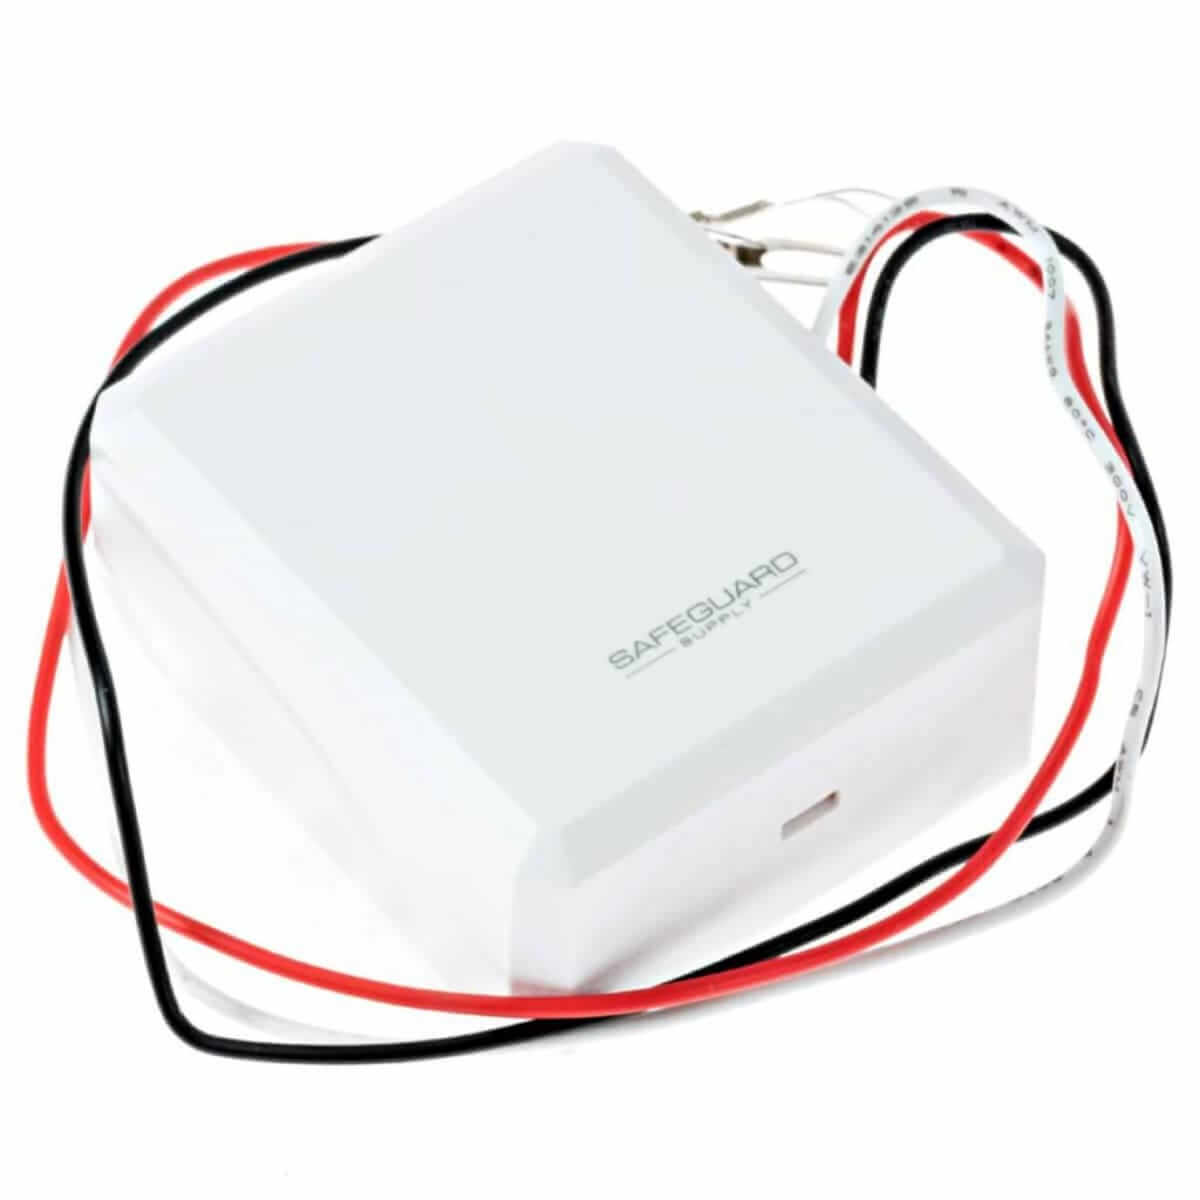
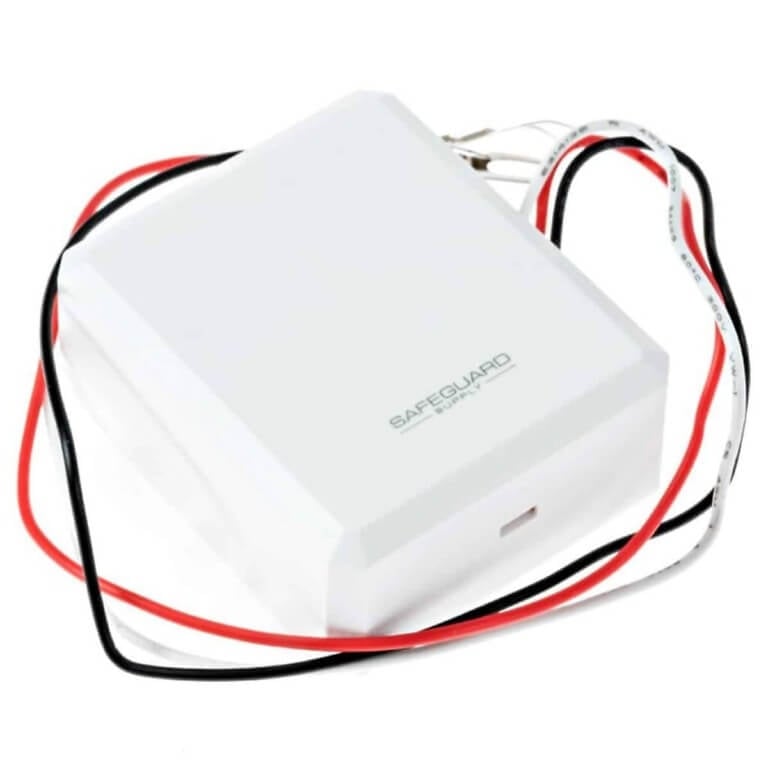
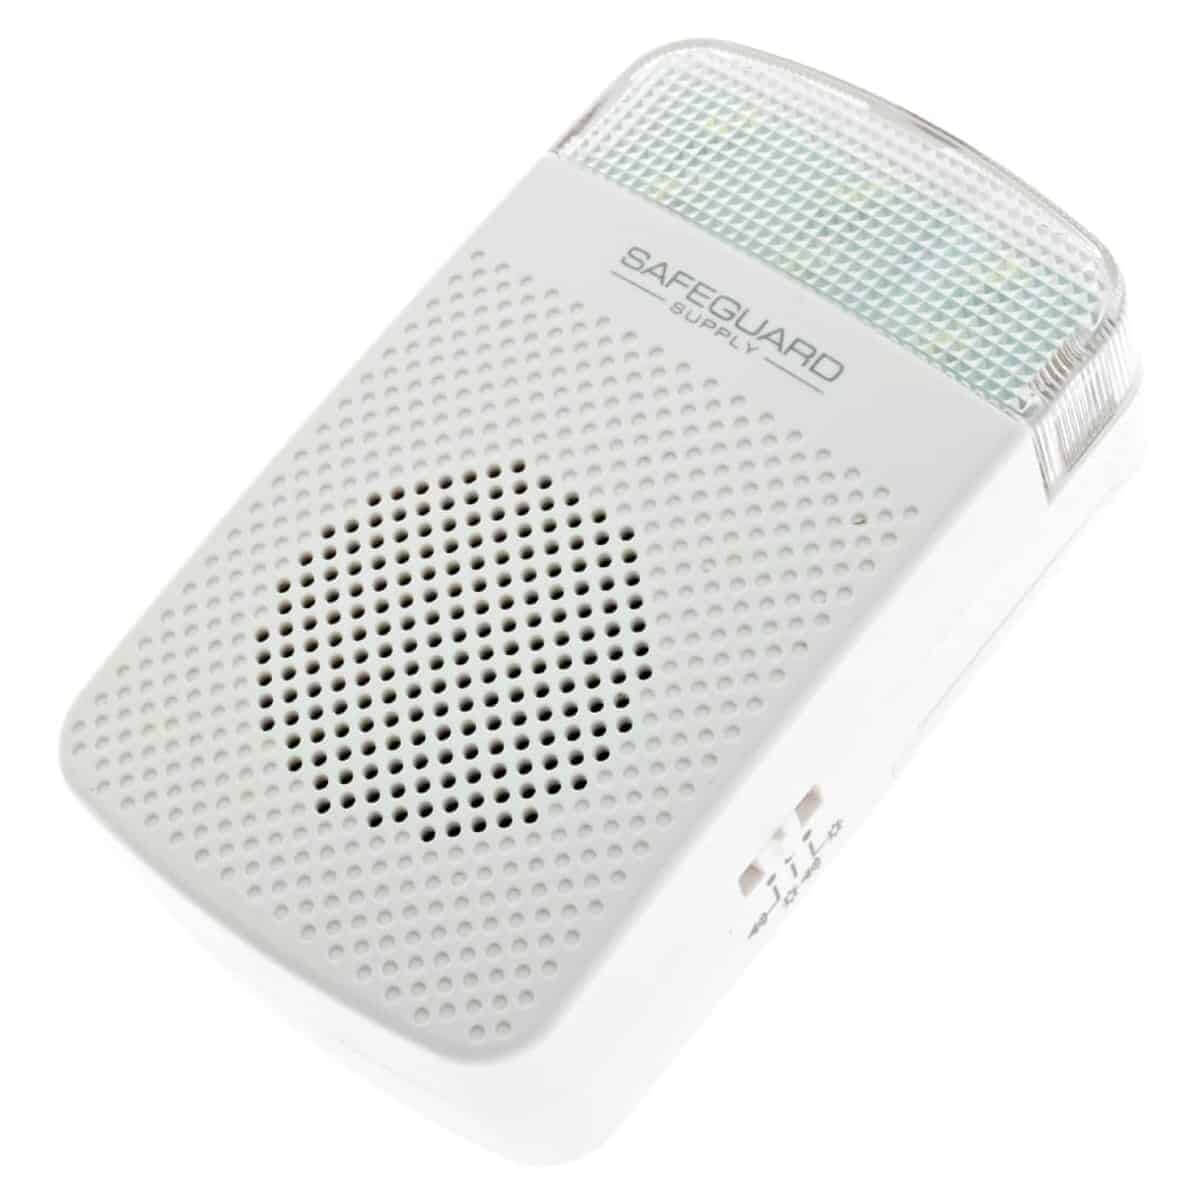
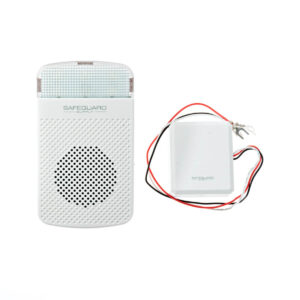
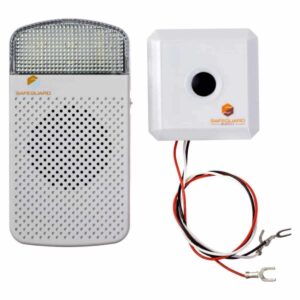

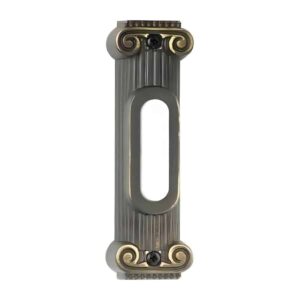
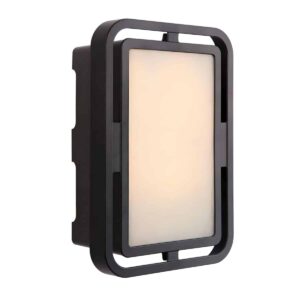
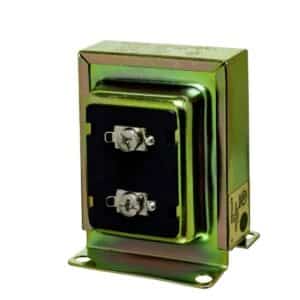
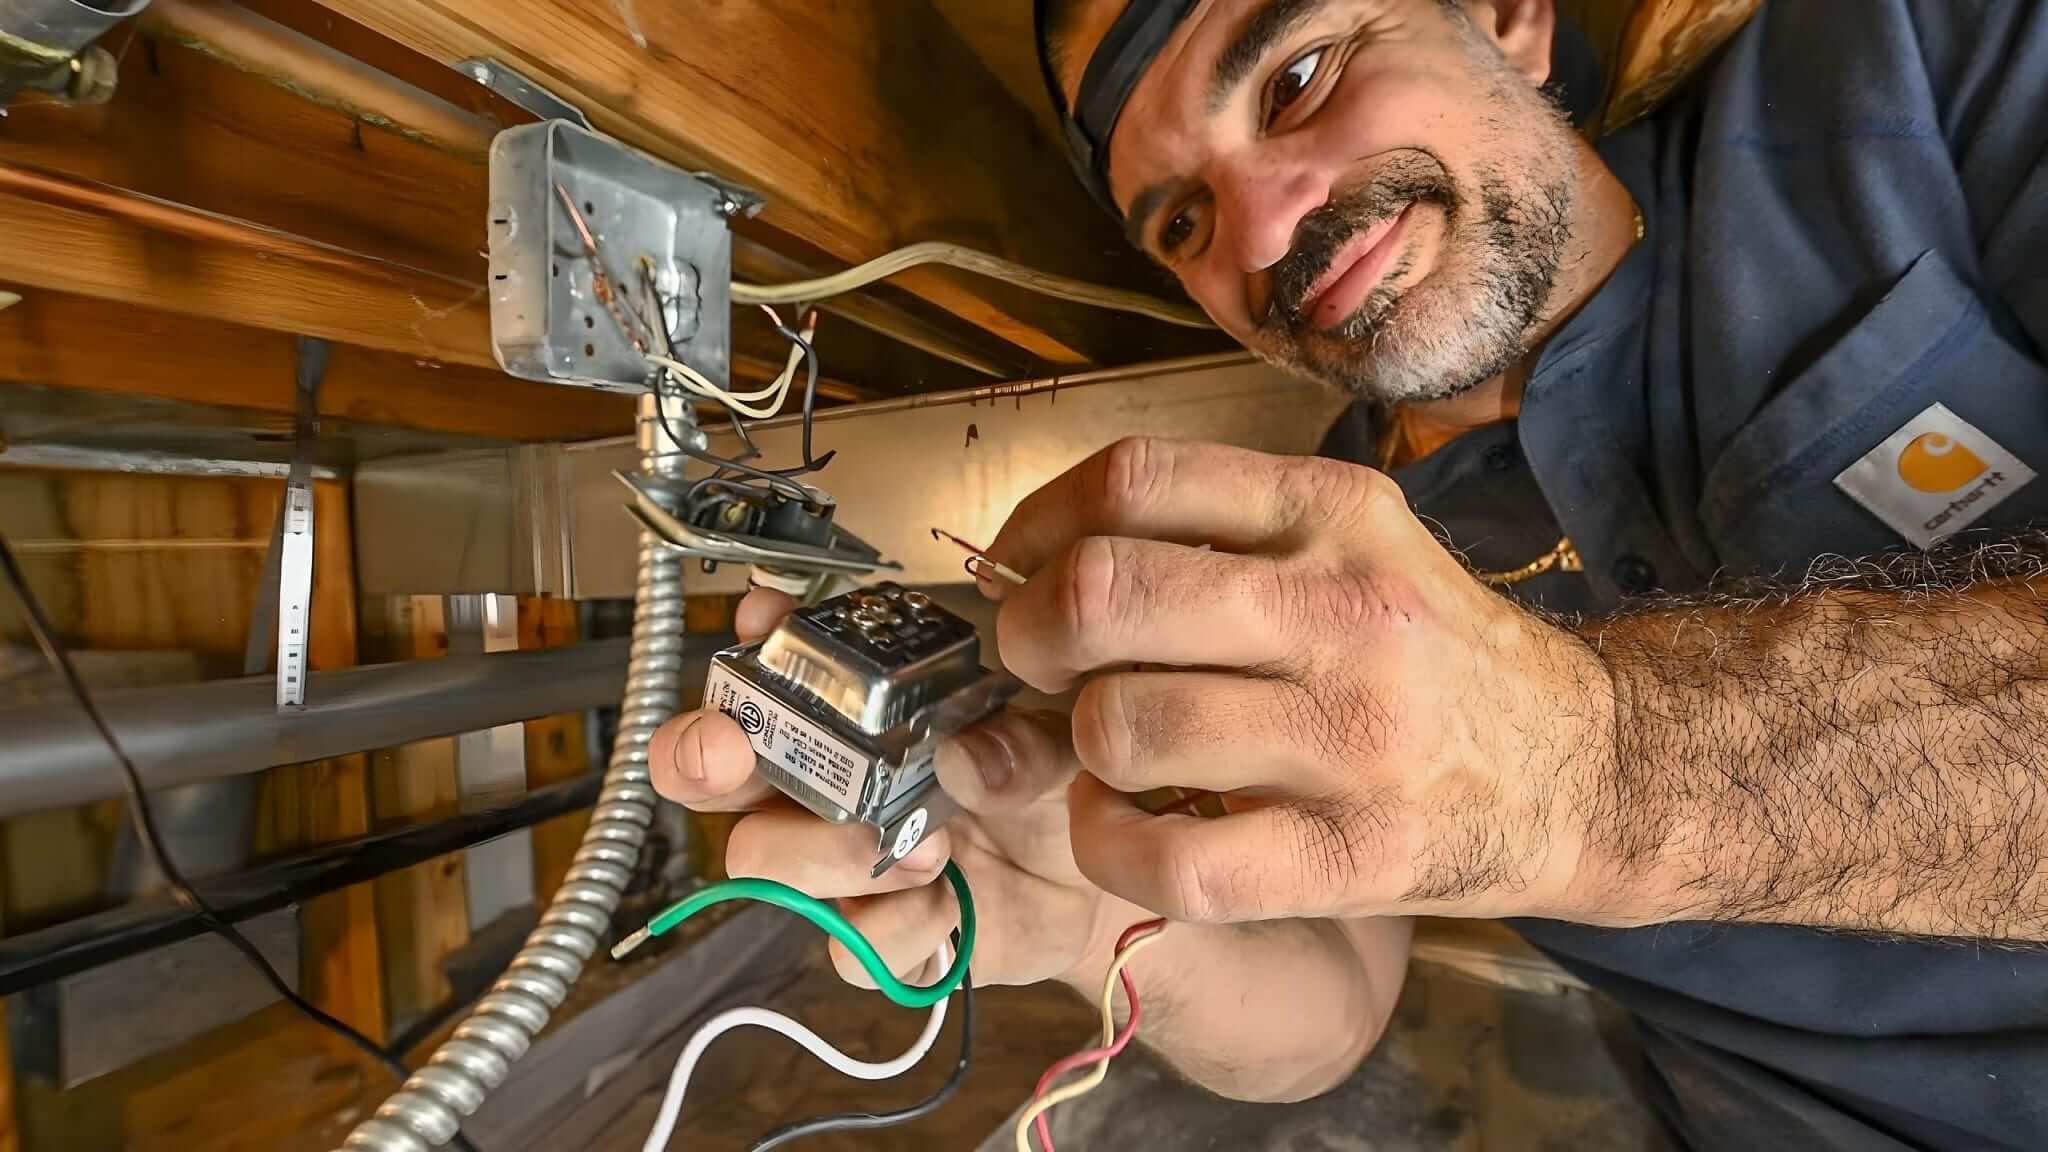
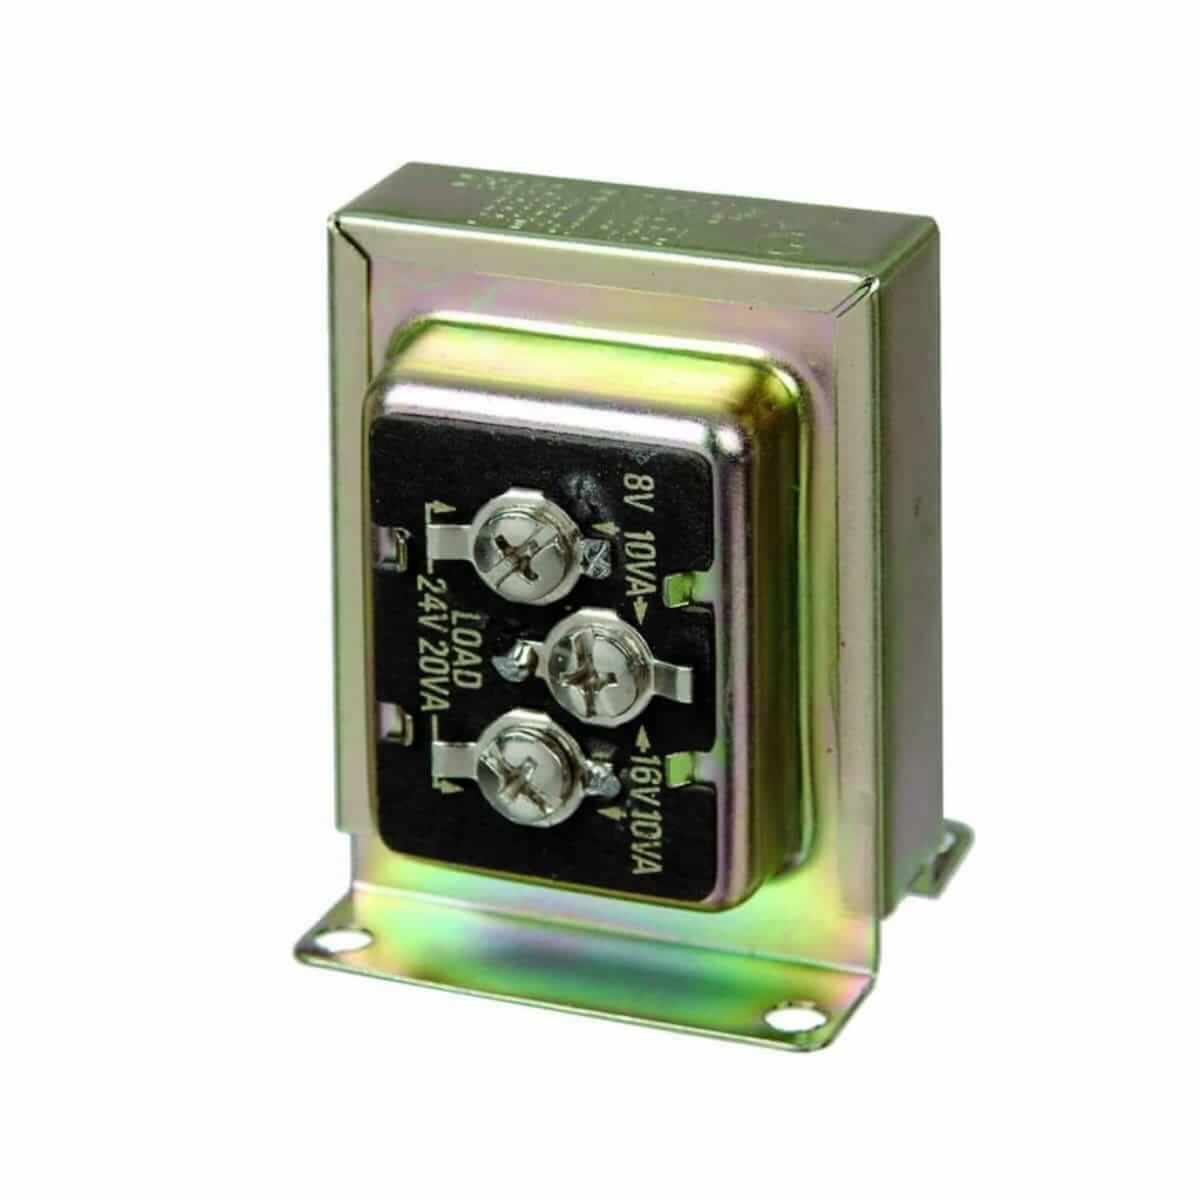
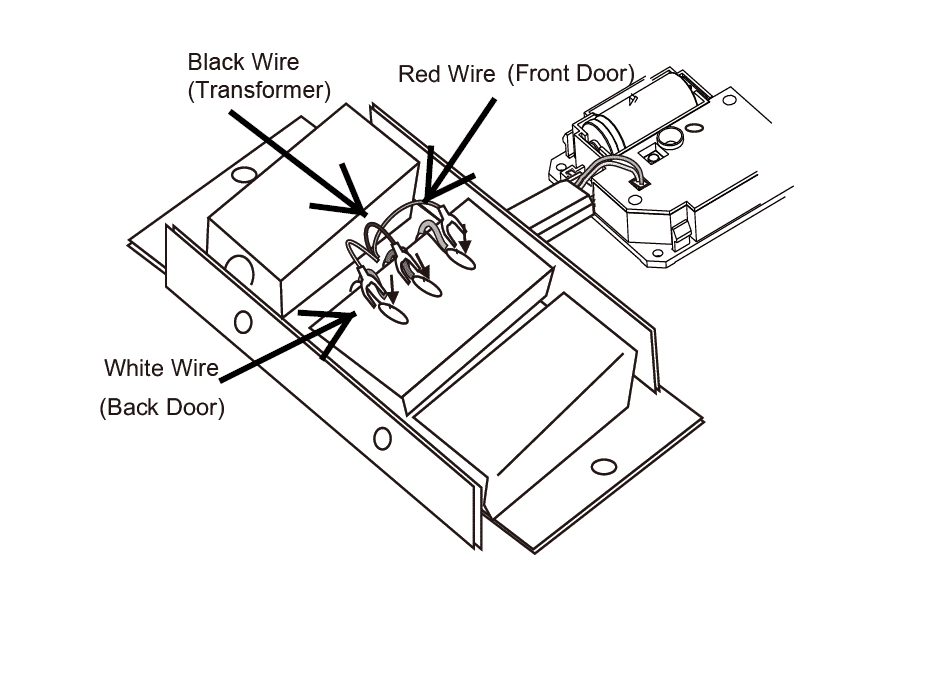
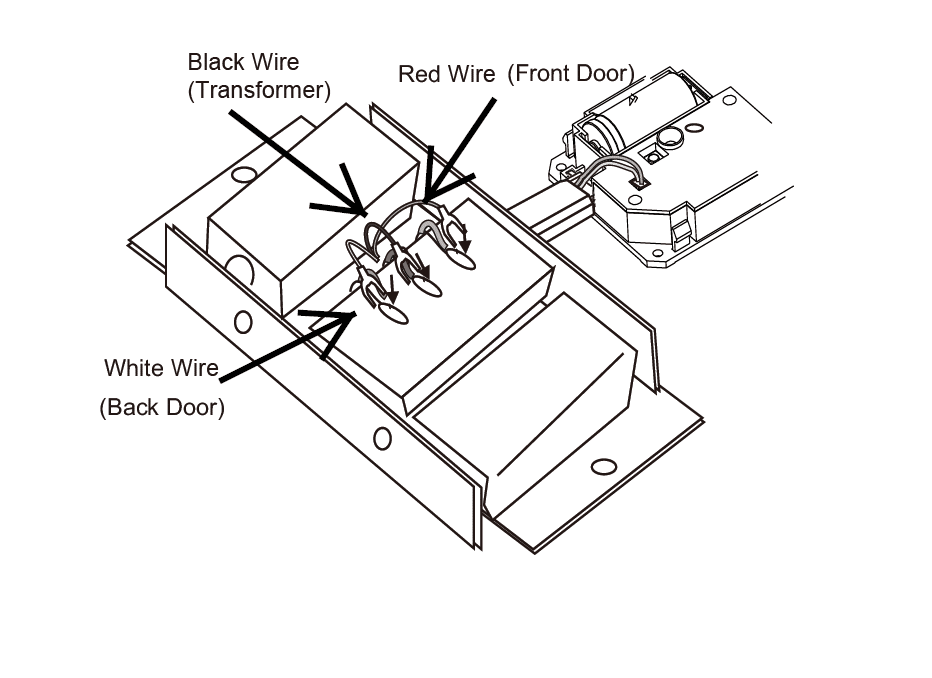
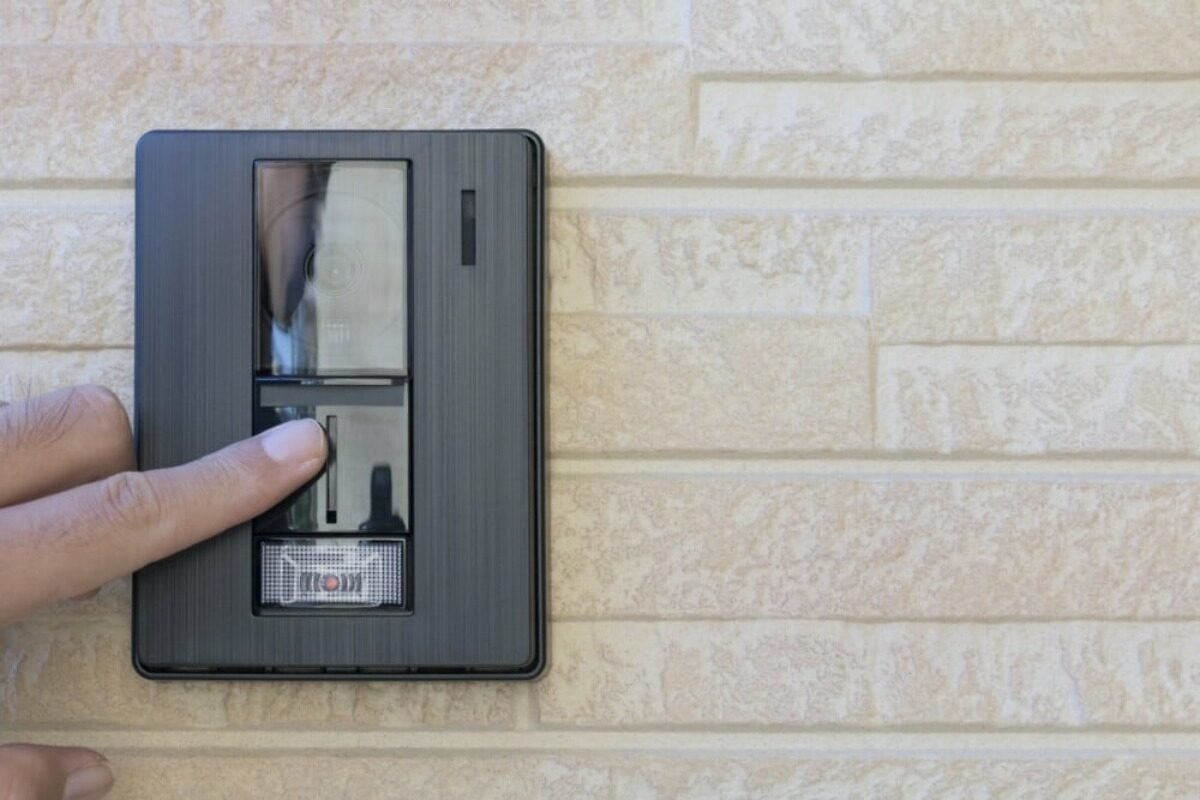
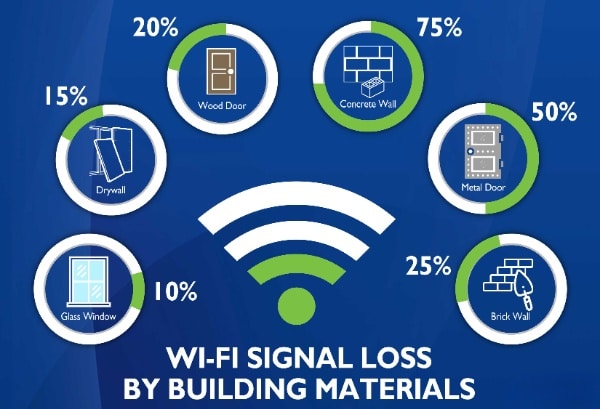

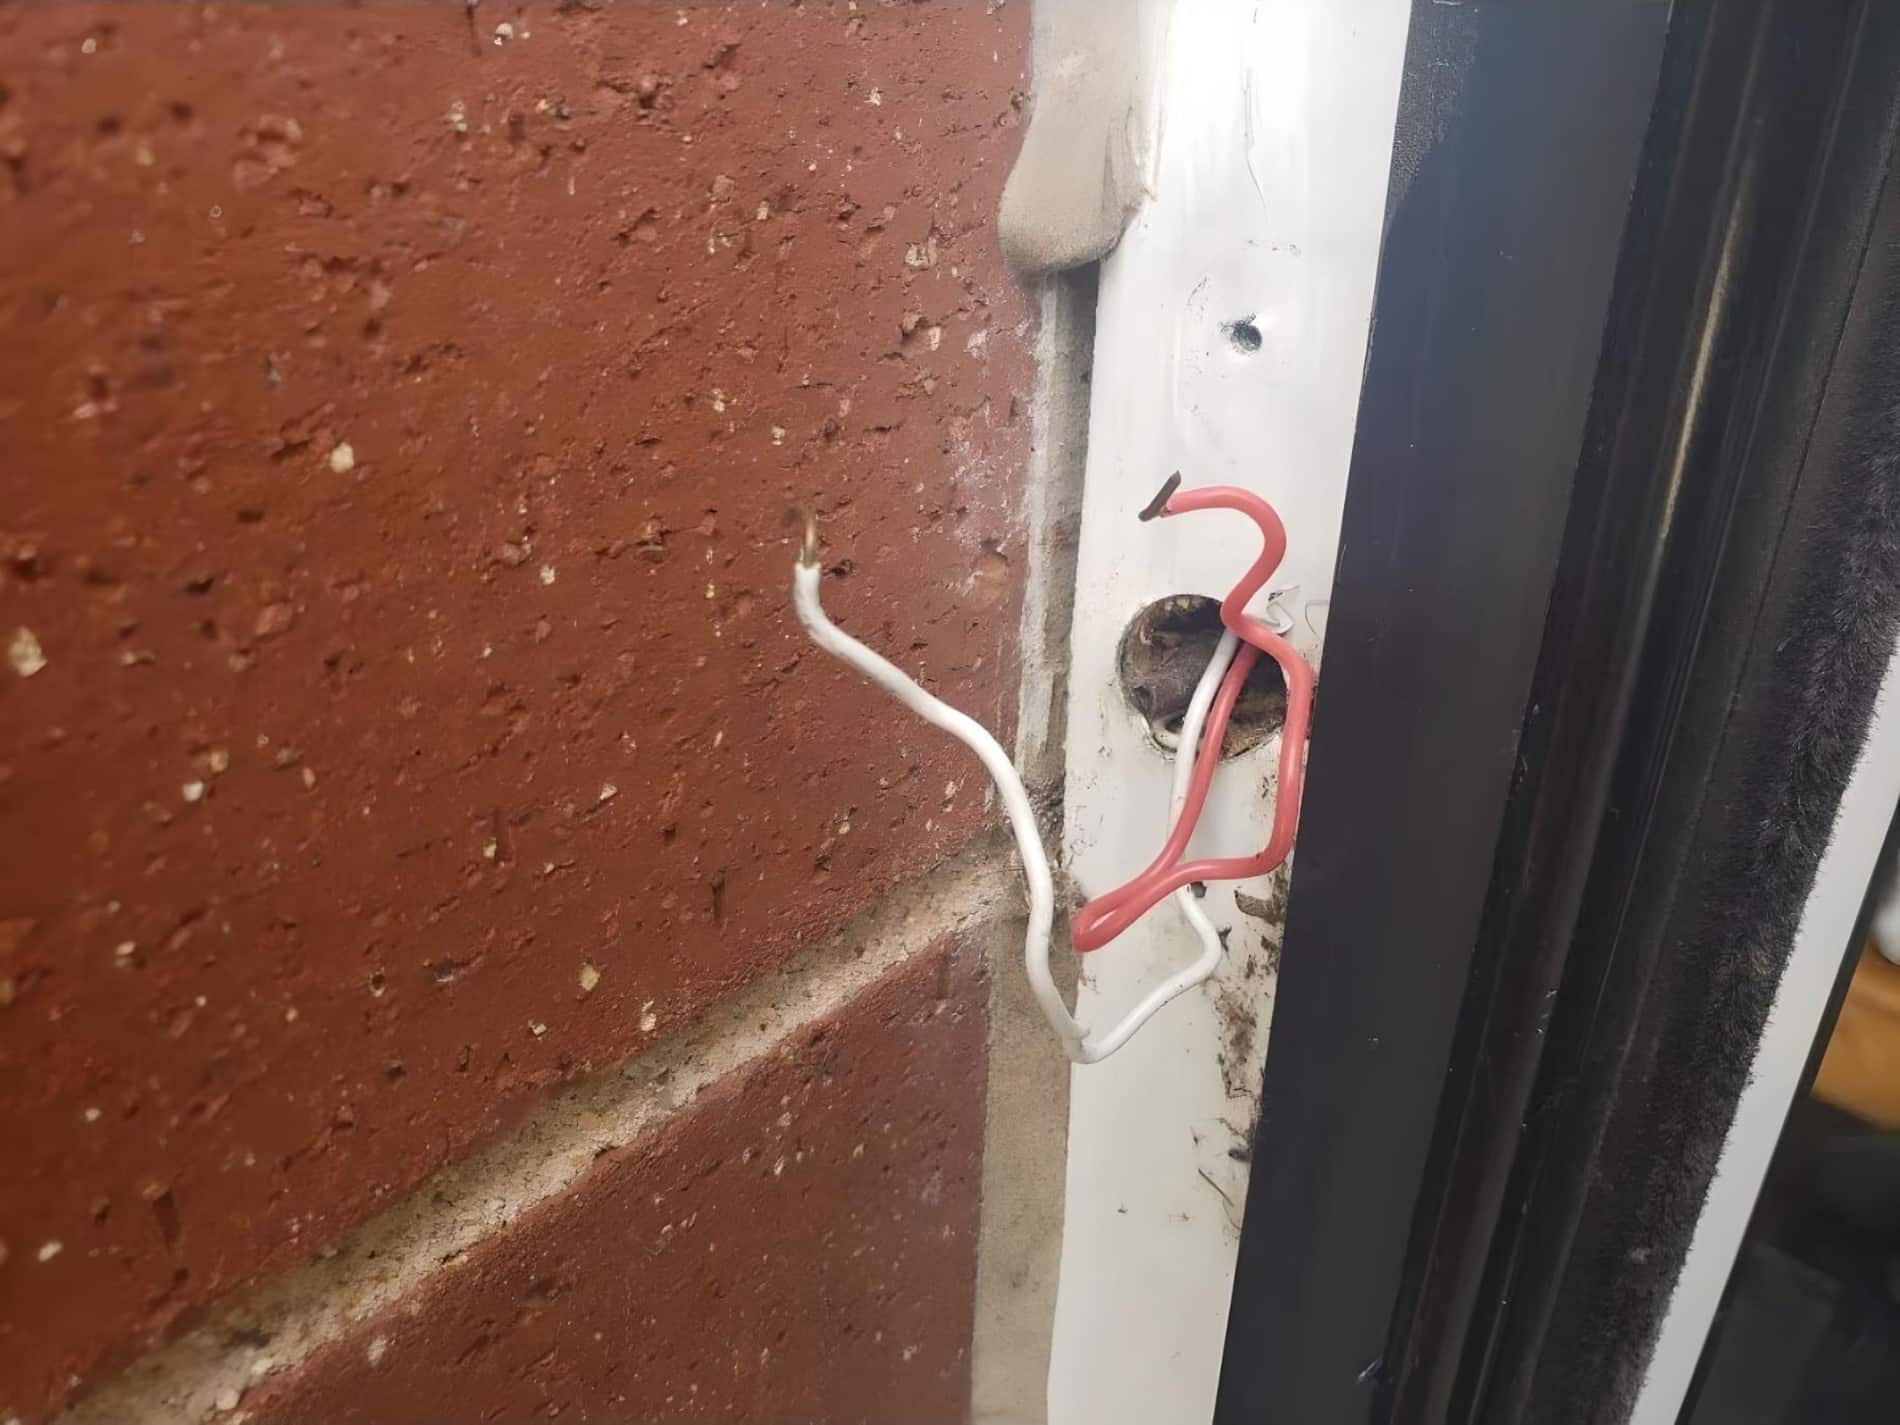
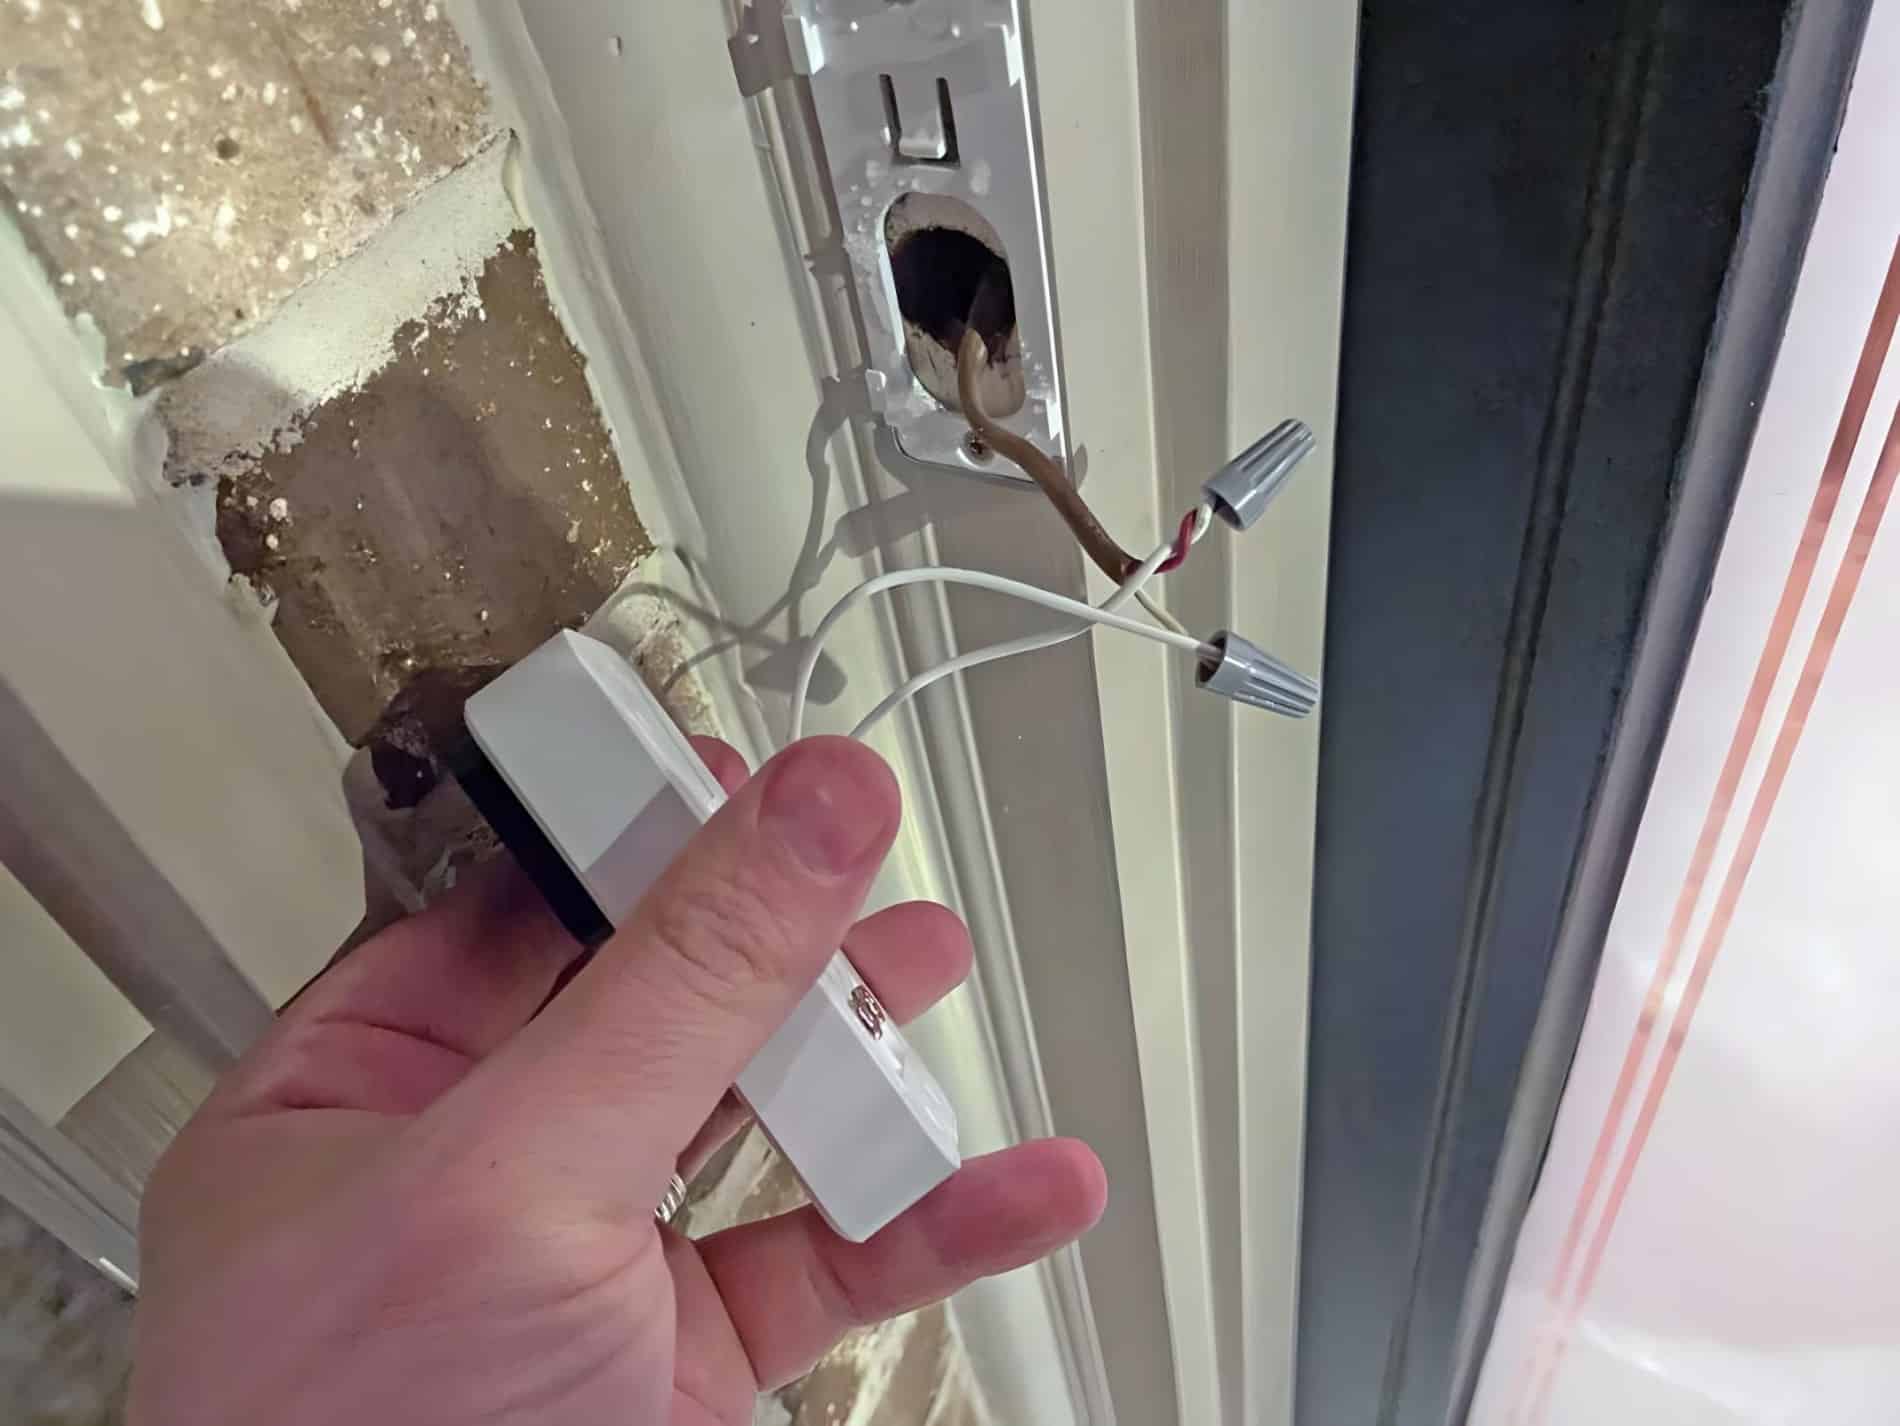
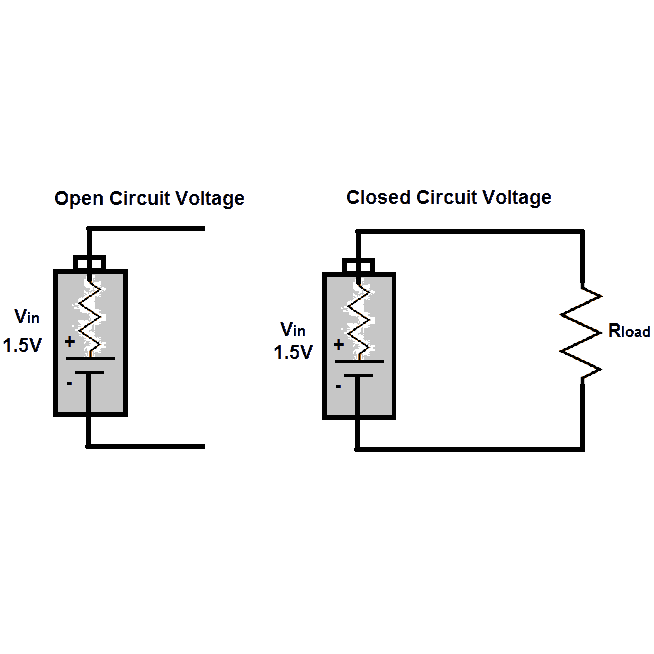 In a doorbell system, the button closes the circuit between these two wires, allowing electricity to travel through them and trigger the door chime. To test whether the button is the problem, disconnect one of the wires.